
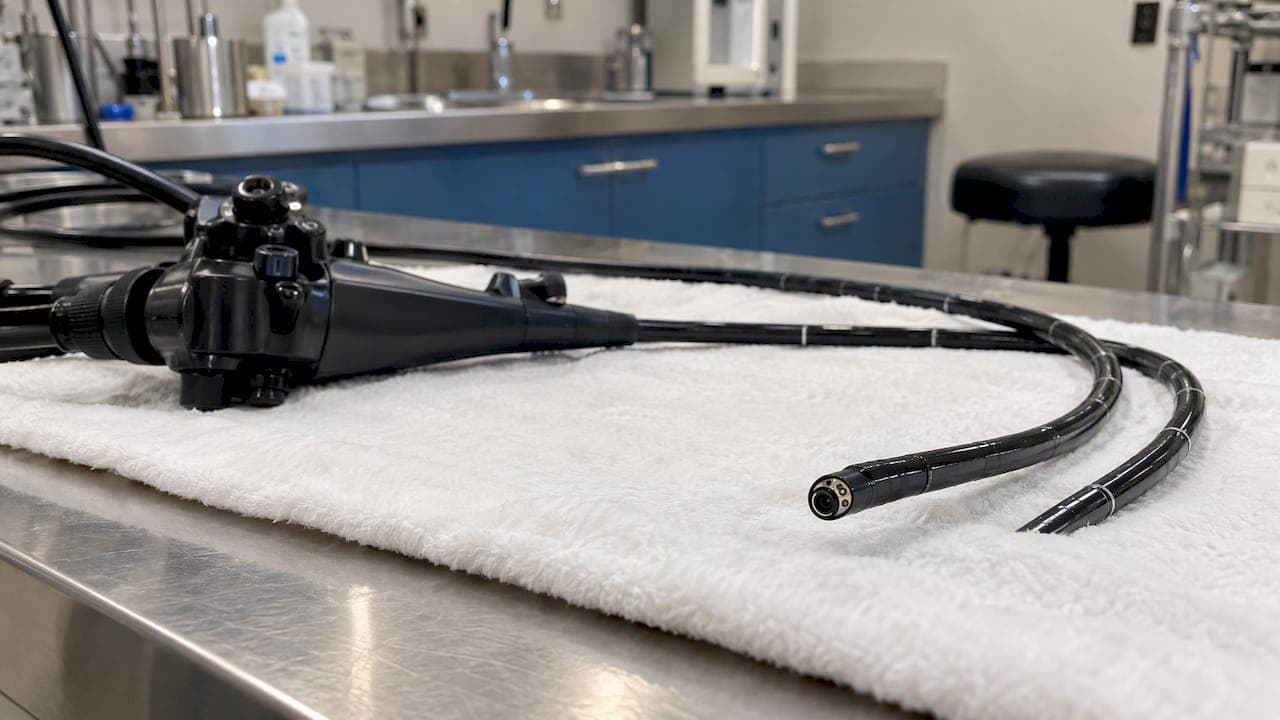
Most scratches on an endoscope lens come from avoidable contact: the tip hits a hard surface, rubs against another instrument, or gets wiped with the wrong material. You prevent them by controlling the distal end at every step, cleaning with soft, manufacturer-approved materials, and storing and transporting the scope so nothing can touch the tip. This guide walks through each step for veterinary clinics and industrial inspection teams, and explains what to do when you find a scratch anyway.
TL;DR
- Impacts are the leading cause of lens and tip damage. Hold the distal end separately from the control body and connector, and never let it swing free.
- Clean external surfaces and optics with soft materials and a detergent the manufacturer approves. Follow the instructions for use (IFU) for your exact model.
- Store scopes in a way that keeps the tip from touching anything, and carry them in closed, correctly sized containers.
- Inspect the tip before and after every use. Pull a scope that shows damage until it has been evaluated.
- Check that any sheath or cap fits snugly and does not affect vision or articulation before you rely on it.
Table of Contents
- Why endoscope lenses get scratched
- Handle the distal end like the delicate part it is
- Clean without scratching
- Store and transport scopes so the tip touches nothing
- Veterinary and industrial scopes: where practice differs
- Inspect before and after every use
- Sheaths, caps and other protection
- Our perspective
- Scopes and accessories built for veterinary and industrial work
- FAQ
- Sources
Why endoscope lenses get scratched
A scope tip is small, exposed, and constantly moving between patients, cases, racks and carts. That combination makes it the most vulnerable part of the instrument.
A trade article on protecting scopes and minimizing repairs reports that impacts are the main cause of light guide lens damage, such as the tip hitting the floor or striking peripheral equipment. Those impacts can happen during transport, inspection or maintenance. In other words, most damage happens around the procedure, not inside it.
The common situations are easy to recognize:
- A scope set down on a counter or cart with the tip hanging over the edge.
- A coiled insertion tube that lets the tip knock against a tray, sink or table.
- Scopes stacked together in a case or drawer.
- Wiping the lens with a dry paper towel or a gritty cloth.
- Pulling the scope back through a rigid guide, speculum or tight fixture without checking that the tip is clear.
Wear inside the scope is also normal. A 2018 study in Gastrointestinal Endoscopy found superficial scratches in 98.5% of inspected working channels, which the authors described as consistent with expected wear and tear from accessories and cleaning. That study looked at human GI scopes, but the lesson carries over: some micro-wear is unavoidable, so your goal is to stop the avoidable damage at the lens and tip, where it affects image quality directly.
Handle the distal end like the delicate part it is
Good handling is free and prevents most of the problem.
Control the tip at all times
The same trade source advises that staff should control the distal end at all times, holding it separately from the control body and connector so it cannot strike anything. In practice:
- Pick the scope up with one hand on the control body and the other supporting the insertion tube near the tip.
- Never carry the scope by the insertion tube alone, and never let the tip dangle.
- Set the articulation knobs to neutral before insertion and removal, as the same guidance recommends. A locked, bent tip is more likely to catch an edge.
- Keep the connector and umbilical from swinging. They add weight that can pull the tip off a table.
Set up the workspace first
Before the scope leaves its case, clear the area. Remove loose instruments, forceps and clamps from the path. Place a clean, soft, lint-free pad where the scope will rest between steps. In a clinic, decide where the scope goes between the exam and the cleaning sink so nobody improvises with the tip on a steel counter.
For our own pre-procedure checklist, see prepping an endoscope for inspection.
Mind the accessories
Biopsy forceps, grasping tools and brushes pass close to the lens and through the working channel. Insert them slowly, with the tip of the scope straight when the manufacturer allows it, and never force a stiff accessory. If an accessory binds, stop and withdraw it rather than pushing. Damaged or kinked accessories scratch channels and can contact the distal end on exit, so retire them promptly. Our flexible biopsy forceps are sized for veterinary scopes, which helps you match the instrument to the channel instead of forcing a near fit.
Clean without scratching
Cleaning is the second biggest source of surface wear, because it involves friction. The rule is simple: soft materials, the right detergent, and the manufacturer's IFU.
Start right after use
U.S. infection-prevention guidance from CDC's advisory committee says pre-cleaning should begin immediately after the procedure, followed by manufacturer-directed leak testing and then meticulous manual cleaning before high-level disinfection or sterilization. Dried debris is harder to remove, and harder removal means more rubbing on the optics.

Choose soft tools and compatible detergent
A peer-reviewed review in Gastrointestinal Endoscopy says external surfaces should be cleaned with a soft cloth, sponge or brushes, using an enzymatic detergent that is compatible with the device and follows the manufacturer's instructions. A 2025 U.S. guide from a sterile processing company adds that the manufacturer's IFU dictates the correct procedure. It generally calls for a low-foaming, pH-neutral endoscope detergent, an endoscope sponge and correctly sized channel brushes, continuing until visible debris is gone.
For the lens itself, the working rules are:
- Use only materials your scope's manufacturer permits for optics. If the IFU does not name a material, ask before you try one.
- Keep cloths and sponges single purpose. A sponge that has touched a sink or a bench can carry grit.
- Rinse debris off first so you are not dragging particles across the glass.
- Wipe gently and lift away from the lens rather than scrubbing in circles.
- Keep household abrasives, scouring pads and rough paper products away from the optic.
The top search results for this topic are mostly about eyeglasses and camera lenses, where a gentle soap, lukewarm water and a microfiber cloth are common advice. An endoscope is a sealed medical or industrial instrument with its own cleaning and disinfection requirements, so use that thinking only as a reminder to be gentle. The IFU for your scope overrides any consumer lens tip.
For full processing steps, see our guides on step-by-step endoscope sterilization and sterilization in veterinary endoscopy.
Store and transport scopes so the tip touches nothing
Many scratches occur when no one is using the scope at all.
Storage
The infection control source recommends storing endoscopes vertically in endoscope-specific cabinets. A hanging position keeps the tip free and prevents the tube from resting on hard edges. Not every veterinary or industrial site has a dedicated cabinet. If you use a case instead, the principles are the same:
- Give each scope its own molded or padded space.
- Do not stack scopes or lay accessories on top of them.
- Keep the case closed and in a place where it will not be knocked over.
- Make sure the scope is fully dry before you close the case.
Our guide to storing endoscopic equipment covers veterinary and industrial setups in more detail.
Transport
The same source advises moving scopes in appropriately sized, closed or covered containers. That matters most for mobile work: an equine practice moving between barns, a farm call, or an inspection technician carrying a borescope in a truck. A container that is too big lets the scope slide. One that is too small bends the tube and presses the tip.
A short transport checklist:
- Set articulation to neutral.
- Put the scope in its fitted case, tip first into its cradle.
- Secure the case so it cannot slide or fall.
- Keep the case off the floor of the vehicle when you can, and away from tools and heavy gear.
The article's overall point is that following handling, reprocessing, transport and storage protocols can help avoid scope damage and minimize repair costs.
Veterinary and industrial scopes: where practice differs
The core rules are the same for every scope. The risks around the tip differ by use.
| Factor | Veterinary endoscopy | Industrial inspection (borescopes) |
|---|---|---|
| Typical contact risk | Teeth, mouth gags, speculums, and animal movement during airway or GI exams | Metal edges, welds, tight bores, pipe fittings |
| Contamination | Body fluids and organic debris | Oil, grease, dust, coolant, debris |
| Cleaning focus | Enzymatic cleaning, then disinfection or sterilization per IFU | Removing grit and residue before wiping the lens |
| Transport | Farm calls, mobile equine work, clinic to clinic | Job sites, vehicles, field work |
| Tip protection | Sheaths, guards and careful positioning | Probe caps, guides, and careful withdrawal through openings |
Two points stand out. In veterinary work, the animal can move suddenly, so a second person controlling the patient and a bite guard where the case calls for one protect the tip as much as any handling habit. In industrial work, the biggest hazard is grit: a lens wiped while particles are on it is scratched by those particles. Blow or rinse off debris first when the IFU permits, then wipe gently.
If your work involves pipes and tight spaces, our borescopes and pipe inspection videoscopes are built for field use, and the same handling rules apply when you pull them back through a fitting.
Inspect before and after every use
A 10-second look catches problems before they reach a patient or a customer's job.
Academic work on endoscope evaluation notes that damage to the distal end can create gaps where debris and microorganisms collect, and that careful visual inspection can support decisions to remove a scope from service for evaluation. For a veterinary clinic, that means a scratched or chipped tip is more than a picture-quality issue.
A simple inspection routine
- Before use: Look at the lens under good light. Check for scratches, chips, cracks, cloudiness, residue and loose or lifted edges around the tip. Confirm the image is clear on a monitor.
- After use: Inspect again after cleaning, not before, so residue is not mistaken for damage. Look at the tip from several angles.
- Log it: Note the date, the scope and what you saw. A scratch that grows over weeks tells you something is going wrong in your handling.
What to do when you find a scratch
- Image still clear, surface only: Keep a record and watch it. Review how the scope is handled and stored, because the cause is probably repeatable.
- Image blurred, a visible chip or crack, or a gap at the tip edge: Take the scope out of service and have it evaluated. Do not keep using it and do not try to polish or fix it yourself.
- Not sure: Treat it as damaged until someone qualified has looked. A clinic's infection control lead or the manufacturer's service team is the right contact.
If the picture is degraded and you cannot tell why, our videoscope troubleshooting guide and animal endoscopy troubleshooting guide help you tell a dirty lens from a damaged one. Small scratches rarely justify a new scope, but chips and cracks may need professional repair. We offer endoscope repairs for that reason.
Sheaths, caps and other protection
A protective sheath or cap can shield the tip, but only if it suits your scope. FDA guidance for ENT endoscope sheaths says a sheath should fit snugly without appreciably increasing the outside diameter or impairing articulation, light refraction or vision. It also expects manufacturers to show data that the sheath is impermeable to microorganisms. That guidance is written for a specific device type, but the questions it raises are the right ones for any cover:
- Does it fit your exact scope model without forcing?
- Does it leave articulation and the field of view unchanged?
- Does it stay clean and intact in use, and can you check it before each case?
- Does the manufacturer of your scope approve it?
A badly fitted cap can trap grit against the lens and cause the scratch it was meant to prevent. If you are choosing a sheath for a veterinary scope, our article on veterinary endoscope sheath selection explains how to compare options and why a $10,000 repair is worth avoiding.
Do not improvise protection with household materials taped or slipped over the tip. They can shed fibers, lift off in the patient or the pipe, and change what the lens sees.
Our perspective
We sell and service veterinary and industrial scopes, and the pattern we see is consistent: tip damage is nearly always a habit problem, not a bad-luck problem. A scope that is cleaned gently, hung or cased properly and carried with the tip supported will keep a clear image for far longer than one that is handled like a hand tool.
Three habits matter more than any accessory. First, decide where the scope sits between steps, and make that place soft and clear. Second, make cleaning the job of one trained person using the same approved materials every time. Third, inspect the lens every time, because the first small scratch is your cheapest warning.
We also think affordability should not mean carelessness. A lower-cost, portable scope designed for veterinary or field work is a sound choice for a clinic, but it still earns its price back only if the tip is protected. If you are buying your first scope, our guide on which endoscope a veterinary clinic should buy first will help you match the tool to the work, and our small animal endoscopy tips cover handling for smaller patients.
— Endoscope
Scopes and accessories built for veterinary and industrial work
If you are replacing a damaged scope or adding a second one so your main unit gets less wear, we offer portable veterinary and industrial endoscopes, borescopes and accessories at prices aimed at clinics and inspection teams. Browse the veterinary endoscopy equipment or our endoscopic accessories to build a setup that fits your cases.
For field airway work, the portable 6mm airway inspection videoscope records to an SD card, which means fewer people handling the scope around the patient.
FAQ
Can I polish a scratch out of an endoscope lens?
No. Lens surfaces and distal tip assemblies are sealed and precisely made, and polishing can worsen the damage or break the seal. If a scratch affects the image or you can see a chip, take the scope out of service and have it evaluated by the manufacturer or a qualified repair service.
What should I use to wipe an endoscope lens?
Use what your scope's IFU allows. Guidance from U.S. sources calls for soft cloths, sponges or brushes with a compatible enzymatic detergent on external surfaces. Avoid abrasive pads, rough paper products and any cleaner the manufacturer does not approve.
Is a scratched lens a safety problem or only a picture problem?
It can be both. Damage at the distal end can create gaps where debris and microorganisms collect, so a damaged tip should be evaluated before more use. A faint surface scratch that does not affect the image is still worth logging and watching.
How should I store scopes to avoid tip damage?
Store them vertically in endoscope-specific cabinets when you can. Otherwise use a fitted case with a separate space for each scope, and make sure nothing presses on the tip. Our storage guide above covers both options.
Do borescopes need different care from veterinary endoscopes?
The handling rules are the same: control the tip, clean gently, store and carry it protected. The difference is the contamination. Industrial scopes pick up grit, oil and residue, so remove loose debris before wiping the lens, and withdraw the probe carefully through fittings.
Sources
- Safeguard Your Scopes: Tips to Minimize Scope Repairs and Maintain Reprocessing, Infection Control Today
- Essential Elements of a Reprocessing Program for Flexible Endoscopes, CDC HICPAC
- Cleaning and Disinfecting Gastrointestinal Endoscopic Instruments, PubMed Central
- Endoscope Manual Cleaning and Point-of-Use Treatment, STERIS
- Scoping the scope: endoscopic evaluation of endoscope working channels, PubMed Central
- Guidance for Manufacturers Seeking Marketing Clearance of Ear, Nose and Throat Endoscope Sheaths, FDA