
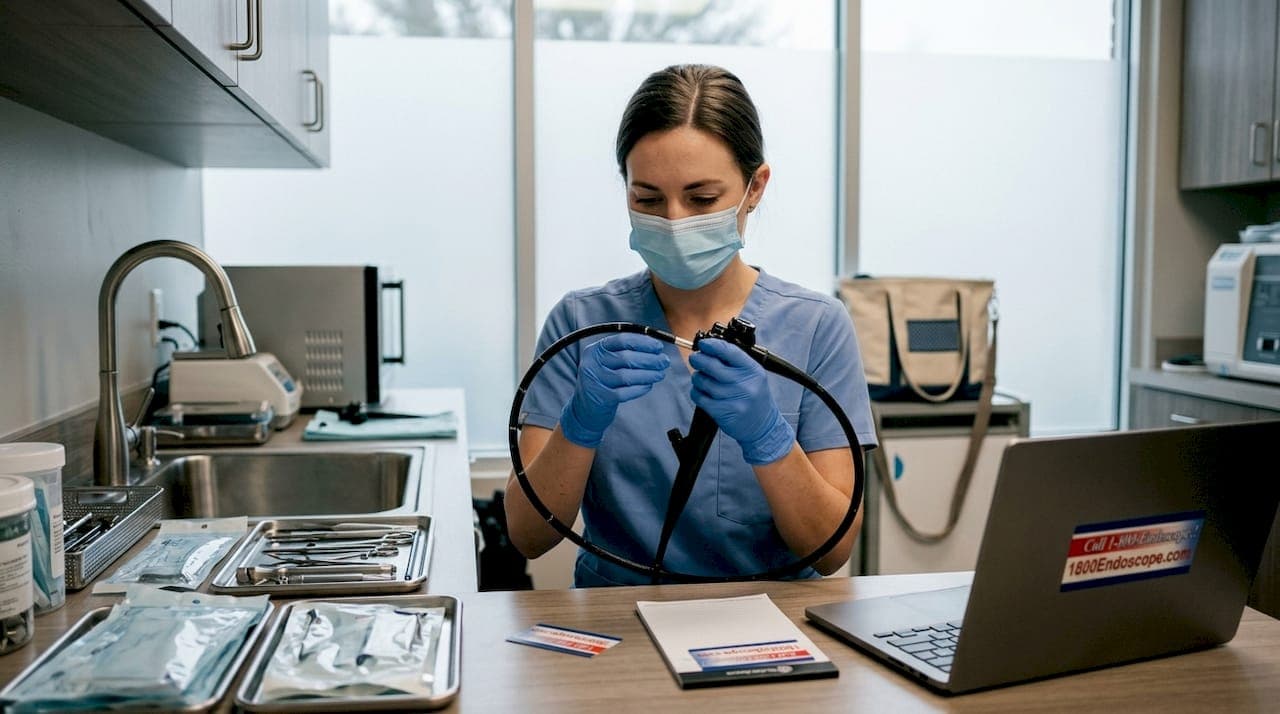
Endoscope sterilization is defined as the complete elimination of all microbial life, including bacterial spores, from reusable endoscopic instruments before they contact tissue or critical surfaces again. The industry-standard endoscope reprocessing workflow includes 9 sequential steps, from point-of-use pre-cleaning through proper storage. Flexible and rigid endoscopes are heat-sensitive and cannot tolerate steam autoclaving, which means every step by step endoscope sterilization protocol must rely on low-temperature chemical or gas-based methods. Skipping or shortcutting any stage creates direct patient and animal safety risks, and in regulated environments, compliance failures.
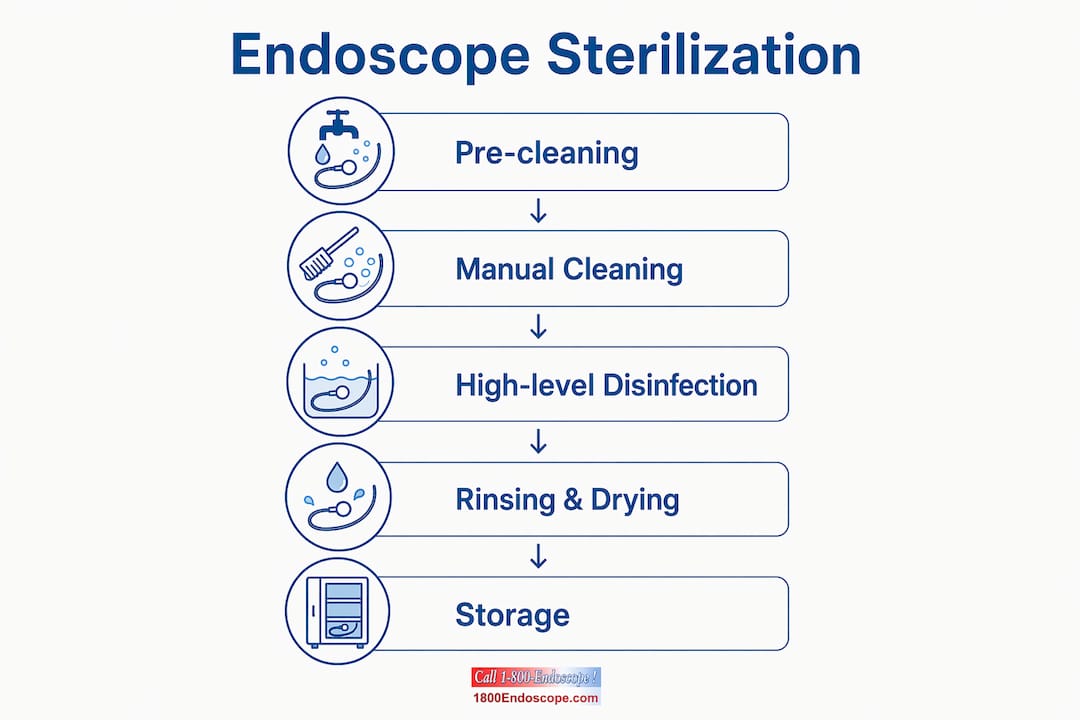
What are the essential tools and prep steps before sterilization?
Preparation determines whether the rest of the sterilization workflow succeeds or fails. Before touching a used endoscope, you need enzymatic detergent, a leak tester, channel-specific brushes sized to the scope's instructions for use (IFU), a clean basin, and appropriate personal protective equipment including gloves, goggles, and a fluid-resistant gown.
Cleaning agents: enzymatic vs. detergent
| Agent Type | Example Products | Best Use | Limitation |
|---|---|---|---|
| Enzymatic detergent | Enzol, Cidezyme | Breaks down protein-based bioburden | Requires correct dilution and soak time |
| Neutral detergent | Intercept Plus | General surface cleaning | Less effective on heavy organic soil |
| Enzymatic foam | EndoZime | Point-of-use pre-cleaning at bedside | Not a substitute for full manual cleaning |
Enzymatic detergents are the standard choice for endoscope cleaning because they actively digest protein, fat, and carbohydrate residues. Neutral detergents work for lighter contamination but should not be the sole agent after high-bioburden procedures.
Point-of-use pre-cleaning must happen immediately after the procedure ends. Wipe the insertion tube, flush all channels with enzymatic solution, and cap the scope before transport. This step is not optional. Delayed cleaning increases biofilm risk and forces more complex reprocessing protocols later.
Pro Tip: Set up a dedicated reprocessing station in your veterinary clinic or industrial facility before the first procedure of the day. Having all tools pre-staged cuts transition time and reduces the chance of skipping steps under pressure.
Step by step process for manual cleaning and inspection
Manual cleaning physically removes over 99% of bioburden and biofilm, making it the single most critical step in the entire reprocessing sequence. No chemical disinfectant can penetrate intact biofilm. If organic debris remains on the scope, disinfection will fail regardless of the agent used.
Follow these steps in order, without skipping:
-
Leak test first. Submerge the scope in water and apply pressure using a leak tester. Look for bubbles indicating internal damage. A damaged scope must not be cleaned further until repaired, as fluid ingress will destroy internal components.
-
Prepare the cleaning basin. Fill with water at the temperature specified in the scope's IFU, typically lukewarm. Add enzymatic detergent at the manufacturer's recommended dilution. Never guess the ratio.
-
Brush all accessible channels. Insert the correct brush into each channel and pass it through until the brush emerges clean on the other side. Brush diameter must match the channel IFU. An undersized brush misses debris along the channel walls. An oversized brush tears the channel lining.
-
Flush all channels with enzymatic solution. Use a syringe or channel flushing pump to force solution through every port, including the air, water, and suction channels. Repeat until the effluent runs clear.
-
Brush the exterior. Scrub the insertion tube, light guide connector, and control body with a soft brush. Pay attention to valves, buttons, and recessed areas where debris collects.
-
Rinse thoroughly with clean water. Flush all channels and wipe the exterior to remove detergent residue. Residual detergent interferes with disinfectant activity in the next stage.
-
Perform visual inspection. Examine the exterior under bright light for cracks, discoloration, or damage. Then use a borescope for internal inspection to check channel walls for residual debris or physical defects. This step is the quality gate before disinfection.
The golden hour rule states that manual cleaning must begin within 60 minutes of the procedure ending. Beyond that window, biofilm begins to form and standard cleaning protocols may not be sufficient.
Pro Tip: Log the procedure end time and cleaning start time for every scope, every time. This documentation protects your facility during audits and flags any workflow bottlenecks before they become compliance problems.
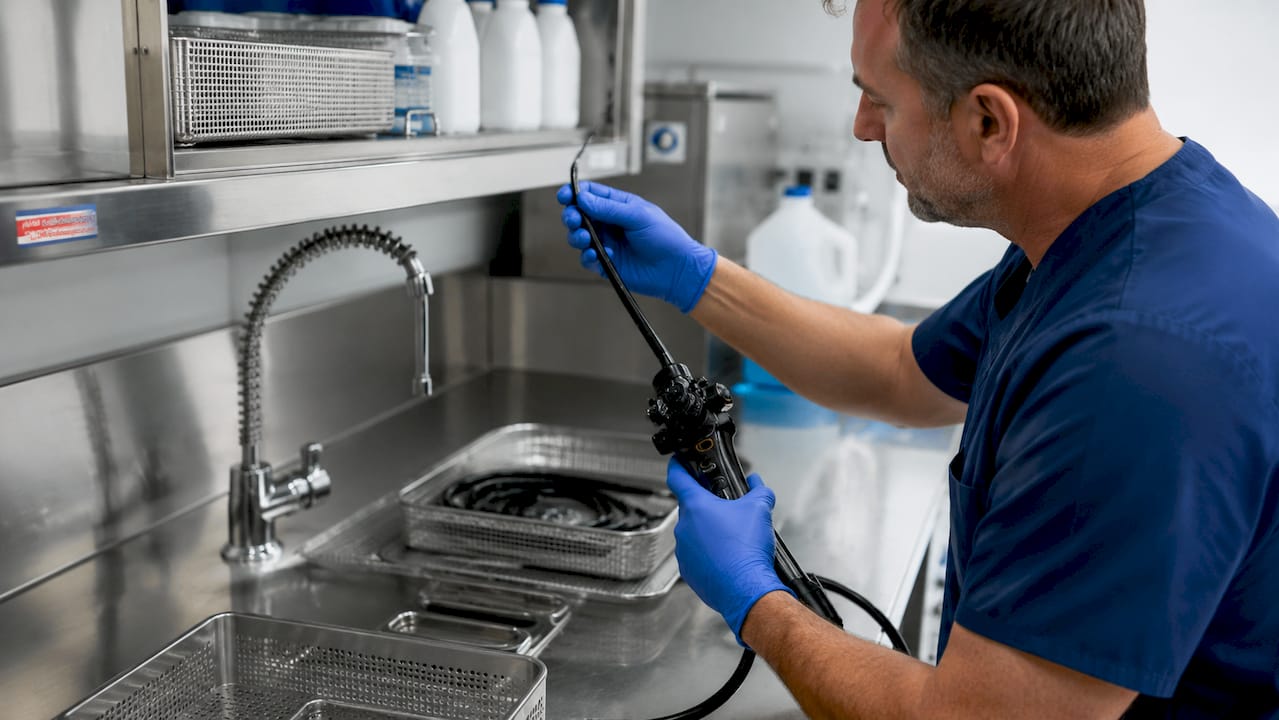
How to perform high-level disinfection or sterilization correctly?
High-level disinfection (HLD) is the minimum accepted standard for semi-critical devices, meaning instruments that contact mucous membranes but not sterile tissue. True sterilization achieves a sterility assurance level of 10⁻⁶, eliminating all microbial life including spores. HLD does not reach that threshold. For higher-risk devices such as duodenoscopes used in critical procedures, full sterilization is increasingly required.
Common disinfectants and sterilants compared
| Agent | Contact Time | Pros | Cons |
|---|---|---|---|
| Glutaraldehyde (2.4–3.4%) | 20–45 min at 25°C | Widely available, effective HLD | Toxic fumes, requires ventilation, limited reuse life |
| OPA (Ortho-phthalaldehyde, 0.55%) | 12 min at 20°C | Less irritating than glutaraldehyde, faster | Stains protein gray, higher cost |
| Peracetic acid (0.2–0.35%) | 5–12 min | Rapid, no toxic residue, sporicidal | Corrosive to some metals, short shelf life |
| Ethylene oxide (EtO) gas | Several hours | True sterilization, compatible with delicate scopes | Requires specialized equipment, long aeration time |
The stepwise procedure for chemical HLD is straightforward but requires discipline:
- Confirm the disinfectant concentration with a chemical test strip before each use. Glutaraldehyde and OPA solutions degrade with repeated use and temperature changes.
- Fully submerge the scope and inject disinfectant into every channel using a syringe or automated injector. Air pockets prevent contact and create disinfection failures.
- Maintain the required contact time precisely. Setting a timer is not optional.
- Work in a ventilated area when using glutaraldehyde or OPA. Both agents cause respiratory irritation and sensitization with repeated exposure.
Flexible endoscopes require strict adherence to low-temperature methods because heat destroys their internal optics and adhesives. Using an autoclave on a flexible scope is not a shortcut. It is destruction of the instrument.
For sterilization in veterinary endoscopy, the choice between HLD and true sterilization depends on the procedure type and the tissue the scope contacts. Rigid arthroscopes entering sterile joint spaces require sterilization. Flexible gastroscopes used in the upper GI tract of animals typically require HLD at minimum.
Post-disinfection rinsing, drying, and storage best practices
Rinsing after HLD is not optional. Residual disinfectant on the scope surface or inside channels causes chemical burns to tissue on the next use. Flush every channel with sterile water or filtered water, then rinse the exterior completely.
Drying is where many facilities fail. Flushing channels with 70% ethyl or isopropyl alcohol followed by forced air drying is the mandated protocol. Alcohol displaces residual water and evaporates quickly, leaving channels dry. Moisture left inside channels supports bacterial growth, particularly from water-loving organisms like Pseudomonas aeruginosa.
Key drying and storage rules:
- Flush all channels with 70% alcohol after the final water rinse.
- Apply forced air through every channel until no moisture exits.
- Hang the scope vertically in a ventilated storage cabinet. Coiling a wet scope traps moisture in dependent loops.
- Use a dedicated drying cabinet with HEPA-filtered airflow if your volume justifies the investment. These cabinets maintain drying conditions for extended storage.
- Label stored scopes with the date and time of reprocessing. Most guidelines recommend a maximum hang time of 5–7 days before re-reprocessing if the scope has not been used.
Pro Tip: Never store a scope in a sealed plastic bag or transport case immediately after reprocessing. Sealed environments trap residual humidity and accelerate bacterial growth. Always allow full drying before any enclosed storage.
Common challenges and troubleshooting in endoscope reprocessing
The most common reprocessing failure is inadequate manual cleaning. No chemical disinfectant substitutes for thorough manual cleaning because disinfectants cannot penetrate intact biofilm or organic debris. If a scope goes into the disinfectant bath with visible soil, the process has already failed.
Common problems and their fixes:
- Delayed cleaning past the golden hour. If cleaning cannot start within 60 minutes, extended detergent soaking with enzymatic solution is required before manual brushing. This adds time and complexity. The fix is workflow planning, not chemistry.
- Wrong brush size. A brush that is too small leaves debris on channel walls. A brush that is too large damages the channel lining and creates crevices where biofilm forms. Always match brush diameter to the scope model's IFU.
- Skipped visual inspection. Internal inspection with a borescope catches residual soil and channel damage that external inspection misses entirely. Skipping this step means sending a potentially contaminated or damaged scope into disinfection.
- Inconsistent SOP compliance. Consistent SOPs reduce infection risk by removing variability from the process. Post a laminated checklist at every reprocessing station and require sign-off for each completed step.
"The highest-performing reprocessing teams establish rapid documentation protocols for point-of-use treatment to ensure timely cleaning and avoid biofilm formation." — Becker's ASC
Documentation is not bureaucracy. It is the only way to prove compliance after the fact and identify where a process broke down when an infection event occurs.
Key Takeaways
Effective endoscope reprocessing requires manual cleaning before any chemical disinfection, strict timing within the golden hour, correct brush sizing, and proper drying before storage.
| Point | Details |
|---|---|
| Manual cleaning is non-negotiable | Physical removal of bioburden must precede disinfection; chemicals cannot penetrate intact biofilm. |
| The golden hour matters | Begin manual cleaning within 60 minutes of procedure end to prevent biofilm formation. |
| Match brushes to the IFU | Use the brush diameter specified for each scope model to avoid missed debris or channel damage. |
| HLD vs. sterilization is risk-based | Semi-critical devices require HLD at minimum; high-risk devices like duodenoscopes require full sterilization. |
| Drying prevents recontamination | Flush channels with 70% alcohol and apply forced air before vertical storage in a ventilated cabinet. |
What I've learned from watching reprocessing go wrong
Most reprocessing failures I've seen do not happen because professionals don't know the steps. They happen because the workflow is set up in a way that makes shortcuts feel necessary. A busy veterinary clinic with one reprocessing sink and three scopes in rotation will cut corners under pressure. That is a facility design problem, not a training problem.
The second thing I've noticed is that visual inspection with a borescope gets treated as optional. Professionals assume that if the brushing looked thorough, the channel is clean. It often isn't. Residual debris in channel bends is invisible from the outside and invisible to the naked eye at the channel entrance. A flexible borescope inspection takes two minutes and catches what everything else misses.
The third pattern is documentation avoidance. Teams that resist logging cleaning times are usually the same teams that cannot explain an infection cluster six months later. Timing logs are not paperwork. They are the audit trail that protects both the patient and the professional.
My honest recommendation: treat your reprocessing station with the same seriousness as your procedure room. The scope that goes into an animal or an industrial system is only as safe as the last person who cleaned it.
— Endoscope
Professional endoscopy equipment from 1800endoscope
Proper sterilization starts with equipment built to withstand repeated reprocessing cycles.

1800endoscope carries a full range of veterinary and industrial endoscopes, including rigid veterinary endoscopes and portable inspection borescopes designed for professionals who reprocess regularly. The catalog includes small-diameter videoscopes, fiber optic systems, and accessories like cleaning brushes and channel flushing tools. Whether you run a veterinary clinic handling small animals or an industrial NDT team inspecting confined spaces, 1800endoscope stocks equipment that fits your reprocessing protocol. Browse the full endoscopy product catalog to find instruments matched to your procedure volume and sterilization requirements.
FAQ
What is the difference between HLD and sterilization for endoscopes?
High-level disinfection eliminates most microbial life but does not achieve a sterility assurance level of 10⁻⁶. True sterilization eliminates all microbial life including spores and is required for high-risk devices like duodenoscopes.
Why can't flexible endoscopes be steam autoclaved?
Flexible endoscopes are heat-sensitive instruments. Steam autoclaving destroys their internal optics, adhesives, and channel linings. Low-temperature chemical or gas-based methods are the only safe options.
How soon must manual cleaning begin after a procedure?
Manual cleaning must begin within 60 minutes of the procedure ending. This window is called the golden hour. Delays allow biofilm to form, which requires extended soaking protocols and increases reprocessing complexity.
What happens if the wrong brush size is used during cleaning?
An undersized brush misses debris along channel walls. An oversized brush damages the channel lining and creates surface irregularities where biofilm accumulates. Always use the brush diameter specified in the scope model's IFU.
How long can a reprocessed endoscope be stored before it needs re-reprocessing?
Most guidelines recommend a maximum storage period of 5–7 days for a reprocessed scope hanging in a ventilated cabinet. After that window, the scope should be re-reprocessed before use even if it was not touched.