
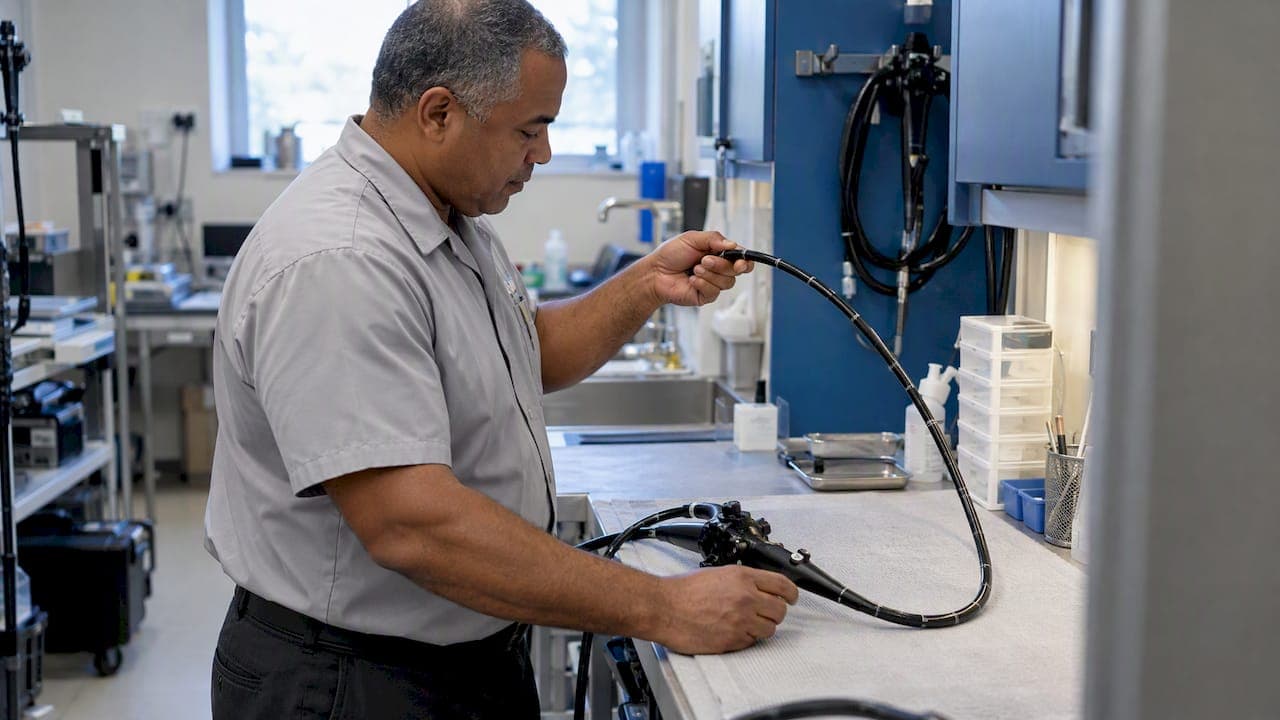
Endoscope preventive maintenance is a routine of checks you do after every use, plus a scheduled inspection by a qualified technician, all written down. The after-use checks are leak testing (for scopes that require it), visual inspection and proper storage. There is no single U.S.-wide interval for the scheduled inspection. It follows your manufacturer's instructions and how hard the scope works. Many facilities settle on a quarterly or semiannual review. Below is how to build that routine for veterinary and industrial scopes, what to record, and when to pull a scope from service.
TL;DR
- Preventive maintenance is three layers: checks after every use, a scheduled inspection, and a written record of both.
- Leak test flexible scopes that require it after each use and before manual cleaning. This is the check that catches damage early.
- Set the formal interval from the manufacturer's instructions and your caseload. Quarterly or semiannual reviews are common.
- Pull any scope with a visible defect out of service until it is repaired or replaced.
- Track repairs by serial number. Patterns show you who or what is damaging the scope.
Table of Contents
- Why preventive maintenance beats repairing after a failure
- The three layers of an endoscope maintenance program
- What to do after every use
- How often should an endoscope get scheduled maintenance?
- Scheduled checks for veterinary and industrial scopes
- Signs a scope must come out of service
- Keep records that you can use
- Our perspective
- Repairs and replacement parts from 1800endoscope
- A simple monthly routine to start with
- FAQ
- Sources
Why preventive maintenance beats repairing after a failure
An endoscope is a precision instrument with a fragile bending section, a delicate light path and narrow channels. Small damage rarely announces itself. A pinhole in the outer covering lets fluid in. A cracked bending rubber traps debris. A dimming light bundle makes a procedure harder before anyone calls it a fault.
The 2025 APIC issue brief on endoscope reprocessing says reusable medical devices need scheduled preventive maintenance to preserve their integrity and lifespan and to reduce malfunctions and frequent repairs. It also names where damage happens: during procedures, during reprocessing, in storage and in transport. The same brief notes that a damaged or incompletely reprocessed scope can retain contamination, fail mid-procedure or contribute to pathogen transmission.
That guidance is written for human healthcare, and veterinary and industrial users are not bound by it. The logic still carries over. A scope that fails halfway through a gastroscopy on a dog, or in the middle of a pipe inspection with a client waiting, costs you the case, the time and often the repair bill. A structured schedule turns that surprise into a calendar entry.
The three layers of an endoscope maintenance program
It helps to separate what happens when, because each layer catches different problems.
| Layer | When | Who | What it catches |
|---|---|---|---|
| Point-of-use care | Every procedure or inspection | The operator | Debris, obvious damage, leaks |
| Routine inspection | Weekly to quarterly, by your own policy | Trained staff | Wear, image and light changes, accessory condition |
| Technical service | Per manufacturer and use, often quarterly or semiannual | Qualified service technician | Internal wear, fiber loss, angulation drift, optics |
The CDC's HICPAC reprocessing elements state that a preventive maintenance program should retain maintenance and repair records, and that manufacturer instructions for reprocessing should be followed. Treat those two points as the spine of everything below.
What to do after every use
The after-use routine is where most scope life is won or lost. Follow the manufacturer's instructions for your exact model. For flexible medical-type scopes, the federal guidance lists the same sequence: pre-cleaning, leak testing when required, manual cleaning, visual inspection, disinfection or sterilization, storage and documentation, according to the CDC HICPAC document.
Pre-clean at the point of use
Wipe the insertion tube with a soft, damp cloth or gauze and an approved enzymatic solution as soon as the scope is out of the patient or the pipe. Flush the channels as the manufacturer directs. Dried-on organic material or industrial residue is much harder to remove later, and it stresses the channels and valves.
Leak test before you clean
For endoscopes that require leak testing, test after each use and before manual cleaning. The reason, per the CDC document, is to detect damage to external surfaces and internal channels that could lead to inadequate disinfection or further damage. Submerging a leaking scope in cleaning fluid can ruin it, which is why the order matters. Not every scope is leak-testable, so check your manual. Many rigid scopes and some small-diameter videoscopes have different rules.
If the test fails, stop. Do not soak the scope. Tag it and send it for evaluation.
Inspect before disinfection or sterilization
Academic guidance reviewing CDC recommendations says visual inspection should confirm that the scope and its accessories are clean and free of defects before disinfection or sterilization (PMC review, 2020). In practice, look at:
- The distal tip and articulation: does it move smoothly through its full range, in every direction?
- The bending rubber and outer covering: look for bulges, dents, tears, scratches or sticky spots.
- The distal lens and eyepiece, if there is one: cracks, haze or residue.
- The scope body, controls and connectors: loose parts, stiff dials, damaged pins.
- Light output: is it even and bright, or patchy and dim?
- The channels and valves: clean, free of debris, and seated properly.
An inspection checklist like this is consistent with manufacturer competency guides, which cover distal-tip articulation, the bending rubber, the body, the eyepiece and the distal lens, plus illumination and the cleanliness of the exterior and channels.
Rinse, dry, disinfect, store
The AHRQ ambulatory surgery toolkit describes flexible endoscope processing as point-of-use precleaning, transport, leak testing, cleaning, rinsing, inspection or cleanliness testing, disinfection or high-level disinfection where applicable, another rinse, drying with an alcohol flush, and storage. Drying matters for maintenance as well as safety: residual moisture speeds corrosion and encourages biofilm.

For the veterinary details, see our guides on step-by-step endoscope sterilization and sterilization in veterinary endoscopy. For storage, which prevents a surprising share of damage, read how to store endoscopic equipment. The short version: store scopes straight or in a case designed for them, never coiled tight, and never with the insertion tube pinched under a lid.
How often should an endoscope get scheduled maintenance?
No single U.S. rule sets one interval for comprehensive preventive maintenance. The APIC brief says the schedule should follow the manufacturer's instructions and the facility's use and risk profile. It describes periodic checks as weekly, monthly or quarterly in some settings, and industry sources describe quarterly or semiannual preventive maintenance inspections. Leak testing, by contrast, is not on a calendar. It happens after every procedure and before cleaning.
A workable starting point for a clinic or inspection shop:
| Use level | Suggested internal review | Technician service |
|---|---|---|
| Daily or near-daily use | Weekly full inspection of tip, covering, light and accessories | Quarterly, or sooner if the manufacturer says so |
| A few cases or jobs per week | Monthly inspection | Quarterly to semiannual |
| Occasional use, long storage | Check before each use and after any long idle period | At least as often as the manufacturer states |
This table is our suggested framework, not a regulation. Your manual wins over any generic chart. If you do not have the manual, ask the manufacturer or us for the correct maintenance guidance for your model.
Adjust the interval upward in frequency if you see any of these:
- Several repairs on the same scope in a short period.
- A scope used in rough conditions: large animals, dusty or wet industrial environments, tight bends.
- Multiple operators with uneven training.
- Scopes transported between sites.
Scheduled checks for veterinary and industrial scopes
The routine inspection sits between your after-use check and a technician's visit. It takes more time than the after-use look, and it is worth putting on the calendar with a name next to it.
Veterinary scopes
Flexible videoscopes and fiberscopes used for gastrointestinal, airway and nasal work see the most stress. Add to the after-use list:
- Test angulation against its published range, and note any slack or sticking.
- Compare image quality against a reference target or a saved image from when the scope was healthy.
- Check the light source lamp hours or LED output and the light guide connection.
- Examine biopsy forceps jaws, springs and sheaths for fatigue, since a stiff or misaligned jaw damages the working channel. See our flexible biopsy forceps range.
- Inspect valves, seals and caps, and replace worn ones.
- Check pumps and tubing used for insufflation or irrigation.
- Check the case, cable and monitor or SD-card unit for portable systems.
Rigid scopes, arthroscopes and otoscopes have their own failure points: bent shafts, cracked lens windows and damaged light-post connectors. Look down the scope against a light for internal fogging or lost clarity. Our rigid scope range covers these.
Industrial borescopes
Borescopes rarely face biological contamination, but they face oil, dust, solvents and abrasion. After each job, wipe down the probe and check the tip window for scratches. Check the articulation cable tension if the model has one, and confirm that LED output is steady. Keep the camera tip protected during transport. Probes used in pipes meet more abrasion than anything else, so inspect the outer sheath for wear every time. For the right tools, our borescope and pipe inspection videoscopes are listed on one page.

Consider inspecting with a borescope
A peer-reviewed U.S. study found that inspecting every endoscope with a borescope after manual cleaning was associated with lower repair costs over time. The institution's 2024 fleet-maintenance cost was $488,283 lower than in 2022. That was a large hospital system, so the scale will not match yours. The takeaway is the principle: looking inside channels finds damage and residue before they become failures. Our guide to prepping an endoscope for inspection walks through the setup.
Signs a scope must come out of service
The APIC brief is plain: a scope with a defect should be removed from service for repair or replacement. Inspection may reveal tears, scratches, discoloration, staining or bioburden. Treat these as stop signs:
- A failed leak test.
- Any tear, bulge, cut or sticky patch on the outer covering.
- Stiff, jerky or incomplete angulation.
- Cloudy, dark, spotted or distorted images that cleaning does not fix.
- Uneven or noticeably reduced light output.
- Visible staining, residue or debris that survives proper cleaning.
- Loose, bent or corroded connectors.
- Fluid inside the eyepiece or lens.
Tag the scope clearly so nobody picks it up by accident. Record what you saw. Then decide between repair and replacement based on the cost, the scope's age and whether your service provider can restore it to specification. If a fault shows up in the middle of a case, our videoscope troubleshooting guide and animal endoscopy troubleshooting guide help you tell a setup problem from real damage.
Keep records that you can use
The CDC document says facilities must maintain records of preventive maintenance and repairs for endoscopes and reprocessing equipment to ensure quality assurance. It also suggests recording the procedure end time and the start of manual cleaning, so you can see how long scopes wait before reprocessing and whether the manufacturer's recommended time to cleaning is being met.
A useful log per scope has:
- Model and serial number.
- Date, operator and case or job reference.
- Result of the leak test and visual inspection.
- Any defect found and what was done.
- Scheduled inspection dates and who performed them.
- Repair history, with dates, causes and costs.
- Accessories used with it.
Records also pay off in a way that is easy to miss. APIC's expert perspective is that repair trends, costs and incident records should be analyzed proactively, because recurring damage patterns can reveal unsafe handling, reprocessing, transport or storage practices before a device fails. If three scopes in a quarter all show the same bending-section damage, you do not have three bad scopes. You have a process problem.
A paper binder works. So does a spreadsheet. If you manage many scopes or sites, a service-management system helps, and this overview of equipment service history fields shows which details make a maintenance record hold up to review.
Our perspective
We sell and repair veterinary and industrial scopes, and the pattern we see is consistent. Most problems that arrive on our bench could have been caught earlier by a quick look. A clinic has a good scope, and it ends up in a drawer with the insertion tube bent. Or a leak went untested because the day was busy. Money is rarely the issue. Habit is.
Our advice is to keep the routine small enough that people actually do it. Put a one-page checklist on the cleaning station. Make leak testing the step nobody skips. Give each scope a serial-numbered log. Agree on a service interval with whoever repairs your scopes, and write it in the calendar rather than waiting for a fault.
Portable, affordable systems change the math too. When a clinic owns a scope priced for veterinary use rather than a hospital-grade system, it can afford to have a spare, and a spare is what makes preventive maintenance possible. You can pull a scope for service without cancelling the day.
— Endoscope
Repairs and replacement parts from 1800endoscope
If an inspection turns up something that cleaning will not fix, we can help. We offer endoscope repairs and supply veterinary and industrial scopes, light sources, valves, pumps and accessories, so replacement parts and a loaner-style spare plan can come from one place. Browse medical and veterinary endoscopes and accessories or contact us about your model.
If you are still choosing equipment, our guide on which endoscope a veterinary clinic should buy first covers the trade-offs. For small-animal work, see small animal endoscopy tips.
A simple monthly routine to start with
If you have nothing in place, begin here:
- Print a one-page after-use checklist and post it where scopes are cleaned.
- Create a log for each scope with its serial number.
- Gather every manufacturer manual and note the maintenance guidance in each.
- Pick a review interval, weekly or monthly, and assign a person.
- Book technician service on a recurring schedule, quarterly or semiannual unless the manufacturer says otherwise.
- Once a quarter, read the repair log and ask what pattern it shows.
After three months you will know which scopes fail most, which steps get skipped and what your repairs really cost.
FAQ
What does endoscope preventive maintenance include?
It covers after-use care (pre-cleaning, leak testing where required, inspection, drying and storage), a regular inspection of the scope and accessories, and technician service on a set schedule. Every step is recorded. Follow the manufacturer's instructions for your model first.
How often should an endoscope be serviced?
No single U.S. rule sets one interval. Follow the manufacturer's instructions and your own workload. Industry sources describe quarterly or semiannual inspections, and heavily used scopes may need more frequent checks.
Do I need to leak test every time?
For scopes that require leak testing, yes: after each use and before manual cleaning. It finds damage that could cause inadequate disinfection or more harm. Check your manual, because not every scope is designed for a leak test.
When should I stop using an endoscope?
Stop when you find a tear, a failed leak test, stiff angulation, unfixable image or light problems, or residue that remains after cleaning. Tag the scope and send it for repair or replacement evaluation.
Sources
- Essential Elements of a Reprocessing Program for Flexible Endoscopes, CDC HICPAC
- The Science Behind Endoscope Reprocessing, APIC 2025
- Appendix N: A Clear View of Flexible Endoscope Processing, AHRQ
- Gastrointestinal Flexible Endoscopes: Infection Control, PMC
- Impact of Borescope Inspections on Endoscope Repair Costs, PMC