
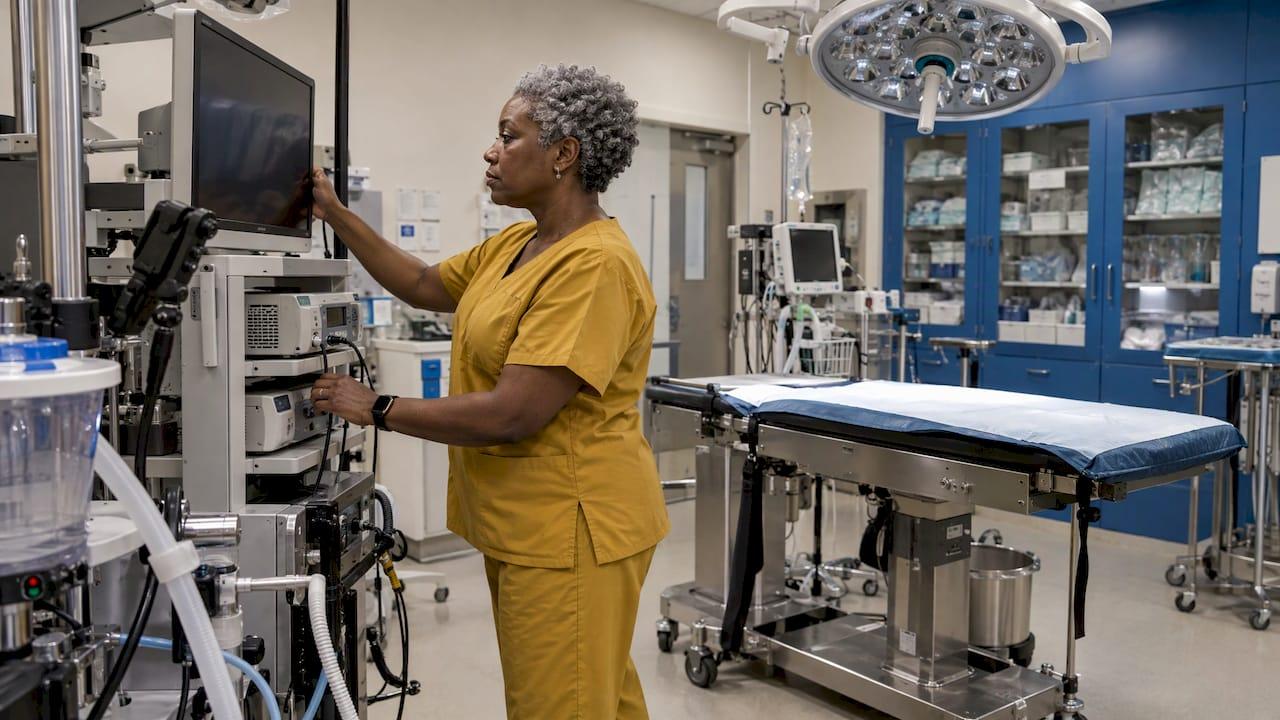
A working veterinary laparoscopy setup is a chain of seven parts: telescope, light source and cable, camera, monitor, CO2 insufflator, access instruments (Veress needle and cannulas) and an electrosurgery or accessory set. The image is only as good as the weakest link, so you buy, size and test the chain as one system. This guide walks through each part, how to match it to patient size, how to lay out the room and what to check before the first incision. If you are specifying rigid scopes, light sources or accessories, our rigid scope and accessory range is built for veterinary clinics.
TL;DR
- The core set is a telescope, light source with cable, camera, monitor, CO2 insufflator, Veress needle, trocar-cannula units and instruments. A start-up package has been put at roughly $19,000 to $24,000.
- Scope size follows the patient: 10 mm only for animals of at least 10 kg, 5 to 7 mm for nearly every dog and cat, 1.7 to 2.7 mm for the smallest patients.
- Insufflate to the lowest pressure that works: about 10 mm Hg in dogs and 8 mm Hg in cats is supported by the literature.
- Run a pre-use check of cables, light, white balance, CO2 supply and alarms before the patient is anesthetized.
- Equipment alone is not enough: monitoring, an anesthetist and hands-on training come with the system.
Table of Contents
- What a veterinary laparoscopy system consists of
- Choose scope size by patient
- Set insufflation pressure for the species
- Lay out the room
- Pre-use checks before the patient is on the table
- Cleaning, sterilizing and storing instruments
- Budget and what you actually need first
- Training is part of the setup
- Our view
- Equip your clinic
- FAQ
- Sources
What a veterinary laparoscopy system consists of
The most basic video endoscopy imaging system has a light source, a light-transmitting cable, an endoscope, a camera and a monitor. Veterinary imaging references stress that a low-resolution monitor or a damaged light cable limits an otherwise high-end system. Laparoscopy adds gas, access and instruments to that chain.
| Component | What it does | Practical point |
|---|---|---|
| Telescope (rigid) | Carries light in and the image out | 0° for general viewing, 30° to look around structures |
| Light source and cable | Illuminates the abdomen | Cable must match the source and scope |
| Camera head and control unit | Turns the image into video | White balance before every case |
| Monitor | Shows the surgeon the field | Wall-mounted on each side of the table is common |
| CO2 insufflator | Creates and holds the working space | Pressure display and adjustable flow |
| Veress needle, trocar-cannula units | Safe entry and ports | Threaded cannulas stay locked in place |
| Electrosurgery, suction/irrigation, forceps | Working instruments | Bipolar avoids a grounding plate |
A standard tower, as listed in a laparoscopy instrumentation reference, includes a high-quality color monitor, an adjustable xenon or halogen light source with cable, a CO2 insufflator with pressure monitor and adjustable flow, a video recording system, a CO2 tank (a primary and a reserve are recommended) and an electrosurgery unit. It lists 0° and 30° endoscopes in 5 mm and 10 mm.
The telescope and the light
The scope sets what you can see and which patients you can treat. Smaller scopes pass less light, so they need a stronger source. A Polish veterinary journal review states that a 150 W source suffices for diagnosis, while 300 W is needed for surgery and video documentation.
When the light source is not in use, keep it in stand-by or turned off. The Veterian Key chapter warns that a live light cable can cause thermal injury to the patient or burn the drapes.
Camera, monitor and recording
The camera and monitor decide how much detail you actually see. Buy them as a pair and look at the monitor's resolution as carefully as the scope's. Recording matters for clinics that document cases for referrals and records, and the same reference tower lists a video or digital recording system as standard.
Insufflator, gas and access
CO2 is the preferred gas. A 2020 review of pneumoperitoneum in veterinary laparoscopy notes it is cheap, noncombustible, excreted by the lungs and highly water-soluble, which lowers the risk of gas embolism. The feline laparoscopy article adds that CO2 also protects against spark ignition with cautery.
For entry, the Veress needle has a spring-loaded blunt obturator. Before insufflating, confirm it is through the abdominal wall and not in subcutaneous tissue, using aspiration or a hanging drop test. Threaded cannulas, such as the Ternamian EndoTip, are particularly helpful in cats because they stay locked in place.
Choose scope size by patient
Patient size is the first specification question. The Polish review above gives these ranges:
| Patient | Scope diameter |
|---|---|
| Animals of at least 10 kg | 10 mm possible |
| Dogs and cats of almost every size | 5 to 7 mm, the most versatile |
| Smallest animals | 1.7 to 2.7 mm |
A practical consequence: if you use a telescope and instruments of the same diameter, say 5 mm, you can swap their positions between ports without changing cannulas. Trocar reducers let smaller instruments pass without losing pneumoperitoneum, as the Veterian Key chapter explains.
For a mixed practice, a 5 to 7 mm rigid scope covers the bulk of dog and cat work. Our endoscope diameter guide goes deeper on the trade-off between image brightness and access, and the small diameter endoscope article covers the smaller end. If you also plan joint work with the same rigid scopes, see our arthroscopy setup guide.
Set insufflation pressure for the species
Pressure is a patient-safety setting, not a preference. The figures below come from published veterinary sources:
- The 2020 pneumoperitoneum review says the literature supports 10 mm Hg in dogs and 8 mm Hg in cats.
- The Polish review says maximum pressure should not exceed 12 to 13 mm Hg in cats or 15 mm Hg in dogs.
- In cats, the feline article reports pressure usually kept at 6 to 8 mm Hg during cannula insertion, then lowered to 3 to 4 mm Hg for exploration. The authors insufflate to the lowest pressure that lets the procedure be done efficiently and safely.
- A 2020 feline study found the working space depends mainly on the volume injected rather than the preset pressure.
Set the insufflator's pressure limit before connecting the patient, and set it to the species. Confirm the unit is on its large-cavity or laparoscopy setting, not an arthroscopy or small-cavity mode.
Keep small patients warm
Prolonged pneumoperitoneum cools small patients. In a 2025 rabbit study, forced-air warming, with or without heated CO2, reduced heat loss over a 120-minute pneumoperitoneum, and the authors recommend it for procedures expected to run long. Have the warming device on the table before induction, not after the temperature drops.

Lay out the room
The layout goal is simple: the surgeon, the monitor and the target organ line up, and nothing blocks the anesthetist.
- Table. The WSAVA presentation on practitioner laparoscopy lists a tiltable surgical table as part of the requirement, since tilting moves organs away from the field by gravity.
- Monitors. A two-portal ovariectomy walkthrough describes wall-mounted monitors on each side of the surgery table so the team can see without turning.
- Tower. Put the light source, camera control unit and insufflator where you can read their displays from the sterile field, with cables long enough to reach without tension.
- Gas. Keep the CO2 tank secured, with a reserve tank and the wrench and gasket nearby.
- Power. Spread the equipment across circuits so that no single multi-socket outlet is overloaded.
- Anesthesia station. Leave clear access for monitoring equipment and the person running it.
The same WSAVA source says monitoring during the procedure is mandatory and calls for an anesthetist plus a spirometer, EKG, pulse oximetry and capnography. If you are comparing how an established surgical practice arranges its operating room and monitoring, a surgical practice's canine surgery page shows what in-house soft tissue surgery services look like from the owner's side.
The sterile instrument box
Standardizing the box saves minutes and prevents missing parts. The two-portal ovariectomy walkthrough lists a gas-sterilized box holding towels, a large paper drape, a Veress needle, insufflation hose, camera head, light cable, a large needle holder, a 6 mm threaded cannula, a 5 mm cannula-trocar assembly, a larger 10 to 14 mm cannula and endoscopic forceps. It recommends a bipolar electrosurgical unit, which needs no grounding plate, a laparoscopic suction and irrigation unit and 10 mm vascular clips kept in reserve for uncontrolled bleeding.

For wrapping, the technician setup instructions call for four hand towels and six towel clamps on top of the instruments, a hand towel for the surgeon, a large paper drape around the box, and a label with date and initials on the outer wrapper. Number multiple boxes for later reference.
Pre-use checks before the patient is on the table
Run this routine every time, in this order. It follows the logic of the SAGES laparoscopy preparation and troubleshooting guide and the veterinary references above.
- Power and cables. Check that everything is plugged in and that no loose cable is hiding behind the tower.
- CO2. Open the tank valve fully, check the gauge, and confirm the insufflator alarm and pressure limit are set. Keep wrench, gasket and a reserve tank at hand.
- Insufflator mode. Make sure it is on the large-cavity or laparoscopy setting.
- Light. Take the source off stand-by, confirm the intensity is not left at manual minimum, and confirm the cable matches the source. A dim image points to the cable or camera.
- Camera. Run white balance on a white surface with the scope attached. Poor color usually means this step was skipped.
- Scope. Inspect the lens and shaft, and warm or treat the lens to limit fogging.
- Monitor. Confirm the picture is oriented correctly and the recording function works.
- Instruments. Test that scissors cut and that jaws and valves move freely. Check the reserve vascular clips are in the room.
- Connection after draping. Pass the camera cord, light cable, cautery cords, suction and irrigation lines and CO2 tubing from the sterile field and connect each to its unit.
SAGES notes that the automatic iris can react to bright reflections, so reposition instruments or switch to manual exposure, and that flickering is often caused by electrical interference or a poor cautery cable. Our animal endoscopy troubleshooting guide covers the same ground for veterinary scopes in more detail, and our small animal endoscopy tips help with day-to-day handling.
Cleaning, sterilizing and storing instruments
New instruments are cleaned, rinsed and sterilized before first use. After each case, a veterinary instrument-care guide directs you to rinse and manually clean with a neutral-pH cleaner, use distilled water where possible, lubricate moving parts, autoclave instruments open, inspect them, test the scissors and store them dry in a climate-controlled area away from chemical vapors.

Check the maker's reprocessing instructions for each scope, camera and cable, because not every part tolerates an autoclave. Sterile packs are also worth watching: the FDA has posted a Class 2 recall of a laparoscopy pack lot over a sterility-assurance issue, initiated in January 2025, and directs users to stop using and return affected kits. Compare the lot numbers on any pre-packed kits you hold with the FDA recall database.
Budget and what you actually need first
Published figures put a laparoscopy start-up package at about $19,000 to $24,000, a figure from a 2014 article that will have moved with the market. Treat it as a scale marker and get current quotes.
For procurement managers, a sensible order of purchase is:
- Scope and light first, because they set the image and the patient range.
- Camera and monitor as a matched pair.
- Insufflator with a pressure display and a CO2 reserve plan.
- Access and working instruments sized to your scope diameter.
- Spares and service, since a damaged cable or scope stops the whole chain.
For clinics buying the scope and accessories side, we offer veterinary endoscopes, rigid scopes and accessories and endoscope repairs.
Training is part of the setup
The WSAVA presenter argues that minimally invasive surgery demands a new surgical philosophy where minimum morbidity is the rule, and that hours, days and weeks of specific training are needed before a practitioner starts. Plan practice time on models, a trained anesthetist and a stepwise introduction, starting with diagnostic laparoscopy before moving to surgical procedures.
Our view
We see a veterinary laparoscopy setup as a system you assemble around the patients you treat most. Start from scope diameter, because it decides light needs, port size and which animals you can serve.
Our focus is making high-resolution, portable veterinary scopes and accessories affordable for clinics, with 24/7 support and rapid shipping. We carry rigid scopes, light sources, accessories and endoscope repair, so one supplier can cover the scope, the light and the upkeep that keep the chain strong.
Choose matched parts, run the same pre-use routine each time and keep spare cables and accessories on the shelf.
Endoscope
Equip your clinic
We supply veterinary rigid scopes, arthroscopes, otoscopes, endoscopic accessories and flexible biopsy forceps, plus endoscope repairs. Browse the medical and veterinary endoscope range or the rigid scope catalog, or start from our home page.
Prices are not published on those pages, so contact us for a quote matched to your caseload.
FAQ
What is the minimum equipment for veterinary laparoscopy?
You need a telescope, light source and cable, camera and monitor, a CO2 insufflator, a Veress needle, trocar-cannula units and basic instruments. Add electrosurgery, suction and irrigation for surgical work. Monitoring equipment and an anesthetist are also required during the procedure.
What scope size should I buy for dogs and cats?
A 5 to 7 mm scope fits dogs and cats of almost every size. Use 10 mm only in animals of at least 10 kg, and 1.7 to 2.7 mm for the smallest patients. Smaller scopes need a brighter light source.
What insufflation pressure is used?
The veterinary literature supports about 10 mm Hg in dogs and 8 mm Hg in cats. Cats are often held lower still during exploration, at 3 to 4 mm Hg. Always insufflate to the lowest pressure that lets you work safely.
Do I need CO2 specifically?
Yes, CO2 is the preferred gas. It is noncombustible, quickly absorbed and excreted by the lungs, and lowers the risk of gas embolism. Keep a reserve tank.
Sources
- Diagnostic laparoscopy in the cat
- Imaging Equipment and Operating Room Setup, Veterian Key
- Laparoscopy and Thoracoscopy: Is It For The Practitioner?, WSAVA 2008
- How to perform a two-portal laparoscopic ovariectomy, dvm360
- General laparoscopic ovariectomy setup instructions for technicians, dvm360
- Laparoscopy Instrumentation
- Laparoscopic procedures in dogs and cats
- Pneumoperitoneum in Veterinary Laparoscopy: A Review
- Pressure–Volume Curve during Capnoperitoneum in Cats
- Influence of Different Warming Methods in Rabbits
- Veterinary instrument care guide
- FDA Class 2 Device Recall, Laparoscopy Pack
- SAGES Laparoscopy Preparation and Troubleshooting Guide