
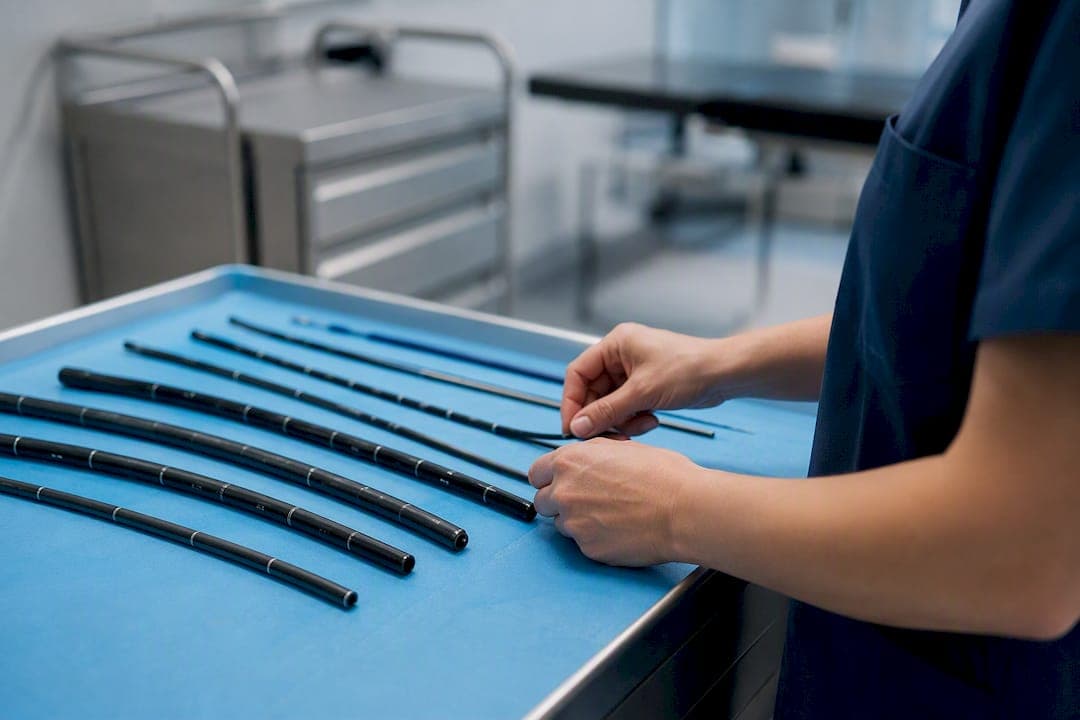
Choose the smallest outer diameter that clears the smallest aperture in the path while still meeting your working-channel and tool requirements, then leave 0.3–0.5 mm of clearance for safe passage. That's the whole rule. Everything else in this endoscope diameter guide is detail on how to apply it.
For quick reference, here's where most procedures land:
- Ultra-slim veterinary/avian: 2.2–3.5 mm OD, for exotics and narrow airways
- Small-animal GI, bronchoscopy, cystoscopy: 3.5–8.0 mm OD, covering most cats and dogs
- Equine and large-animal work: 8–11+ mm OD, for longer reach and larger channels
- Industrial smart defaults: 4 mm for precision access, 6 mm as a general-purpose workhorse, 8 mm and up for documentation-grade or therapeutic tasks
Pro Tip: A 0.3–0.5 mm clearance margin isn't a rounding error. On a 3 mm channel, that's a 10 to 15% buffer against binding, and it's the number most gastrointestinal endoscopy guidance points to for safe passage.
The trade-off runs in one direction: shrink the diameter and you gain access, but you lose light throughput, channel real estate, and often articulation strength. Go bigger and you get better optics and room for accessories, but you close doors on smaller patients or tighter ports.
Table of Contents
- Veterinary Endoscope Diameter Recommendations by Procedure
- What Borescope Diameter Should Industrial Technicians Use?
- How Do You Measure and Calculate the Right Diameter?
- Which Working Channel Size Do You Actually Need?
- Building a Compatible Endoscope System
- Material and Durability Differences by Endoscope Diameter
- How Diameter Affects Sterilization and Maintenance
- Safety Risks From Choosing the Wrong Endoscope Diameter
- Reading Manufacturer Specs: Outer Diameter vs. Insertion Tube Diameter
- Building a Practical Kit That Actually Gets Used
- Where to Find the Right Scope Once You Know Your Size
- Sources
Veterinary Endoscope Diameter Recommendations by Procedure
The right endoscope diameter recommendations depend almost entirely on which orifice or cavity you're entering and what you need to pull out through the channel while you're in there.
For bronchoscopy, rhinoscopy, and cystoscopy in cats and small dogs, flexible endoscopes in the 2.8–5.0 mm range handle most cases without excessive tissue trauma. Rigid cystoscopy in female dogs is a special case: a 2.7 mm telescope is the workhorse size most practices settle on, with working lengths typically running 60–100 cm depending on the manufacturer.
Gastroscopy and upper GI work in general small-animal practice calls for a longer, slightly heavier instrument. A standard gastroscope should run at least 100 cm, with an outer diameter under 10 mm, ideally 7.8–9.0 mm, and a working channel of 2.2–2.8 mm so you can actually pass biopsy forceps rather than just look around.
Equine and large-animal procedures push both numbers up. Expect ODs of 9.0–11.0 mm or more, and working lengths anywhere from 1.5 to 3.5 meters depending on whether you're scoping the upper airway or working toward the stomach.
| Procedure Type | Typical OD Range | Working Length |
|---|---|---|
| Bronchoscopy/rhinoscopy (small animal) | 2.8–5.0 mm | 60–100 cm |
| Cystoscopy (cats/small dogs) | 2.7–3.5 mm | 60–100 cm |
| Gastroscopy (small animal GI) | 5.8–9.2 mm | at least 100 cm |
| Equine airway/gastroscopy | 8–11+ mm | 1.5–3.5 m |
Most mixed small-animal practices end up running two rigid scopes rather than one compromise size. A 2.7 mm oblique telescope paired with a 5 mm forward-viewing scope covers the overwhelming majority of rigid procedures you'll encounter, from urethroscopy to laparoscopic-assisted work. Our veterinary rigid endoscopy catalog is built around exactly that pairing, since it's the combination that actually gets used week to week rather than sitting in a drawer.
What Borescope Diameter Should Industrial Technicians Use?
Industrial inspection follows the same logic as veterinary work, minus the biology. You're threading a probe through ports, bores, and ducts, and the smallest aperture in the whole path still sets your ceiling.
Most working technicians default to a 6 mm probe for general use. It balances image quality against access reasonably well, though the ideal kit carries a smaller and a larger option alongside it: a 4 mm precision probe for micro-apertures, and an 8 mm probe when documentation quality matters more than reach. That three-tier approach shows up constantly in field practice because no single diameter covers everything a shop actually inspects.
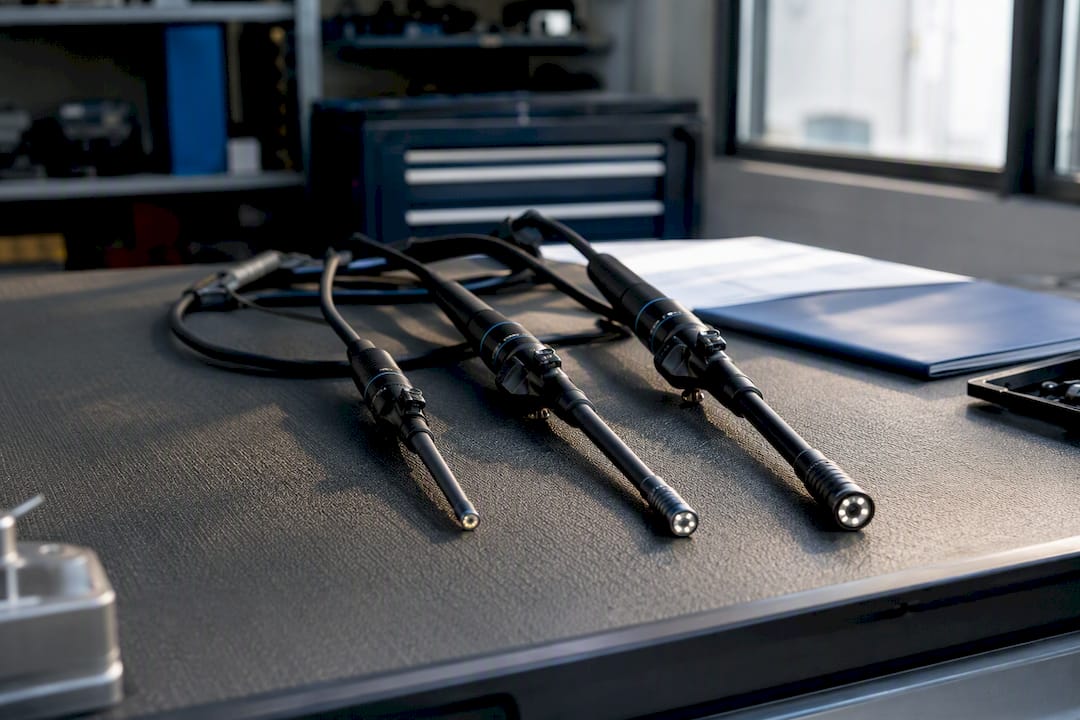
The trade-off is not subtle. Drop from 6 mm to 4 mm and you lose sensor area, which means less light and softer resolution on camera. Articulation strength typically drops too, since the mechanism steering the tip has less room to work with. A 4 mm probe threading a 300 mm bore is going to droop or wander more than an 8 mm probe would in open space, so plan your lighting and mounting stability accordingly rather than assuming the smaller scope will behave the same way.
A few common access points and where they land on diameter:
- Fuel injector ports: typically demand 4 mm or smaller to clear the injector bore without contact
- Valve assemblies and small hydraulic lines: usually fit a 4–6 mm probe depending on fitting size
- Engine cylinder bores: generally accept 6–8.5 mm, giving room for better optics
- HVAC ducts and larger structural voids: rarely constrain diameter at all, so 8 mm+ probes are the better call for image quality
Pro Tip: If you inspect a wide mix of equipment, resist the urge to buy one "do everything" probe. A 4 mm plus 6 mm combination costs less than most single premium 6 mm units, and it means you're never stuck explaining to a client why you couldn't finish the job. Our borescope catalog breaks down probe diameters by application if you're building out that kind of layered kit.
How Do You Measure and Calculate the Right Diameter?
Sizing an endoscope correctly is a measurement problem before it's a shopping problem, and skipping steps here is where most sizing mistakes happen.
- Measure the smallest aperture along the entire path, not just the entry point. A trocar site might look generous, but an intermediate joint, valve seat, or stricture further along can be the real constraint. Use calipers or bore gauges for mechanical access points; for animal anatomy, imaging like CT or fluoroscopy can reveal narrowings you won't catch on physical exam alone.
- Determine the working channel diameter you actually need, based on the largest accessory the procedure requires; biopsy forceps, a retrieval basket, a foreign-body grasper. Add a small allowance for mounting play inside the channel, since accessories rarely sit perfectly centered.
- Calculate your minimum OD by adding the accessory diameter to the scope's internal construction thickness, then layer on the 0.3–0.5 mm clearance margin that practitioners consistently recommend for safe passage and articulation room.
A quick worked example: if your procedure needs a biopsy channel of moderate size, and construction thickness adds to that, you derive a practical minimum outer diameter before clearance. Adding the recommended clearance margin, your real target scope diameter should allow safe passage rather than aiming for the bare minimum. The full compatibility walkthrough on small-animal technique covers more worked examples if you want to sanity-check your own math against real cases.
Which Working Channel Size Do You Actually Need?
Working channel diameter, not outer diameter, is usually what limits which tools you can actually use once you're inside. Getting the scope in is only half the job.
- 1.2 mm channels handle micro forceps and small brushes, useful for diagnostic sampling but not much beyond that.
- 2.0 mm channels step up to small biopsy forceps and cytology brushes, giving you limited interventional capability.
- 2.4–2.8 mm channels are the practical minimum for real therapeutic work. Standard biopsy forceps and foreign-body retrieval tools both need this range, and it's where most general small-animal practices should be aiming.
- 3.0 mm and larger channels open the door to bigger graspers and true therapeutic tools, the range you'll want for equine work or any major interventional case.
Picking a scope with a wider OD but an undersized channel is a common trap. You end up with a bigger, less maneuverable instrument that still can't pass the tool you need.
Building a Compatible Endoscope System
Diameter alone doesn't guarantee a working system. The scope has to talk to your camera, your light source, and whatever sheath or trocar you're passing it through, and mismatches here cause more failed procedures than undersized scopes do.
Before you commit to a purchase, run through this checklist:
- Confirm the camera coupler size matches the eyepiece or head on the scope you're buying
- Check the light-guide connector type, since not every light source fits every scope without an adapter
- Verify insufflation or insufflator compatibility if the procedure requires cavity distension
- Match the sheath or trocar diameter to the scope's OD, with room for the clearance margin already discussed
- Confirm spare probe or replacement part availability before you're mid-procedure and stuck
Our veterinary rigid endoscopy catalog and industrial borescope catalog list coupler types and adapter options alongside the scope diameters themselves, which is the fastest way to confirm fit before you order.
Pro Tip: When you're stuck between two sizes, order the smaller OD, provided its channel still supports the largest accessory you'll realistically need. A slightly narrower scope that fits comfortably beats a wider one that barely squeezes in.
Material and Durability Differences by Endoscope Diameter
Diameter and construction go hand in hand, and the relationship isn't always intuitive. Smaller-diameter scopes generally use thinner outer sheaths and finer internal bundles, whether that's fiber optic strands in an older flexible scope or a smaller sensor and wiring harness in a videoscope. That thinner construction means the instrument tolerates less lateral stress before something inside cracks, kinks, or delaminates.
Rigid telescopes tell a similar story from the optics side. A 1.9 mm rigid scope packs its lens system into a tube barely wider than a large needle, which limits how much glass and how many relay lenses the manufacturer can fit. Rigid telescopes span roughly 1.9 mm to 10 mm OD, and the general guidance is to choose the largest diameter the port and clinical situation allow, since more glass generally means better light transmission and a wider field of view.
Industrial borescopes face a parallel trade-off, just with sensors instead of biopsy channels. A 4 mm probe crams its imaging chip and LED ring into a housing with much less room for shock absorption than an 8 mm probe carries. That's part of why smaller probes tend to show wear, cable stress, and connector fatigue sooner under repeated heavy use.
None of this means smaller scopes are fragile in absolute terms. It means the margin for rough handling shrinks as the tube gets thinner, and that's worth factoring into how you budget for spares and replacement schedules rather than treating every diameter as equally durable.
How Diameter Affects Sterilization and Maintenance
Smaller-diameter endoscopes are harder to clean thoroughly, not easier, which surprises a lot of people who assume less surface area means less work.
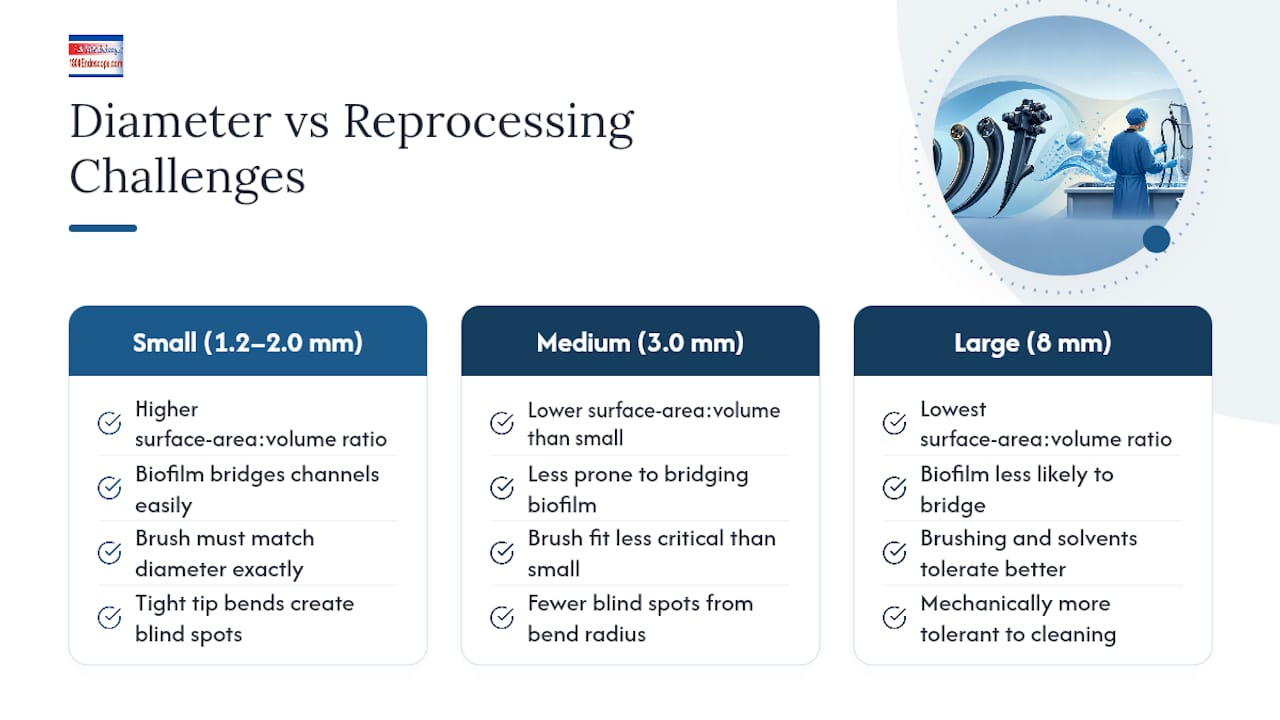
The issue is channel geometry. A narrow working channel, say 1.2–2.0 mm, has proportionally more surface area relative to its bore volume than a wide 3.0 mm channel, and organic debris or biofilm can bridge that gap more easily during reprocessing. Manual brushing becomes trickier too, since brush sizes have to match channel diameter almost exactly, and a brush that's even slightly undersized will miss debris along the channel wall.
Flexible scopes with tight bend radii near the tip, common on smaller-diameter airway and cystoscopy instruments, also create blind spots where fluid can pool during rinsing if the reprocessing protocol doesn't account for scope-specific geometry. That's a manufacturer-specific detail worth confirming rather than assuming.
On the industrial side, maintenance stakes are lower biologically but similar mechanically. Thinner probes accumulate debris in articulation joints faster, and the smaller working parts inside mean less tolerance for aggressive cleaning solvents that a heavier-duty 8 mm probe might handle without issue.
Practically, this means your reprocessing checklist needs to scale with diameter, not shrink with it. Smaller scopes generally need more careful brush selection, more attention to manufacturer-specific channel geometry, and often shorter intervals between full teardown cleanings, especially in high-volume clinics running back-to-back procedures.
Safety Risks From Choosing the Wrong Endoscope Diameter
Getting endoscope diameter wrong isn't a minor inconvenience. It creates real safety exposure on both sides of this guide, veterinary and industrial.
Oversized scopes pushed into an aperture that's genuinely too small risk mucosal tearing, airway trauma, or forced insertion that damages the instrument itself. The most common pitfall practitioners report is measuring only the entry point and missing a tighter constriction further along the path, then discovering the mismatch mid-procedure when the scope binds.
Undersized scopes carry a different but equally real risk: inadequate visualization. A channel too narrow to pass the right retrieval tool can turn a routine foreign-body case into an incomplete procedure, forcing a second attempt, a referral, or open surgery that a properly sized scope would have avoided entirely.
Industrial inspection carries its own version of this risk profile. A probe forced into a bore it can't safely clear risks damaging both the probe and the component being inspected, sometimes masking a defect the inspection was supposed to catch in the first place. Skipping to the largest available probe "just to be safe" backfires just as often, since a probe that can't actually enter the target area gives you a report on the wrong section of the equipment.
The fix in both cases is the same one this endoscope diameter guide leads with: measure the real constraint first, size to that number plus your clearance margin, and don't guess.
Reading Manufacturer Specs: Outer Diameter vs. Insertion Tube Diameter
Manufacturer spec sheets aren't always consistent about which diameter they're quoting, and that inconsistency causes more ordering mistakes than any other single factor in this guide.
Outer diameter (OD) usually refers to the widest point of the insertion tube, the number that determines whether the scope physically clears your aperture. Insertion tube diameter is often the same measurement, but on some scopes, particularly ones with a distal tip that houses a larger camera or light assembly, the tip diameter can run slightly larger than the shaft diameter quoted elsewhere on the spec sheet.
That gap matters most on borderline cases, when you're sizing a scope to clear a port with only a millimeter or two of slack. If a spec sheet lists insertion tube diameter without separately calling out tip diameter, treat that as a flag to confirm with the manufacturer or distributor before ordering, rather than assuming the two numbers match.
Working channel diameter is usually listed separately and clearly, since it's the number buyers ask about most. But watch for scopes that list a "maximum accessory diameter" instead of a plain channel diameter. These aren't always identical, since some accessories need a small amount of side clearance to move freely inside the channel.
When a spec sheet feels ambiguous, our Pro's Guide to compatibility and the Industrial Camera Probe Diameter Guide both walk through how to cross-check tip diameter against shaft diameter before you commit to a purchase.
Building a Practical Kit That Actually Gets Used
The scopes that earn their keep aren't the ones with the most impressive spec sheet. They're the ones sized for the work you actually do most weeks. A three-probe industrial kit built around 4 mm, 6 mm, and 8 mm covers the overwhelming majority of inspection calls without forcing a compromise on any single job.
Buy spares for the accessories that fail first, not just the scope itself. Cameras and light sources also deserve a quick functional check on a regular schedule, since a diameter-perfect scope paired with a dying light source still produces a useless inspection. Training your team on measurement technique matters just as much as the equipment.
— Endoscope
Where to Find the Right Scope Once You Know Your Size
Once you've measured the aperture, calculated your minimum OD, and settled on a working channel size, the next step is matching that number to an actual product rather than guessing from a catalog thumbnail.
If you landed on a 6 mm general-purpose scope after working through the ranges above, the portable 6mm airway inspection videoscope covers most mixed veterinary and light industrial work with an SD card recording setup already built in. For larger patients or longer reach, the 8mm equine field scope handles the working lengths equine practitioners need without stepping up to a bulkier hospital-grade unit. Industrial technicians building a layered kit around 4 mm, 6 mm, and 8 mm probes will find the full range broken out in the borescope catalog, while clinics standardizing on rigid telescopes should start with the veterinary rigid endoscopy catalog for the 2.7 mm and 5 mm pairing most practices rely on.
Before you check out, confirm coupler and adapter compatibility against your existing camera and light source using the Pro's Guide. It takes a few minutes and saves the far bigger headache of a scope that arrives but doesn't connect to what you already own.
The single most reliable way to choose an endoscope or borescope diameter is to measure the smallest aperture in the path and size the scope to that number plus a 0.3–0.5 mm clearance margin.
| Point | Details |
|---|---|
| Measure before you shop | Find the smallest aperture along the full path, not just the entry point, before choosing an OD. |
| Add a clearance margin | Build in 0.3–0.5 mm beyond your calculated minimum OD for safe articulation and passage. |
| Match channel to accessory | Pick working channel diameter based on the largest tool you'll pass, not the scope's marketing spec. |
| Keep two or three scopes | A 2.7 mm plus 5 mm rigid pairing, or a 4 mm, 6 mm, 8 mm probe set, covers most real workloads better than one compromise size. |
| Confirm system compatibility | Check couplers, light connectors, and sheath fit before ordering; 1800endoscope's catalogs and Pro's Guide list these details alongside diameter specs. |
Sources
- Endoscopy | Veterian Key
- Overview of Flexible and Rigid Endoscopy in Small Animal Practice - VIN / WSAVA content
- Gastrointestinal endoscopy procedures and equipment care | VetFolio