
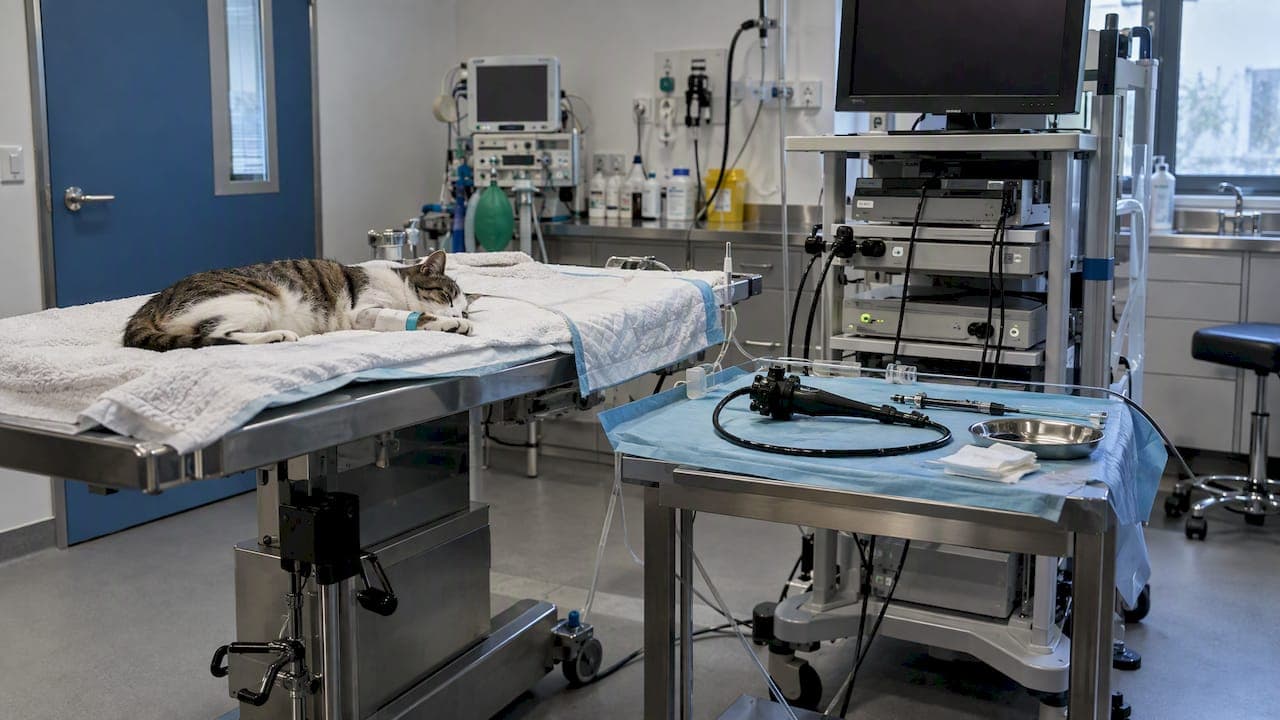
A good feline rhinoscopy setup comes down to five things: a scope small enough for a cat's nasal passages, a tower and monitor placed where you can work without twisting, a patient under general anesthesia with a cuffed endotracheal tube, a measured depth mark on the scope, and every accessory on the tray before the cat is induced. This guide walks through each one in the order you will actually do them.
It is written for veterinarians and clinic teams who are building or tightening a rhinoscopy workflow, and for the people buying the equipment.
TL;DR
- Use a small rigid scope (a 2.7 mm 30° telescope is a common feline choice) or a slim flexible scope, with a protective sheath, a cannula and biopsy forceps ready.
- Rhinoscopy needs general anesthesia and a cuffed endotracheal tube. Plan imaging and bloodwork before the scope goes in, because bleeding from the exam obscures the anatomy.
- Measure from the nose tip to the medial canthus and mark the scope with tape so you cannot reach the cribriform plate.
- Skip the mouth gag unless you truly need it, and be very careful with infraorbital blocks.
- Put the monitor, camera and light source where you can see them without moving your head or hands off the patient.
Table of Contents
- What rhinoscopy is for, and when to schedule it
- Choosing the scope
- The equipment tray
- Room layout and the endoscopy tower
- Patient preparation and anesthesia
- Safety checks that belong in the setup
- Running the exam
- Our perspective
- Equipment for your rhinoscopy setup
- Pre-procedure checklist
- FAQ
- Sources
What rhinoscopy is for, and when to schedule it
Rhinoscopy lets you see the nasal cavity directly, find mass lesions, fungal plaques or foreign bodies, and take guided biopsies. Indications include chronic or recurrent sneezing, nasal discharge, epistaxis and abnormal sounds such as stertor, along with nasal obstruction, reverse sneezing and facial swelling.
Sequence matters more than most setup checklists admit. Bleeding caused by inserting the endoscope can hide nasal architecture and interfere with reading imaging studies, so the complete workup, CT included, should ideally come first. If the cat has epistaxis, a coagulation screen should be assessed, ideally before rhinoscopy, and blood pressure checked. Those two checks belong on your pre-procedure list, not in the room on the day.
Before any endoscopic exam, a detailed history and a thorough physical exam should localize the disease process. Rhinoscopy answers a question you have already narrowed down. It is a poor first step for an undifferentiated sneezing cat.
Choosing the scope
There are two families of instruments, and many practices end up with both.
| Rigid scope | Flexible scope | |
|---|---|---|
| Typical feline size | 2.7 mm or 1.9 mm, 30° viewing angle | Around 3.7 mm with two-way deflection |
| Strength | Sharp image, easy to sterilize, sturdy | Can retroflex into the nasopharynx |
| Limit | Cannot bend around the soft palate | Smaller working channel, more delicate |
A review of feline upper respiratory endoscopy pictures a 2.7 mm 30° rigid scope, a 1.9 mm 30° rigid scope and a 3.7 mm two-way deflection flexible endoscope as the instruments commonly used in feline practice. For retroflexion to look at the choanae from behind, slim pediatric fiberoptic scopes with a 5.0 mm outer diameter and a 2.0 mm biopsy channel are described as ideal. Check the dimensions against your patient population: a 5 mm scope will not go into the nasal passage of most cats, but it can work in the nasopharynx.
If you are deciding what to buy first, our guides on which endoscope a veterinary clinic should buy first and on small diameter endoscopes in veterinary practice cover the trade-offs between diameter, working length and image quality.

The equipment tray
Lay out everything before induction. Anesthetic time is the one resource you cannot get back, and hunting for a cannula with the cat under is how nasal exams run long.
For rigid antegrade rhinoscopy, the same feline review lists the working set: a 2.7 mm 30° telescope, a protective sheath, a multipurpose cannula, grasping forceps and biopsy forceps. Add the following from your own protocol:
- Light source and cable. Test the cable end for dark fibers and make sure the lamp is warmed up and the output is where you want it.
- Camera head and coupler. Fit and focus on a sterile drape or printed text before the scope goes near the patient.
- Irrigation. Sterile saline in a pressure bag or large syringes with extension tubing, with a plan for suction.
- Sample handling. Labeled formalin containers, and culture and cytology supplies if you intend to use them.
- Retrieval tools. Grasping forceps and a spare set of biopsy forceps, because a dull or stuck cup mid-procedure costs time.
- Gauze and swabs. Bleeding is expected.
- Measuring tape or marker. More on this below.
Our flexible biopsy forceps and rigid scopes, arthroscopes and otoscopes pages list what we carry in these categories if you are filling gaps in the tray.
Room layout and the endoscopy tower
The cat will be in sternal recumbency for the antegrade approach. In the feline review's theater photo from a mobile endoscopy practitioner, the monitor, camera and light source sit level with the patient's pelvis. The idea is simple: the person holding the scope should look straight ahead at the screen, with the scope hand relaxed and the other hand free for the cannula or forceps.
A practical layout:
- Operator at the head of the table, standing or on a stool depending on table height.
- Monitor directly in the operator's line of sight, so the eyes do not travel between the cat and the screen.
- Assistant to one side, with the instrument tray and the sample containers within reach.
- Anesthetist with a clear view of the monitor readouts and the cat's chest, not blocked by the tower.
- Cables routed away from the walkway and secured so nobody pulls the camera mid-biopsy.
If you work from a mobile or compact unit, the same logic applies. A portable monitor-type system with SD-card recording keeps everything on one cart. We cover the recording side in how to optimize endoscope video recording, which is worth setting up before the first case so you have images to put in the record and show the owner.
Patient preparation and anesthesia
Handling before the procedure
A stressed cat is harder to examine and harder to anesthetize. The AVMA's coverage of feline-friendly guidelines notes that moving a cat straight into an exam room limits exposure to other cats and dogs and helps keep arousal low. Researchers at the University of Guelph found that full-body restraint increased struggling 8.2-fold and doubled exam time, so hold the cat lightly, with as little restraint as you can manage.

For anxious cats, a 2017 study of 20 cats found a single oral dose of gabapentin (100 mg per cat) given before the visit lowered owner-assessed stress and improved veterinarian-assessed compliance. Side effects included sedation, ataxia and hypersalivation. Whether to use it, and at what dose in an individual cat with nasal disease, is your call as the attending veterinarian.
Venous access
Place an IV catheter before induction. In cats, the external jugular, cephalic, lateral saphenous and medial saphenous veins are the usual venipuncture sites. A cephalic catheter keeps the head and neck clear, which matters when you will be working at the face.
General anesthesia and the airway
Rhinoscopy is done under general anesthesia. The sneeze and gag reflexes would otherwise prevent useful visualization and put delicate equipment at risk, and a cuffed endotracheal tube is needed to protect the airway from fluid and blood. Check cuff inflation before you start and again after you reposition the head. Many clinicians also pack the oropharynx with gauze behind the tube to catch irrigation and blood, which is worth adding to your own protocol if you do not already.
Safety checks that belong in the setup
Three hazards show up in the literature. Each has a setup step that prevents it.
Measure the scope to stay clear of the brain
The cribriform plate separates the nasal cavity from the brain. Before insertion, hold the scope against the face from the tip of the nose to the medial canthus of the eye and mark that distance with tape, then do not advance past the mark. This takes ten seconds and removes a catastrophic error from the list of things you have to think about during the exam.
Think twice about the mouth gag
Forcing the mouth open wide has a documented risk. Over-extension can occlude maxillary artery blood flow and lead to post-anesthetic cortical blindness. For a nasal exam you often do not need the mouth open at all. If you need it for a retroflexed look at the nasopharynx, open it only as far as required and for as short a time as possible.
Be careful with infraorbital blocks
Local analgesia is attractive for a painful nasal procedure, but there is a case report of globe penetration and endophthalmitis after an infraorbital block performed for rhinoscopy in a cat. If you use a nerve block, talk through your technique with your anesthesia team beforehand and consider whether a catheter-based delivery system would be safer, as the authors suggest. Entering the infraorbital canal with a needle is where the risk lies.
Running the exam
Setup pays off in a predictable sequence:
- Induce, intubate, check the cuff and position the cat in sternal recumbency.
- Mark the scope depth, fit the sheath, white-balance and focus the camera.
- Examine the nostril and the rostral nasal cavity first, then move caudally along the airway, taking time to see both sides.
- Irrigate gently to clear mucus and blood, and note findings before bleeding builds.
- Take biopsies under direct vision. The first sample can be guided by the scope, which is the main advantage over blind sampling.
- Record clips and stills for the chart, then recover the cat with the airway protected until the tube comes out.
Expect the view to degrade as the exam goes on. That is why the first pass should be systematic and why your most important biopsy target should not wait until the end.
Our perspective
Most rhinoscopy trouble we hear about is not the scope. It is a setup problem: a monitor behind the operator's shoulder, a cable too short for the table, forceps that were not on the tray, or a scope too large for the cat on the table.
We sell veterinary endoscopes and accessories, and our view is that a clinic should be able to do routine small-animal work on equipment that does not cost what a hospital-grade human system does. For many practices that means starting with a small-diameter system, adding the sheaths, forceps and light source the procedure calls for, and building a repeatable tray. We also repair endoscopes, which matters because a scope that is out for service is a procedure you cannot offer.
Our advice: write your rhinoscopy tray as a checklist, tape it inside the cabinet, and run through it every time. A dull routine is what makes the exam itself go smoothly.
— Endoscope
Equipment for your rhinoscopy setup
If you are equipping a clinic, our veterinary endoscopy equipment and endoscope range covers scopes and repairs, and the medical endoscopes and endoscopic accessories page lists light sources and add-ons. For a compact, portable airway option with direct monitor and SD-card recording, see the 6 mm x 150 airway inspection videoscope. Check the diameter against the size of the cats you see before you order. For broader guidance, our veterinary endoscope buying guide and small animal endoscopy tips are good next reads.
Pre-procedure checklist
- Workup done: history, exam, bloodwork, coagulation screen if epistaxis, blood pressure, imaging.
- Owner consent and a realistic discussion of what biopsies can and cannot show.
- Cat handled gently, IV catheter placed, anesthesia plan agreed.
- Scope, sheath, cannula and forceps tested and on the tray.
- Light source, camera and monitor tested, white-balanced and in line of sight.
- Depth marked from nose tip to medial canthus.
- Mouth gag decision made deliberately, nerve block technique reviewed.
- Saline, suction, gauze, formalin and labels ready.
FAQ
What is rhinoscopy used for in cats?
It lets you look inside the nasal cavity and take guided biopsies. Typical reasons are chronic sneezing, nasal discharge, epistaxis, stertor, and suspected masses, fungal plaques or foreign bodies. It works best after the workup has narrowed the question.
Do cats need general anesthesia for rhinoscopy?
Yes. General anesthesia suppresses the sneeze and gag reflexes that would stop you seeing anything and could damage the scope. A cuffed endotracheal tube protects the airway from blood and irrigation fluid.
Should imaging come before or after rhinoscopy?
Before, ideally. Bleeding from the scope can obscure nasal architecture and make later CT harder to interpret. Coagulation screening and blood pressure checks also come first in cats with epistaxis.
What size scope works for a cat?
Small rigid scopes of 2.7 mm or 1.9 mm, or a slim flexible scope of about 3.7 mm, are commonly used in feline practice. Wider flexible scopes of about 5 mm are better suited to retroflexion into the nasopharynx than to passage through the nose.
Sources
- Overview of small animal respiratory endoscopy (Proceedings), dvm360
- Upper Respiratory Tract Endoscopy in the Cat, PMC
- Nasopharyngeal Disease in Cats, PMC
- Clinical Approach to Chronic Upper Respiratory Tract Disease in Cats, WSAVA 2018, VIN
- Current Approach and Management of Diseases of the Nasal Cavity in Cats, WSAVA 2018, VIN
- Nose, PMC
- Iatrogenic ocular trauma associated with infraorbital block performed for rhinoscopy in a cat, PMC
- Feline-friendly handling guidelines, AVMA
- Study looks at which method proves best to restrain cats, AVMA
- Effects of a single preappointment dose of gabapentin, JAVMA
- SOP: Venipuncture in Dogs and Cats, Virginia Tech