
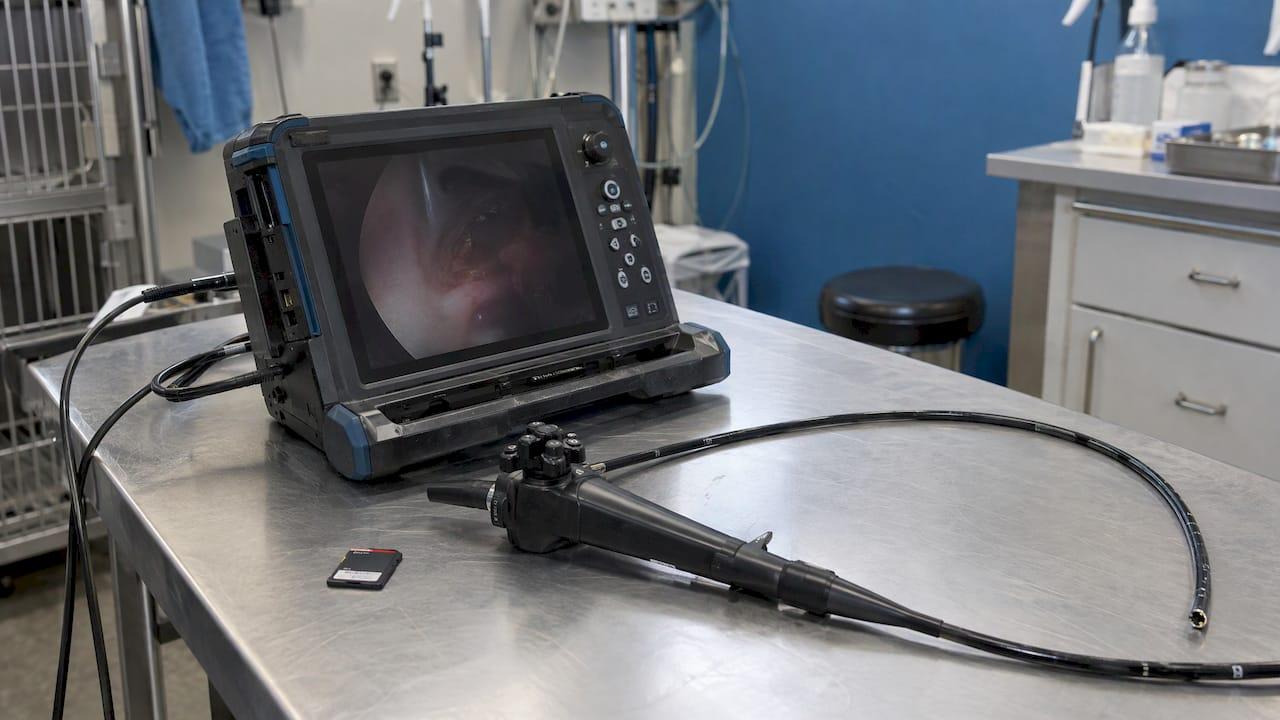
The simplest way to keep every endoscopy exam on file is a scope with a monitor and an SD card slot built in. You press record, the footage lands on the card, and you copy it to a computer afterward. HDMI capture to a PC is the route for systems you already own that have no recorder of their own. This guide covers both for veterinary clinics and industrial inspection teams: what each setup needs, where recordings go missing, and how to confirm a file exists before the patient wakes up or the crew leaves the site.
Our own range includes monitor-type SD-card videoscopes and veterinary endoscopy systems with recording built into the unit. That is why we start with the card and treat the capture chain as the second route.
TL;DR
- A videoscope with a built-in monitor and SD card slot records without a computer, a capture card or extra cables. It is the shortest path from exam to saved file.
- HDMI capture to a PC needs three parts: a source with video output, a cable and adaptor chain, and a capture device with recording software. Free software such as OBS Studio covers the recording side.
- Many older veterinary systems output analog video (S-video, composite). That signal must be converted to digital before a PC can record it.
- Most lost footage comes from power order, wrong input or mode selection, or a full card, not from a faulty scope. A thirty-second check before every procedure prevents nearly all of it.
- Whichever route you use, make the recording check part of the procedure: play back a few seconds before you close the case.
Table of Contents
- Why recording to an SD card is the practical default
- How to record to an SD card, step by step
- Recording to a PC with HDMI capture
- Choosing between the card and the capture chain
- When the recording is missing: a short troubleshooting list
- A recording routine you can write into your protocol
- Equipment that records from the first exam
- Our perspective
- FAQ
- Sources
Why recording to an SD card is the practical default
For a clinic or inspection crew, the question is rarely "how do I get video?" It is "how do I get video that is saved, labeled and retrievable without anyone babysitting a laptop?" A card-recording videoscope answers that in three ways.
Fewer parts to fail. A chain of scope, processor, adaptor, cable, capture card, PC and software has six or seven points where something can be unplugged, mis-set or updated overnight. A scope with a monitor and card slot has one: the card.
Portability. Equine airway work happens in a barn aisle or at a track. Pipe inspection happens in a crawl space or a plant corridor. Neither has a rack cart or a bench for a computer. A field unit with its own screen goes where the work is. Our equine airway scopes, for example the 8mm monitor-type SD-card videoscope and the 8mm USB airway field scope, are built for exactly that setting.
A clean handoff. The card is a physical record. Pull it, label the case, copy the files to the practice management system or the inspection report folder. For procurement managers, that also means a recording workflow that any technician can learn in one session.
If you want a deeper look at how recording systems fit into a day-to-day routine, our guide on preventing lost footage with 1080p endoscopy workflows walks through the habits that matter.

How to record to an SD card, step by step
The exact button layout differs by model, so use your unit's manual for menus. The sequence below holds for any card-recording videoscope.
1. Prepare the card before the day starts
Use a card of the type and capacity your unit's manual specifies. Format it in the device itself rather than on a computer, so the folder structure the scope expects is created correctly. Keep at least two prepared cards per unit: one in use, one in the case. Video files grow quickly, and a card that was fine for a single quick look can fill halfway through a long gastroscopy or a multi-hour pipe run.
Where it goes wrong: a card full of earlier cases. The scope may still show a live image on the monitor while having nowhere to write. Clear or swap the card before the procedure, never during.
2. Confirm the mode
Many compact endoscope recorders can capture both still photos and video, and some return to photo mode when powered off. Check the on-screen indicator for the mode you need before you insert the scope. This is the single most common reason a technician finishes a case and finds a folder of still frames instead of a movie.
3. Set white balance and lighting
White balance tells the camera what "white" looks like under your light source, so tissue or metal surfaces show true color. Veterinary equipment guidance from DVM360 recommends setting white balance at the start of every procedure by pointing the scope at a white tube or gauze pad and pressing the white balance button. Do it before you start recording, so the whole file is color-correct rather than only the second half.
4. Start recording, then enter the patient or the asset
Start the recording before the scope goes in. You capture the entry, which is often diagnostically useful (the arytenoid movement on an equine airway exam, the first view of a pipe joint), and you confirm the recording indicator is active while it is still easy to fix. Say the patient name or asset ID aloud if your unit records audio, or hold a labeled card in view for one second.
5. Stop, then verify
Stop the recording, then play back a few seconds on the monitor. You want to see a file in the list, not just a recording icon that appeared once. Only then withdraw the scope and move on.
6. Offload and label
Copy files to a computer the same day. Name each one with the date, patient or asset ID and the procedure. If your unit can connect to a PC by USB, the card or device typically shows up as a drive, and you copy the files across like any other folder. Our PVSM3M gastroscope system with direct monitor, SD card and USB PC video is built around exactly this: record on the unit, move to the computer afterward.
Recording to a PC with HDMI capture
Some clinics already own a good scope and processor, or a rigid system with a camera head, and want to record without replacing it. Others want live video on a larger screen for a team or for teaching. HDMI capture covers both cases.
What the chain needs
A 2025 peer-reviewed paper on gastrointestinal endoscopy documentation, published in the South African Journal of Animal Science, describes a minimal setup: a DVI-to-HDMI adaptor, an HDMI cable and an HDMI video capture card, with OBS Studio as the recording software. The authors point out that OBS is free, open source and runs on Windows 10 and 11 as well as macOS and Linux, and that it records continuous video and takes still screenshots.
In practice that gives you this list:
| Part | What it does | What to check |
|---|---|---|
| Video source | Scope processor or camera control unit with a video output | Which output ports it has (HDMI, DVI, S-video, composite) |
| Adaptor and cable | Matches the source port to the capture card input | Connector types on both ends, cable length to the PC |
| Capture device | Turns the video signal into a stream the computer reads | Input type, USB version, whether it is recognized by your OS |
| Software | Records the stream to a file | Frame rate, resolution and save location set before the case |
| PC | Hosts the software and stores the files | Free disk space, power settings, no automatic updates mid-case |
The same paper notes that OBS can take up to four capture devices at once, so a second source such as fluoroscopy or ultrasound can be recorded into the same session. That is useful in referral practices, where the endoscopic image and a second modality belong in one case record.
The analog problem in veterinary equipment
A lot of established veterinary equipment predates HDMI. The DVM360 equipment proceedings explain that most veterinary endoscopy gear has analog outputs such as S-video, composite BNC or RCA, which must be converted to digital before a computer can use them. The same source advises wiring the capture device directly from the video processor or camera outputs. When several image sources feed one capture device, you have to toggle or program the capture source, and you may need to change the monitor's input to see what was captured.

In plain terms: look at the back of your processor before you buy anything. If you see only analog ports, you need a converter in the chain, and the quality of that converter sets the quality of your recording. If you would rather skip the conversion step entirely, a unit with a digital image path and a built-in card recorder avoids it.
Steps for a PC recording session
- Power order. DVM360 advises keeping power to all components off while attaching or detaching an endoscope. Connect first, then power up.
- Connect the chain from the processor output to the capture device, then to the PC. Use the shortest cable run that reaches. The South African paper's example uses a 5-meter HDMI cable, a reasonable ceiling for a room-sized setup.
- Open the software and add the capture device as a source. You should see live video in the preview window before the patient is on the table.
- Set the output folder and file format in the software settings. Pick a drive with plenty of free space.
- Record a ten-second test with the scope pointed at something in the room. Play it back. Then begin the case.
- Stop, check the file, and back it up to your records system before closing the software.
If you also want to capture your screen alongside a webcam, for example to narrate a teaching case, a quick how-to on how to record your screen and webcam covers the general approach.
Choosing between the card and the capture chain
| Situation | Better fit |
|---|---|
| Field work, ambulatory equine practice, site inspections | Videoscope with monitor and SD card |
| Single technician, no computer on hand | Videoscope with monitor and SD card |
| Existing processor with only analog output | Converter plus capture card, or a card-recording unit |
| Team viewing, teaching or live streaming | HDMI capture to PC, or a unit with USB PC video |
| Several image sources in one case record | HDMI capture with multi-source software |
For most clinics, the sound arrangement is a card-recording scope for everyday cases, plus a PC connection where a case needs a bigger screen or a second modality. That is why several of our systems combine a direct monitor, an SD card and a USB connection to a computer in one unit. If you are comparing USB options, what to check before buying a USB 3 endoscopy camera lists the points that decide whether it will work with your computer.
When the recording is missing: a short troubleshooting list
Nearly all failed recordings trace back to a handful of causes. Work through them in order.
No image at all. Start with power, as DVM360 does: check the cart's plug strip, surge protector and on/off switch, then each component's own power. Reseat the scope connection with power off.
Image on the monitor but nothing recorded. Check the mode (video or photo), the card (inserted, not full, not locked) and the recording indicator. On a PC chain, check that the correct capture device is selected as the source in your software.
Image on the capture preview but wrong or black after switching sources. This is the multi-source situation DVM360 describes: toggle or reprogram the capture source and check the monitor's input selection.
Color looks off. Redo white balance with a white gauze pad before the next case.
Files exist but will not open or are cut short. Suspect a full card, a card removed before the recording was stopped, or the unit powered off mid-file. Always stop the recording, then power down.
For model-specific problems, our guides on animal endoscopy troubleshooting and videoscope troubleshooting for vet professionals go further. If a unit itself needs attention, we also offer endoscope repairs.
A recording routine you can write into your protocol
Procedure checklists work because they remove decisions. A version that fits on an index card:
- Before the case: card inserted and cleared (or software open with output folder set), mode set to video, white balance done, battery or power confirmed.
- During: recording started before the scope enters, indicator confirmed.
- After: recording stopped, a few seconds played back, files named with case ID, copied to the records folder the same day.
- Weekly: spare cards rotated, firmware or software updates installed outside of clinic hours, a full test recording made.
Procurement managers can use the same list as a purchase specification. Ask of any unit: does it record without a computer, which media does it use, how do files move to a PC, and how many steps separate "power on" from "recording"? Fewer steps means fewer missed recordings across a team of rotating technicians. For optimizing quality once the basics are solid, see how to optimize endoscope video recording for vets, and for why recorded video matters clinically, video imaging in animal diagnosis.
Equipment that records from the first exam
If you are equipping a new practice, adding a field unit or replacing a rack that never quite worked, start from the recording requirement and choose the scope to match. Our monitor-type SD-card videoscopes and borescopes cover industrial and pipe inspection, and our veterinary range includes rigid scopes, arthroscopes and otoscopes, flexible biopsy forceps and endoscopic accessories, so the scope and the tools you use through it come from one place. Our positioning is simple: high-resolution, portable systems at lower prices than hospital-grade or human-use equipment, backed by 24/7 support and rapid shipping.
For a fully portable airway system with the monitor and SD card in the unit, see the 6mm x 150 airway inspection system. For GI work, the 12.9mm x 3.5 meter gastroscope system records to SD card and connects to a PC over USB.
Our perspective
We build and sell scopes for people who work away from the hospital rack: the equine vet at a barn, the technician in a boiler room, the small clinic that cannot justify a human-hospital price tag. What those users share is that the recording has to work without anyone thinking about it.
That is why we put so much weight on the monitor-and-card design. A videoscope that shows the image on its own screen and writes it to an SD card removes the laptop, the capture card and the adaptor bag from the job. Our units with USB PC video keep the computer option open for the cases that need it, so one system does both.
Our advice to any team: decide where the footage must end up (the patient record, the inspection report, a referral), then choose the shortest chain that gets it there. Write the pre-case check into your protocol, and make playback the last step of every case. A recording you have not seen is a recording you do not yet have.
Our goal is high-resolution, portable, affordable endoscopy for veterinary and industrial professionals, with support that is there when a case runs late.
Endoscope
FAQ
Can I record endoscopy video directly to an SD card without a computer?
Yes, with a videoscope that has a built-in monitor and card slot. You start and stop recording on the unit and copy the files to a computer later. Our monitor-type SD-card videoscopes work this way.
What do I need to record endoscopy video to a PC over HDMI?
You need a video source with an output, a cable and any adaptor that matches the ports, a capture device, and recording software. A 2025 paper on GI endoscopy documentation describes a DVI-to-HDMI adaptor, an HDMI cable, a capture card and free OBS Studio as a working chain. Older veterinary processors with analog outputs also need a converter to digital.
Why did my recording save as photos instead of video?
Many compact units can capture both, and some return to photo mode after power-off. Check the mode indicator before every case, and make it part of your pre-procedure checklist.
Why is the image fine on the monitor but missing on the computer?
The usual causes are the wrong capture source selected in the software or the wrong input selected on the monitor, particularly when several image sources feed one capture device. Check power first, then the source selection, then the cable connections with the equipment powered off.
How do I make sure the footage is actually saved?
Stop the recording, play back a few seconds on the unit or in the software, and confirm the file appears in the folder. Copy it to your records system the same day, and keep a spare card ready for the next case.
Sources
- Photo- and video-documentation of gastrointestinal endoscopy (SciELO South Africa, 2025)
- Endoscopy: troubleshooting equipment (DVM360 proceedings)
- Record screen and webcam: quick how-to