
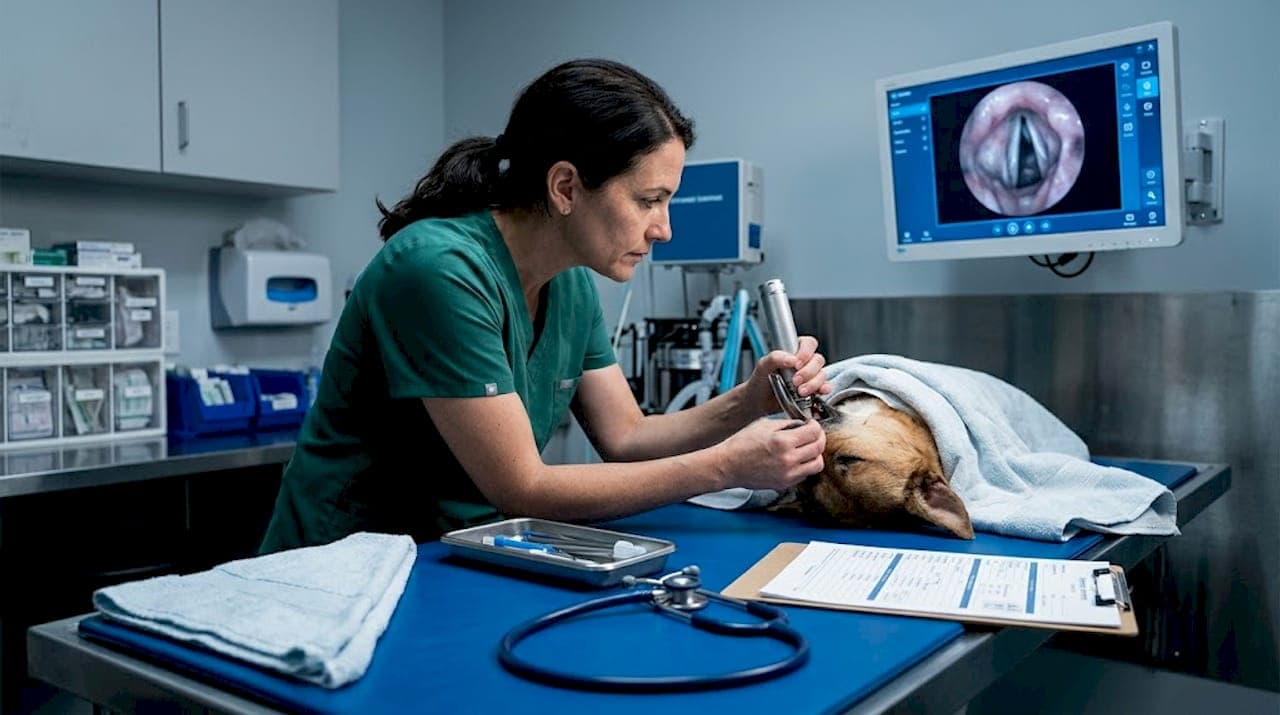
When you compare a 15-degree field of view to 60 or 80 degrees, you start to understand why video laryngoscopy is changing the way veterinary professionals handle airway management. Traditional direct laryngoscopy demands perfect patient positioning, ideal anatomy, and a straight line of sight to the glottis. Video laryngoscopy removes most of those variables. If you have been relying exclusively on direct visualization for intubation in small or large animals, this guide will clarify what video laryngoscopy is, how it works mechanically, where it outperforms conventional methods, and what it takes to integrate it effectively into your clinic's workflow.
Table of Contents
- Understanding video laryngoscopy technology
- How video laryngoscopy improves airway visualization and intubation success
- Operational nuances and limitations for veterinary professionals
- Implementing video laryngoscopy in veterinary airway management workflows
- A veterinary professional's perspective on video laryngoscopy implementation
- Explore video laryngoscopy solutions for your veterinary practice
- Frequently asked questions about video laryngoscopy in veterinary medicine
Key Takeaways
| Point | Details |
|---|---|
| Video laryngoscopy basics | Video laryngoscopy uses a camera-equipped blade to improve visualization during animal intubation. |
| Enhanced visualization | It provides a wider field of view and better glottic visualization than direct laryngoscopy. |
| Improved intubation success | Studies show higher first-pass success rates in difficult airway cases using video laryngoscopy. |
| Operational considerations | Device familiarity and pre-use checks are essential due to different device mechanics and optics. |
| Team and training benefits | Shared video display supports team situational awareness and improves coaching during procedures. |
Understanding video laryngoscopy technology
Video laryngoscopy uses a blade with a camera to transmit video images of the glottis to a screen, providing better visualization than direct laryngoscopy allows. That single design change, replacing a bare metal blade with one that carries an onboard camera, fundamentally shifts how you see the airway during intubation.
The video laryngoscopy definition is straightforward: it is an indirect laryngoscopy technique where a miniature high-definition camera embedded in the laryngoscope blade captures real-time images and transmits them to a monitor. You no longer need to align the oral, pharyngeal, and tracheal axes to see the glottis. The camera does that work for you.
Here is what a standard video laryngoscope system includes:
- Blade with embedded camera: Positioned at or near the tip, typically angled to capture the glottic opening without requiring a direct line of sight
- Video transmission system: Wired or wireless signal from the blade camera to the display
- Monitor or integrated screen: Ranges from a screen built directly into the device handle to a separate tablet-style display
- Light source: LED illumination at the blade tip, eliminating the need for an external light source in most systems
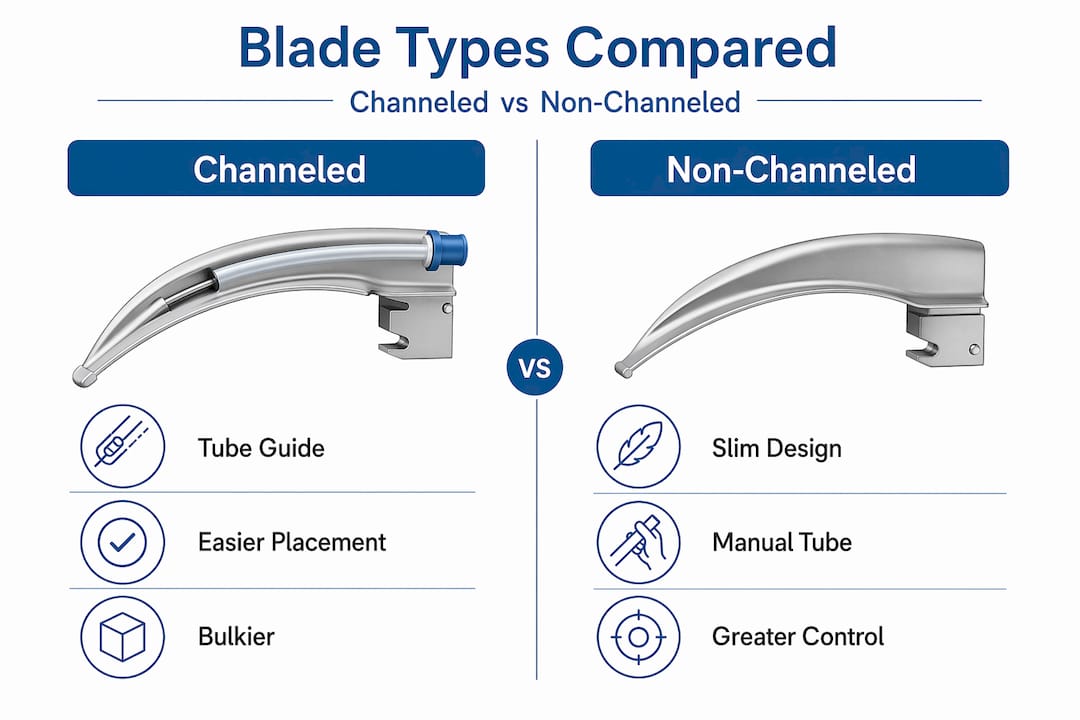
- Blade geometry options: Channeled blades (with a dedicated tube guide) or non-channeled blades (tube passed separately)
Battery-powered handheld units with integrated screens are increasingly common in veterinary settings because they require no cart, no external monitor, and no power cable. For veterinary video laryngoscopes, this portability matters especially in field situations, equine stalls, or farm calls where you cannot wheel in a full anesthesia tower.
The channeled vs. non-channeled distinction is worth understanding before you purchase. Channeled blades guide the endotracheal tube through a dedicated channel on the blade itself, which can simplify tube delivery when the glottic view is excellent. Non-channeled blades require you to pass the tube independently alongside or below the blade, demanding more hand-eye coordination but offering more flexibility in tube choice and angle.
How video laryngoscopy improves airway visualization and intubation success
The numbers behind this technology are hard to ignore. First-pass success rates with video laryngoscopy run at 88.6% compared to 76.5% with direct laryngoscopy, and those gains are most pronounced in difficult-airway scenarios. In veterinary medicine, difficult airways are not rare. Brachycephalic breeds, large exotic animals, patients with oral masses, and trauma cases all present visualization challenges where that 12-point difference in first-pass success translates directly into patient safety.
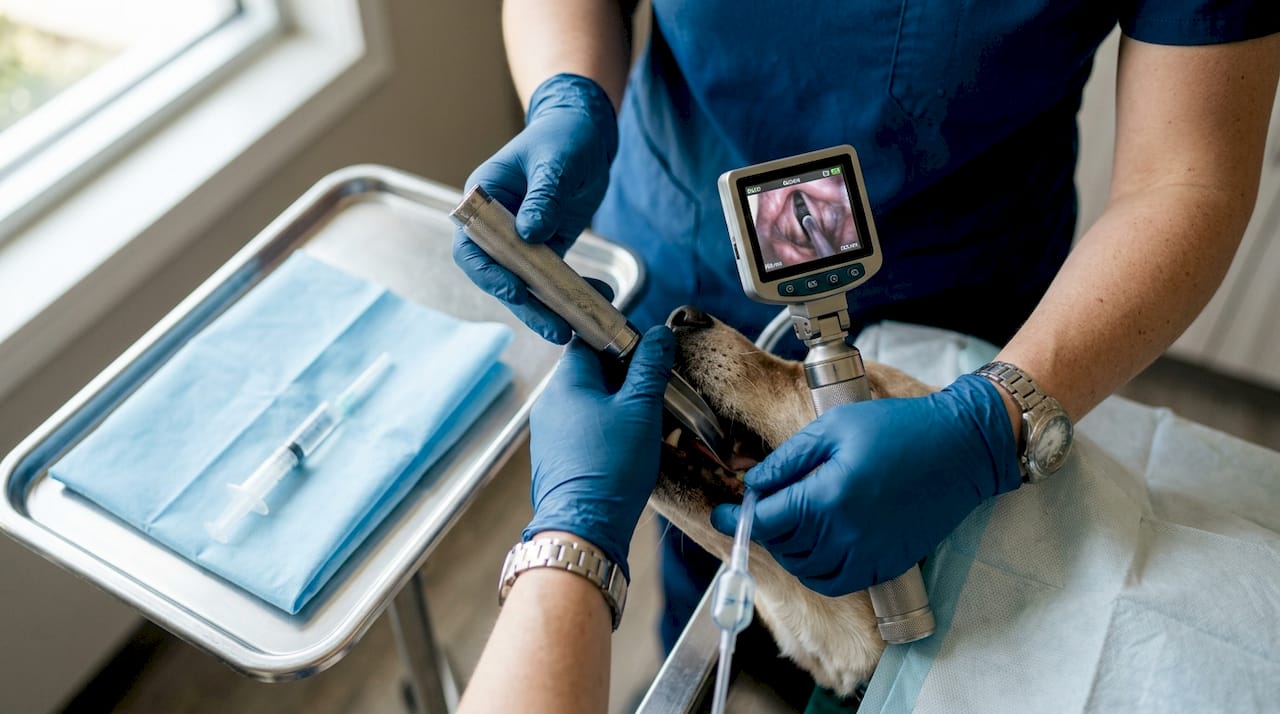
The mechanism behind those improved outcomes comes down to viewing angle. Field of view widens from about 10 to 15 degrees with direct laryngoscopy to 60 to 80 degrees with video laryngoscopy. That is not a minor upgrade. It means you can see surrounding structures, assess for secretions or masses, and center the glottis on screen even when anatomy is atypical.
| Feature | Direct laryngoscopy | Video laryngoscopy |
|---|---|---|
| Field of view | 10 to 15 degrees | 60 to 80 degrees |
| Line of sight required | Yes | No |
| First-pass success rate | ~76.5% | ~88.6% |
| Team visibility | Operator only | All staff at monitor |
| Useful for difficult airways | Limited | Strong evidence |
| Depth perception | 3D, natural | Reduced (2D image) |
| Equipment cost | Lower | Moderate to higher |
Key takeaway: Video laryngoscopy does not just make intubation easier in routine cases. Its biggest value is in the cases where direct laryngoscopy would have required multiple attempts, repositioning, or escalation to a surgical airway.
The benefits of video laryngoscopy extend beyond first-pass success rates. Better glottic visibility grades reduce the risk of esophageal intubation. The shared monitor view lets your technician watch the procedure in real time and apply cricoid pressure or external laryngeal manipulation exactly when and where it helps. That kind of coordinated team response is simply not possible when the operator is the only one who can see the airway.
Pro Tip: When evaluating video laryngoscopy devices for veterinary use, specifically check whether the device supports simultaneous video recording. The ability to document intubation attempts adds value for training, case review, and client communication in referral practices.
Key advantages for veterinary video laryngoscopy indications:
- Brachycephalic breeds where soft tissue obstruction limits direct visualization
- Patients in lateral or dorsal recumbency when repositioning is not feasible
- Large animals where airway length and oral cavity size challenge conventional blades
- Animals with cervical injuries or restricted jaw opening
- Teaching environments where trainees and supervisors need shared visualization
- Post-operative airway monitoring where subtle movement or response needs documentation
For equine airway visualization tools, the wide-angle camera is particularly useful given the length of the equine upper airway and the difficulty of achieving direct line-of-sight visualization in standing or sedated horses.
Operational nuances and limitations for veterinary professionals
Knowing the benefits of video laryngoscopy is not the same as being ready to use it well under pressure. The technology introduces a specific set of challenges that catch unprepared operators off guard.
The most common issue is the paradox of a great view and a failed intubation. You can clearly see the glottis centered on the screen and still struggle to advance the tube into it. This happens because 2D video reduces depth perception, making it hard to judge how far the tube tip is from the vocal cords in three-dimensional space. Operators who trained exclusively on direct laryngoscopy find this disorienting at first.
A second limitation involves blind spots. The camera captures a wide angle in front of the blade tip but does not show what is happening lateral to or behind the blade. Secretions, blood, or tissue that sits outside the camera's field can cause tube misdirection without the operator realizing it.
"Operators must treat each video laryngoscope as a distinct device with unique handling and optics quirks requiring prior practice." This principle applies in veterinary medicine just as much as in human critical care. The blade geometry, camera angle, monitor brightness, and fogging response vary meaningfully between video laryngoscope device varieties, and switching between systems without preparation is a genuine risk in emergencies.
Operational considerations every veterinary professional should know:
- Channeled blades and tube geometry: The channel directs the tube, but only when the glottic view is good. If anatomy shifts the view off-center, the channel may constrain your tube placement options rather than helping.
- Fogging and secretions: Camera lenses can fog in warm, humid airways. Apply anti-fog solution to the blade tip before insertion and have suction ready for blood or mucus.
- Screen glare: In brightly lit surgical suites or outdoor settings, monitor visibility can suffer. Position the screen to minimize ambient light interference.
- Blade size mismatch: Using a blade designed for human adults on a small canine or feline patient changes the geometry of what the camera captures. Veterinary-specific blade sizes are not optional.
- Tube stiffness: Stylets with pre-shaped angles matching the blade's curve improve tube delivery in non-channeled systems and reduce the fumbling that costs precious seconds during desaturation.
Pro Tip: Practice passing the tube on an airway training manikin with the video laryngoscope before using it on a live patient. The hand-eye coordination required is genuinely different from direct laryngoscopy, and the only way to internalize it is repetition in low-stakes conditions.
Implementing video laryngoscopy in veterinary airway management workflows
Adopting the video laryngoscopy technique in your clinic requires more than unboxing the device. It requires a structured integration that covers pre-use checks, team communication, and procedural standardization.
Step-by-step pre-use and procedural workflow:
- Power on the device and confirm camera function, lighting, and blade-screen alignment before approaching the patient
- Apply anti-fog solution to the blade tip and confirm suction availability
- Insert the blade along the physiological curve of the patient's airway, following the palate to the base of the tongue
- Advance until the glottis appears on the monitor, then center it in the frame before passing the tube
- Advance the endotracheal tube under direct monitor observation, adjusting stylet angle if the tube tip deviates from the glottic opening
- Confirm placement by chest rise, capnography, and auscultation before securing the tube
Standardizing a device-and-view check before patient approach improves outcomes by confirming camera and blade-screen relationships are functioning before stress enters the room. This step takes 20 seconds and prevents the worst version of a failed intubation: operator confusion about whether the problem is anatomical or equipment-related.
Shared screen viewing enhances team situational awareness, allowing assistants to provide quicker external laryngeal manipulations and better coaching during the procedure. This is one of the most underused advantages of video laryngoscopy in veterinary settings. When your technician can see exactly what you see, cricoid pressure becomes precise rather than approximate.
Practical integration tips:
- Assign one staff member as the equipment check lead for all video laryngoscopy cases
- Keep blade sizes organized and labeled for species-specific use
- Use recorded intubation video for monthly case review and skill development
- Build video laryngoscopy into your difficult airway protocol as the primary tool, not the backup
Pro Tip: Connect your video laryngoscopy system to a secondary monitor or recording device during training sessions. New staff absorb technique far faster when they can watch experienced operators and immediately see what a correctly centered glottic view looks like.
For training resources and FAQs relevant to your clinic's setup, and to see how endoscopy integration fits into broader diagnostic workflows, both are worth reviewing before purchasing.
A veterinary professional's perspective on video laryngoscopy implementation
Here is the honest assessment most product guides will not give you. The hardest part of adopting video laryngoscopy is not the technology. It is the humility required to admit that you need to relearn a skill you already thought you had mastered.
Experienced veterinarians who have performed hundreds of direct laryngoscopies often find their first video laryngoscopy attempts frustratingly slow. The hand-eye coordination is not just different. It is opposite in some respects. Direct laryngoscopy builds muscle memory around where your hands are in space. Video laryngoscopy replaces that spatial map with a 2D screen, and your hands must follow what you see rather than what you feel.
The professionals who adopt this technology most successfully are not necessarily the ones with the most prior intubation experience. They are the ones who commit to deliberate practice before emergencies, build a team culture around shared viewing, and treat device familiarity as a non-negotiable preparation step rather than a nice-to-have.
There is also a real risk in treating video laryngoscopy as an infallible upgrade. Overconfidence in the image on the screen leads to the exact failure mode this technology was supposed to prevent. The correct approach is to use the video feed as your primary guide while maintaining tactile awareness and using combined cues throughout the procedure. The screen shows you the glottis. Your hands still need to know what a successful tube passage feels like.
Clinics that invest in video laryngoscopy and then skip structured training are making a common and expensive mistake. The equipment elevates your capability only when your team's skill level rises to match it. Review common questions about veterinary video laryngoscopy to identify gaps in your team's preparation before your first case.
Explore video laryngoscopy solutions for your veterinary practice
If you have worked through the clinical case for video laryngoscopy and you are ready to evaluate specific equipment, the next step is finding devices built for veterinary anatomy, not adapted from human medicine as an afterthought.

Our portable video laryngoscopy system is designed for veterinary airway diagnostics across small and large animal cases, with HD imaging, integrated screens, and battery-powered portability that works in clinic and field settings alike. For equine and large-animal practices, the equine airway inspection videoscope provides the reach and camera angle needed for upper airway assessment in horses. Browse the full vet endoscopy catalog to find compatible accessories, light sources, and systems matched to your practice's case volume and species range.
Frequently asked questions about video laryngoscopy in veterinary medicine
What is the main difference between video and direct laryngoscopy?
Video laryngoscopy uses a camera to provide an indirect, wider-angle view of the glottis on a screen, while direct laryngoscopy requires a direct line of sight with a limited field of view. Field of view expands from 10 to 15 degrees with direct methods to 60 to 80 degrees with video systems.
Why is video laryngoscopy beneficial in difficult airway situations?
It improves first-pass intubation success rates and glottic visibility, directly reducing complications in patients with challenging anatomy. First-pass success reaches 88.6% with video laryngoscopy versus 76.5% with direct laryngoscopy in difficult airway cases.
Are there any limitations or challenges with video laryngoscopy?
Yes, depth perception is reduced because the image is two-dimensional, and there can be blind spots that require careful technique to avoid misdirecting the endotracheal tube. 2D imaging reduces depth perception and can create blind spots that are not apparent from the screen view alone.
How should veterinary teams prepare to use video laryngoscopy?
Teams should learn device-specific features, perform a device-and-view check before every intubation, and use the shared monitor view collaboratively. Shared screen viewing improves team situational awareness and enables more precise external laryngeal manipulation during the procedure.
Is video laryngoscopy safe for veterinary patients?
Video laryngoscopy is considered safe and is associated with higher first-pass success rates and fewer repeated intubation attempts, both of which reduce trauma and hypoxia risk. Safety improves further when operators are trained on the specific device used and follow standardized pre-use protocols.