
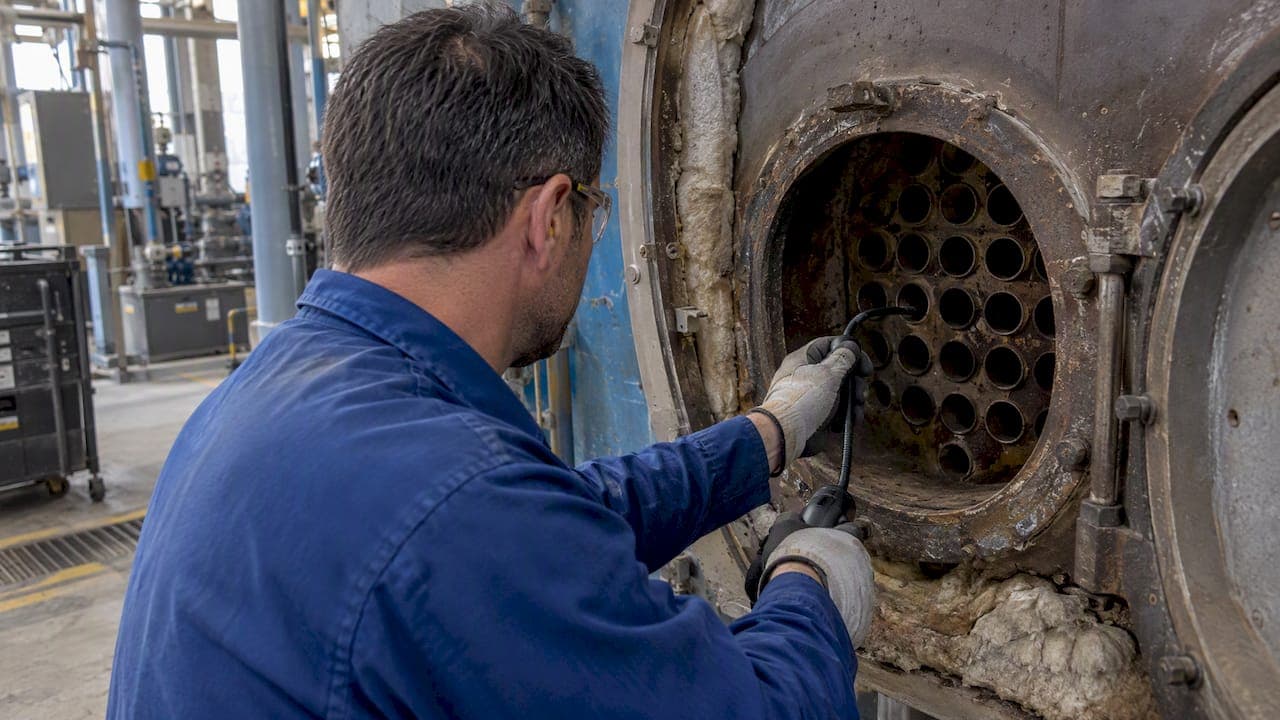
A flexible videoscope sized to your tube diameter, operated with a systematic scanning pattern and consistent documentation, is the right tool for catching pitting, corrosion, cracks, and scale before they cause a failure. Borescopes are essential remote visual inspection (RVI) equipment for this work, but a visual finding that looks severe, such as visible through-wall loss or clustered pitting, should trigger a handoff to certified nondestructive testing rather than a judgment call in the field.
TL;DR:
- Borescopes with a diameter matching the tube size and articulation capabilities are essential for reaching bends and documenting defects effectively.
- Recording and labeling each defect with location, orientation, and size details are crucial for accurate trend analysis and follow-up testing.
- Critical defect patterns, such as clustered pitting or cracks, require immediate confirmation through ultrasonic or eddy-current testing before repairs.
- Regular cleaning, inspection of probes, and proper storage extend borescope reliability, reducing image degradation and equipment failure.
- Routine visual screening during scheduled outages, paired with NDT, ensures early detection of corrosion and cracks while minimizing repair costs.
Table of Contents
- What to look for inside boiler tubes
- Which borescope and specs to choose for boiler tube inspection
- Step-by-step inspection workflow and checklist
- Interpreting findings and defining next steps
- Equipment care, cleaning, and storage for borescopes used in boiler environments
- Practitioner checklist and field case notes
- Preparing the boiler for a safe borescope inspection
- Common challenges and how to work around them
- How borescope inspection compares with ultrasonic and eddy-current testing
- How often to schedule borescope inspections
- Accuracy and reliability considerations for borescope findings
- Why routine RVI belongs in every maintenance program
- Equipping your team for boiler tube inspection
- FAQ
- Sources
What to look for inside boiler tubes
Every defect type shows up differently through a scope, and recognizing the pattern tells you how urgent the follow-up needs to be. Pitting appears as small, deep, rounded cavities, often clustered, and signals localized corrosion that can perforate a tube wall faster than uniform thinning would suggest. General corrosion looks like a dull, roughened surface texture spread evenly along the tube, while scale shows up as a chalky or flaky buildup that reduces heat transfer even when the metal underneath is sound.
Cracks, including stress corrosion cracking, present as fine linear features that may run axially or circumferentially, and they deserve more attention than their size implies because cracks propagate unpredictably. Weld defects such as porosity, lack of fusion, or undercut appear right at the joint and are worth checking on every pass near a weld seam.
- Pitting and localized corrosion: deep, clustered cavities that indicate accelerated, uneven wall loss.
- Scale and fouling: chalky deposits or debris that reduce heat transfer without necessarily indicating metal loss.
- Erosion and thinning: smooth, directional wear patterns, often near bends or high-velocity flow points.
- Cracks and weld defects: linear features or joint irregularities that warrant image capture for trending over successive outages.
Severity depends on size, depth, and distribution, so photograph or record any defect larger than a few millimeters and log its location for comparison against the next inspection cycle.
Which borescope and specs to choose for boiler tube inspection
Borescopes come in three broad types: rigid, fiberscope, and videoscope, and the choice matters more than most technicians expect. Rigid scopes work fine for short, straight-line access but cannot navigate a curved tube run. Flexible fiberscopes add maneuverability but typically sacrifice image clarity compared to a videoscope. For most boiler tube work, a flexible videoscope with articulation and video recording offers the versatility needed to reach bends, document findings, and support later review, a trade-off explained in detail in borescope selection guidance from GlobalSpec.
When specifying a unit, work through these in order:
- Probe diameter: match it to the tube's inside diameter and the access port clearance, leaving room to maneuver without binding.
- Insertion length: measure the actual tube run plus a margin, since running short mid-inspection means pulling the probe and starting over.
- Articulation and direction of view: a tip that articulates in multiple directions, with 0°, 45°, or 90° viewing options, lets you inspect sidewalls and weld seams without rotating the whole probe.
- Image quality and recording: look for resolution adequate to resolve fine pitting, a frame rate that doesn't blur during a scan, and built-in timestamping so footage ties cleanly to a log entry.
- Durability: confirm an IP rating suited to a dusty or damp boiler room, a temperature rating that tolerates residual heat, and a documented minimum bend radius for the probe.
Pro Tip: Carry a probe diameter reference card for your most common tube sizes so you are no longer guessing at clearance on the day of the outage.
Our guide on using flexible borescopes for accurate diagnostics walks through how articulation and lighting settings interact in practice.
Step-by-step inspection workflow and checklist
A repeatable sequence keeps coverage consistent across technicians and outages. Start with preparation, move through insertion and scanning, and close with documentation before anyone leaves the unit.
- Confirm lockout/tagout is in place, permits are signed, and the boiler has cooled to a safe handling temperature.
- Verify access port seals and measure the planned insertion depth against your probe's rated length.
- Insert the probe slowly, orienting the tip according to your direction-of-view setting, and begin a systematic scan pattern that covers the full circumference at set intervals.
- Pause at any irregularity to adjust focus and lighting, then capture a still image or short clip with the location noted.
- Withdraw the probe, export the media, and log each defect against the tube's identification number.
A few habits make the difference between a usable record and a folder of unlabeled clips:
- Label every file with tube ID, port location, and date before moving to the next access point.
- Note orientation (clock position) for each defect so a repair crew can find it without re-scanning.
- Flag any finding that looks like through-wall loss for immediate review rather than waiting for the full report.
Our heat exchanger borescope workflow demo covers a comparable scanning pattern for tube bundles, which translates directly to boiler tube runs. NB-57 guidance ties this kind of documented, checklist-driven inspection program to consistent record retention and examination practices.
Interpreting findings and defining next steps
A visual pass tells you where a problem is, not always how bad it is below the surface. Visual testing functions as a screening step, and significant findings need confirmation from ultrasonic thickness testing or eddy-current testing before anyone commits to a repair plan.
- Shallow, scattered pitting with no visible depth concern can often be logged and monitored at the next scheduled inspection.
- Clustered or deep pitting, visible through-wall indications, or axial cracking should trigger an immediate call to ultrasonic or eddy-current testing.
- When escalating, package the video clip, still images, tube ID, and orientation notes together so the NDT technician or repair contractor can locate the defect without re-inspecting from scratch.
- Temporary mitigations, such as derating or monitoring, buy time; permanent remediation means plugging, re-tubing, or a weld repair confirmed by thickness data.
Equipment care, cleaning, and storage for borescopes used in boiler environments
A probe that gets coated in soot or scale will give you worse images on the next job, so cleaning routines matter as much as inspection technique. Wipe the insertion tube down with a soft cloth and a manufacturer-approved cleaning agent, and avoid solvents or abrasive pads that can scratch the lens or degrade the sheathing.
- Inspect the insertion tube for nicks or kinks, test articulation response, and check LED output before and after every job.
- Store the unit coiled to its rated bend radius in a padded case, away from heat sources and moisture.
- Set a routine calibration and functional check schedule rather than waiting for a visible problem to show up.
Pro Tip: Keep a spare set of batteries and a backup SD card in the case; a dead battery mid-scan on a hot boiler is a lost outage window. Our sterilization and cleaning procedures guide covers compatible agents in more detail.
Practitioner checklist and field case notes
A one-page checklist, keyed to tube ID, insertion length, defect type, recommended follow-up, and a signature and date line, keeps an inspection audit-ready. In one field case, a routine borescope pass identified clustered pitting in several adjacent tubes, which led directly to targeted plugging rather than a full re-tube, saving outage time.
- Keep checklist fields consistent across every outage so trend data stays comparable.
- Reference our industrial borescope field guide for sample images and additional workflow detail.
- Small-diameter probe selection, covered in our turbine inspection borescope guide, applies directly to tight tube rows in boilers.
Preparing the boiler for a safe borescope inspection
Getting the unit ready matters as much as the scope you bring. Shutdown and cooldown come first: confirm the boiler has reached a temperature that will not damage the probe or risk a burn, and never insert a scope into a unit still under pressure. Lockout/tagout procedures need to be fully applied and verified before anyone opens an access port, and that verification should be logged alongside the inspection record that NB-57 guidance expects as part of a documented inspection program.
Access planning comes next. Confirm which ports give you a practical path to the tube runs you need to inspect, and check that port covers and seals are in serviceable condition before you start, since a damaged seal can let debris or moisture into the system during reassembly. Ventilation matters too: a cooled but still-enclosed boiler interior can hold residual gases, so confirm air quality before anyone's head or equipment goes near an open port.
Lay out your equipment and checklist before the first insertion. Having probe diameter references, spare batteries, cleaning supplies, and your documentation sheet staged ahead of time keeps the inspection moving within the outage window instead of stalling while someone hunts for a part. A few minutes of setup discipline here avoids the most common cause of wasted outage time: re-entering a boiler because something was missing on the first pass.
Common challenges and how to work around them
Borescope inspections run into a handful of recurring problems. Tight tube spacing and sharp bends can cause a probe to hang up, especially with a diameter that is too close to the tube's inside clearance, so matching probe size to tube geometry before the outage avoids a stuck scope mid-inspection. Residual heat and debris inside the tube can fog the lens or scatter light, which is why confirming cooldown and clearing loose scale ahead of insertion improves image quality more than any camera setting will.

Lighting is another limitation: a single fixed light source can wash out fine pitting or leave shadows that hide a crack, so adjusting the articulation angle and pausing to let the light settle on a suspect area, rather than scanning past it quickly, catches more defects. Access itself is a constraint too, since not every tube run has a port positioned to reach the full length, and in those cases a longer insertion tube or an additional access point may be the only workaround.
Finally, visual inspection has an inherent ceiling: it tells you what the surface looks like, not what the wall thickness is beneath a deposit or a shallow pit. That's a limitation to plan around rather than a flaw to avoid, which is why pairing RVI with confirmatory NDT on anything ambiguous is standard practice rather than an extra step.
How borescope inspection compares with ultrasonic and eddy-current testing
A borescope shows you what a defect looks like; ultrasonic testing (UT) and eddy-current testing tell you how deep it goes. These methods answer different questions, and treating them as substitutes for each other is where inspection programs run into trouble. RVI is fast, requires no surface prep beyond port access, and covers long tube runs in a single pass, which makes it the right first step for screening an entire bank of tubes.

Ultrasonic thickness testing measures remaining wall thickness at a specific point, which makes it the method to confirm severity once a borescope pass has flagged a suspect area. Eddy-current testing is particularly good at detecting subsurface cracking that a visual scan might miss entirely, since a crack can propagate below a surface that still looks intact. Neither UT nor eddy-current testing covers ground as quickly as a borescope does, so the practical workflow is visual screening first, then targeted NDT on anything that crosses an escalation threshold, a sequence consistent with ASME BPVC Section V guidance on nondestructive examination methods.
How often to schedule borescope inspections
Inspection frequency generally tracks with the boiler's maintenance cycle rather than running on a separate calendar. Most programs schedule a borescope pass during planned shutdowns, since that's when tubes are cooled, depressurized, and accessible without disrupting operation. Between major outages, condition-based triggers, such as a known history of pitting in a particular tube bank or a change in water chemistry, justify an interim inspection even if it falls outside the regular cycle.
Tubes with a documented history of corrosion or prior repairs typically get inspected on a shorter cycle than tubes with a clean record, since trend data from repeat passes is what makes early-stage pitting or thinning visible before it becomes a leak. Folding borescope runs into the same outage window as other planned maintenance, rather than treating RVI as a separate event, keeps the inspection program efficient and aligns with the documented, scheduled approach that NB-57 guidance expects from a maintained inspection program.
Accuracy and reliability considerations for borescope findings
A borescope is only as reliable as the technician operating it and the conditions under which the scan happens. Image resolution, lighting angle, and probe stability all affect whether a shallow pit gets noticed or missed entirely, which is why a consistent scanning pattern matters more than raw camera specs. Two technicians scanning the same tube with different lighting settings or scan speeds can walk away with different impressions of the same defect.
Certified NDE personnel, qualified to the Level I, II, or III standards referenced in ASME BPVC Section V, bring a documented, repeatable interpretation standard that reduces this kind of variability, especially for borderline findings. Calibrated distance markers or a reference object in the frame, along with consistent lighting settings, help correlate visual findings with later UT readings on the same tube location. Treating a borescope result as a screening tool rather than a final verdict, and confirming any finding that affects a repair decision with ultrasonic or eddy-current data, is what keeps the inspection program accurate over time rather than just fast.
Why routine RVI belongs in every maintenance program
Routine borescope runs catch problems while they're still cheap to fix, which is the entire case for building RVI into scheduled outages rather than treating it as optional. Pairing visual screening with ASME-based NDT, instead of relying on either alone, gives a maintenance program both speed and the depth confirmation a repair decision actually needs.
— Endoscope
Equipping your team for boiler tube inspection
Small-diameter videoscopes and portable pipe inspection scopes make this workflow practical in the field, along with repair services for units that have taken a beating in plant conditions.

- Small-diameter, articulating videoscopes sized for tight tube rows and long insertion runs.
- Portable pipe inspection scopes built for SD-card recording and field documentation.
- Repair services when a probe or light source needs attention between outages.
| What you need | Where to find it |
|---|---|
| Borescopes and portable videoscopes | Borescope product line |
| Repair support for existing scopes | Endoscope repairs |
| Compact small-diameter probe for tight access | Small-diameter portable videoscope |
Browse our borescope and videoscope lineup to find a probe diameter and insertion length that match your next outage.
FAQ
What kind of camera can I use to inspect pipes?
A flexible videoscope with a probe diameter matched to the pipe's inside diameter is the standard choice for pipe and tube inspection. Look for articulation, adjustable lighting, and built-in recording so you can document findings as you scan.
What's the difference between an endoscope and a borescope?
Both use a camera on a flexible or rigid probe to see inside an enclosed space, but the terms reflect different fields. "Endoscope" is the general and medical term, while "borescope" describes the same technology applied to industrial inspection work like boiler tubes, pipes, and engine components.
How much does a borescope inspection cost?
Cost depends on the equipment used, the scope of the inspection, and whether follow-up NDT such as ultrasonic or eddy-current testing is required. Pricing for borescope equipment itself is available on request through a borescope product page rather than a fixed industry rate.
What is the purpose of a borescope inspection?
A borescope inspection lets technicians see inside a boiler tube, pipe, or other enclosed component without cutting it open, identifying defects like pitting, corrosion, scale, and cracks. Findings guide decisions on whether a tube needs monitoring, repair, plugging, or further testing with confirmatory NDT methods.