
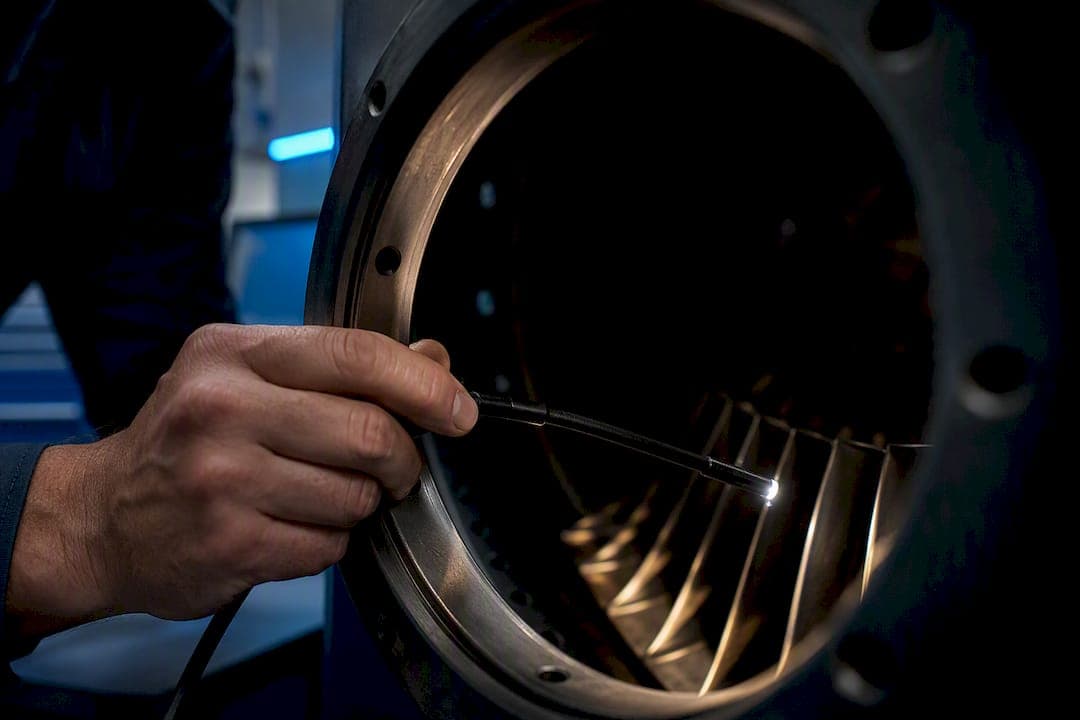
A turbine inspection borescope lets you see inside a hot gas path, compressor stage, or combustor without pulling a single casing. Technicians deploy them during planned outages, when performance data drifts, or after a suspected foreign object strike, to find cracks, coating loss, and cooling hole blockages before they become forced outages. The payoff is a targeted repair scope instead of a guess.
TL;DR:
- Using the correct borescope size and articulation range is essential for reaching curved or tight passages without causing damage or missing defects.
- Standard video borescopes with measurement tools and proper lighting techniques can detect coating loss, cracks, and blockages before they escalate into costly failures.
- Inspection planning should follow a systematic, stage-by-stage process, including proper calibration, recording, and documentation for effective trend analysis over multiple outages.
- Surface defects like cracks and blockages are priority findings, especially in hot gas paths and cooling holes, as they directly influence turbine reliability and safety.
- Regular maintenance, calibration, and operator training are critical to ensuring accurate measurements and consistent inspection quality across turbine service life.
Table of Contents
- What is a turbine borescope, and how does it differ from a standard endoscope?
- Why do borescope inspections matter for turbine maintenance?
- What do technicians actually find, and how do findings drive decisions?
- How do you choose the right borescope for turbine work?
- What is the step-by-step inspection workflow for a turbine outage?
- What should a borescope inspection report include?
- What safety steps come before a borescope inspection?
- Why trust this guide?
- How do you calibrate and maintain a turbine borescope?
- What lighting techniques improve turbine borescope image quality?
- How do you interpret borescope images and assess defect severity?
- What advanced borescope technologies help with turbine inspection?
- What are the limitations of borescope inspection, and how do you work around them?
- What training do turbine borescope operators need?
- A note from the field on probe discipline
- Get the right borescope for your next turbine outage
- Sources
What is a turbine borescope, and how does it differ from a standard endoscope?
Not every scope on the market is built for a hot section. A fiberscope uses a coherent fiber bundle for imaging and works fine for quick, low-detail peeks, but it degrades over time as fibers break and produces grainy images compared to a chip-based unit. A rigid borescope offers the sharpest optics available and is ideal for straight-line access ports, but it cannot bend around a stator vane or reach a curved cooling passage. A video borescope (or videoscope) puts a camera chip at the tip, delivers HD footage, and usually includes onboard measurement tools. Small-diameter flexible scopes, often in the 4mm to 6mm range, thread through tight access ports that hot-section work almost always demands.
Zone dictates the tool:
- Hot gas path and combustor: video borescope with high temperature tolerance and articulation for reaching blade rows
- Compressor: slightly larger diameter is usually acceptable, and rigid or semi-rigid options work where straight access exists
- Cooling passages: the smallest diameter flexible probe you can source, since access holes here are often under 6mm
Why do borescope inspections matter for turbine maintenance?
A missed crack in a hot gas path blade does not stay small. It propagates under thermal cycling, and by the time it shows up in performance data, you are looking at secondary damage instead of a simple blend repair. Borescope inspection catches coating loss, base metal cracking, cooling hole blockages, erosion, and deposit buildup while it is still cheap to fix.
The operational case is straightforward:
- Early detection avoids the scenario where a known defect grows into an unplanned trip
- Targeted findings let you scope a repair to the exact stage and blade count affected, instead of opening every casing "just in case"
- Photographic records from each inspection build a trend line, so you know whether a coating anomaly is stable or accelerating
That trend data is arguably worth more than any single inspection. A defect that looks identical between two outages tells you something different than one that has visibly grown, and you only know which is which if someone kept comparable images.
What do technicians actually find, and how do findings drive decisions?
Every zone has its own signature defects, and each one maps to a different disposition path.
- Hot gas path blades and vanes: Coating loss shows up as a dull, matte patch against the surrounding sheen. Thermal cracks run perpendicular to the leading edge in most cases. Clogged cooling holes are a higher-risk finding than most surface defects because a blocked hole causes localized overheating that accelerates failure, so document open area on every affected row.
- Combustor and transition pieces: Look for carbon or ash deposits, liner distortion, and hot spots that indicate a failing seal or fuel nozzle issue.
- Compressor stages: Foreign object damage (FOD) appears as leading-edge nicks or dents. Corrosion pitting is common in units running near coastal or humid environments.
Disposition generally falls into three buckets: monitor and re-inspect next interval, blend or repair in place, or pull the part for replacement. A shallow coating anomaly with no exposed base metal usually gets monitored. A crack that has propagated past a defined length threshold, or a cooling hole cluster showing more than partial blockage, typically triggers repair or replacement.
How do you choose the right borescope for turbine work?
Access geometry decides almost everything else. Measure the smallest port you will need to pass through before you shop for probe diameter, because a 6.2mm probe simply will not enter a 6mm hole. Turbine-grade video borescopes commonly ship with small-diameter probes around 6.0mm, insertion lengths up to 8 meters, and high-intensity LED tips, which covers most gas turbine hot-section work.
Beyond diameter, weigh these factors:
- Articulation range: you need enough tip control to sweep across a full blade row without repositioning the insertion tube constantly
- Resolution and measurement tools: onboard stereo or shadow measurement turns a visual impression into a defensible number for engineering
- Recording format: SD card capture with timestamped files makes trending across outages far easier than screenshots pulled from a live feed
- Industrial ratings: confirm temperature tolerance for the tip and cable jacket, and check IP rating if the environment involves moisture or dust
- Accessories: guide tubes, tip protectors, and extension tubes are not optional add-ons for hot-section work, they are what keeps the probe from snagging on a shroud edge
Pro Tip: Buy the guide tube kit that matches your specific engine model before outage day. Improvising with a generic tube on-site costs you inspection time you cannot get back once the unit is back online.
What is the step-by-step inspection workflow for a turbine outage?
A borescope inspection is more repeatable when you treat it like a checklist rather than a wander-and-look exercise. A comprehensive inspection proceeds stage-by-stage, and skipping the sequence is how you end up back at a stage you already covered.
- Coordinate rotor indexing with the outage supervisor before you insert anything, so you know which blade you are looking at without guessing.
- Insert the guide tube first if the access port geometry supports it. Guide tubes maintain orientation and repeatability across separate inspection visits, which matters when you are trying to compare this year's images to last year's.
- Drive the probe systematically, stage by stage, capturing a wide establishing shot before zooming into any suspected defect.
- Shoot a calibration frame against a known reference at the start of each session; this is a best practice for validating measurement scaling before you rely on any dimension you pull from the footage.
- Capture measurement shots on every flagged defect, not just a general reference image, since a repair engineer cannot size a crack from a wide shot alone.
- Log time per stage. A clean compressor stage might take ten minutes; a hot gas path row with three flagged defects can run past forty.
Pro Tip: Narrate out loud as you drive the probe, stage number and blade count included. It sounds unnecessary until you are reviewing footage three weeks later and cannot remember which row you were on.
What should a borescope inspection report include?
A report earns its value only if someone can act on it without calling you to ask what they are looking at. Keep the structure consistent across every inspection so trending works.
- Timestamp, engine or unit ID, and stage number on every image file, not just in a header paragraph
- Measurement images for each flagged defect, paired with the calibration frame from that session
- Operator notes describing what changed since the last inspection, not just what you see today
- Consistent file naming, something like unit-stage-date, so a CMMS or outage report can pull images without manual sorting
Providers who deliver documented findings within 24 hours and follow up with a repair consultation give engineering teams a head start on scoping the next outage.
What safety steps come before a borescope inspection?
Rushing prep on a hot section is how equipment gets damaged and people get hurt. Lockout/tagout on rotating equipment and confirmed purge or venting on hot sections come before the probe ever goes in.
- Confirm lockout/tagout status and get sign-off from the outage supervisor, not just a verbal "we're clear"
- Clean access ports and install tip protectors before insertion to prevent introducing FOD into the very system you are inspecting
- Establish clear ownership of rotor handling with the outage team so nobody rotates the shaft while your probe is inside
- Postpone the inspection if internal temperatures exceed your probe's rated limit or if venting is incomplete, no report is worth a melted insertion tube or worse
Why trust this guide?
1800endoscope has spent years supplying veterinary and industrial endoscopic equipment to technicians who cannot afford a scope that fails mid-inspection. Every selection criterion covered above, diameter, articulation, temperature rating, maps directly to products in the borescope catalog, including the PVSM6150 portable videoscope built for exactly this kind of small-access field work. (Proprietary inspection case studies and customer field reports to be added here.)
How do you calibrate and maintain a turbine borescope?
Skipping calibration is how a technician reports a 3mm crack that turns out to be 5mm once someone remeasures it back in the shop. Calibration checks confirm that the optical system's measurement output still matches a known physical reference, and it should happen on a defined schedule, not only when something looks off.
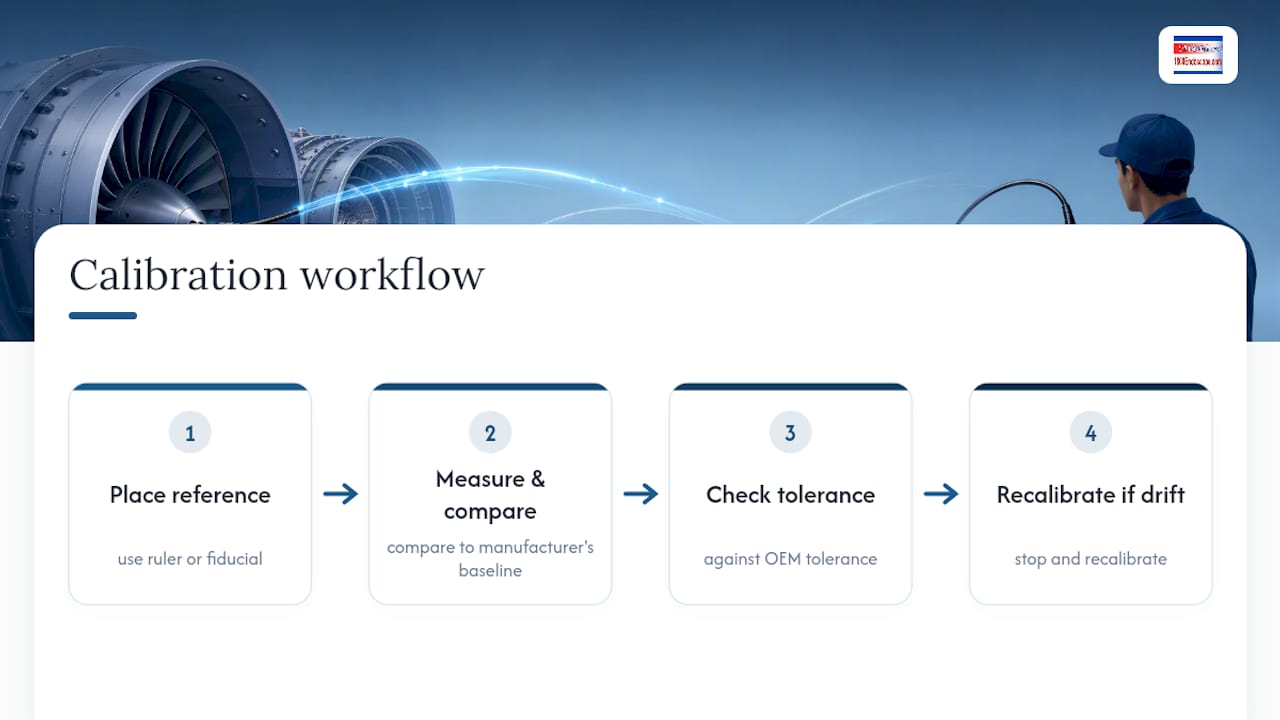
Start every inspection with a calibration frame against a fixed reference, a ruler or fiducial target, and compare it against the manufacturer's baseline scaling. If the measured value drifts beyond the tolerance your OEM documentation specifies, stop and recalibrate before you trust any dimension pulled from that session's footage.
Physical maintenance matters just as much as software calibration. Insertion tubes develop micro-fractures in the outer jacket from repeated bending around tight radii, and those fractures let moisture or debris reach the internal optics or wiring. Inspect the tube's exterior under good light before and after every use, checking for kinks, discoloration, or exposed fiber. Clean the distal tip lens with the manufacturer's specified solution, not a generic cleaner that can haze the coating.
Store the unit in its rated case with the insertion tube coiled to the manufacturer's minimum bend radius, never tighter. A probe stored improperly for a season can develop a permanent set that throws off articulation accuracy on the next outage. Battery and light source components also degrade; check LED output against a baseline brightness reading periodically, since a dimming light source can make a shallow defect invisible without you realizing the equipment, not the part, is the problem.
Build a maintenance log alongside your inspection log. If a scope starts producing inconsistent measurements across multiple outages, that log is what tells you whether the pattern started after a specific drop, storage lapse, or firmware update.
What lighting techniques improve turbine borescope image quality?
Bad lighting turns a real defect into a shadow you second-guess for a week. Turbine interiors are almost universally reflective, brushed metal, polished coatings, which means direct LED light straight down the probe axis tends to blow out highlights and hide surface texture that would otherwise reveal a crack or coating boundary.
Angle matters more than intensity. Driving the probe so light grazes a surface at a shallow angle, rather than hitting it head-on, brings out surface relief, exactly the kind of texture that separates a shallow scratch from an actual crack. Most modern video borescopes let you adjust LED intensity in real time, and dialing brightness down slightly as you approach a reflective coating often reveals detail that full brightness washes out.
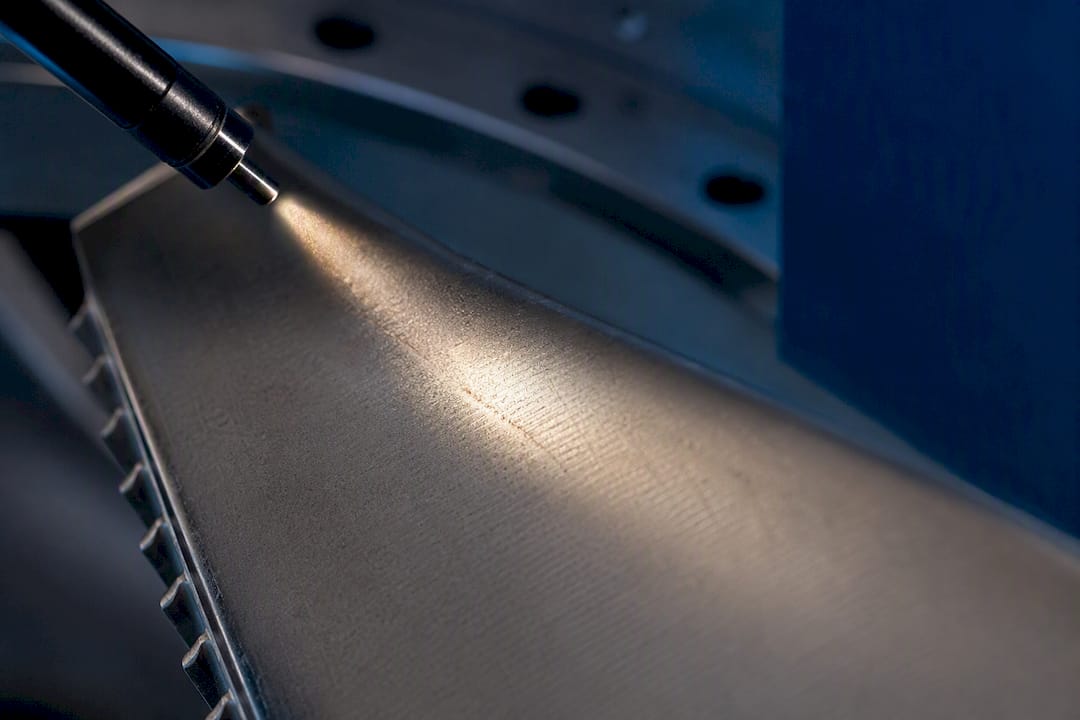
Multiple light sources or a diffused LED ring at the tip help even out inspection of curved surfaces like blade leading edges, where a single point source creates a hot spot on one side and a dark shadow on the other. If your borescope supports it, capture the same defect under two brightness settings, because a crack that is ambiguous under one lighting condition sometimes resolves clearly under another.
Watch for glare off wet or oily surfaces, common near combustor liners or after a cleaning cycle. Glare can mimic the appearance of a surface defect or, worse, mask a real one sitting just behind the reflection. When in doubt, reposition the probe angle rather than trusting a single frame.
How do you interpret borescope images and assess defect severity?
A photo of a crack means nothing without context: length, depth indication, location relative to a stress zone, and how it compares to the last inspection's image of the same area. Interpretation is where documentation habits from earlier sections pay off, because a single image in isolation tells you far less than two images taken a year apart of the same blade.
Severity assessment generally works through a few questions in sequence. Has the defect grown since the last inspection, and by how much? Is it isolated to one blade or repeated across a row, which would suggest a systemic issue rather than a one-off? Does it sit in a high-stress zone, like a blade root or leading edge, where propagation risk is higher than the same defect on a low-stress trailing edge?
High-definition video capture paired with onboard measurement tools materially improves engineering confidence when a decision comes down to in-situ repair versus pulling the part. A measured crack length of 2mm against an OEM-published limit of 5mm supports a monitor decision. The same crack at 4.5mm, trending upward from a 3mm reading the prior outage, supports pulling the part now rather than waiting for the next scheduled window.
Decision criteria should reference OEM technical manuals wherever they exist, since blanket industry thresholds do not account for model-specific metallurgy or duty cycle. When OEM guidance is silent or ambiguous, that is the moment to loop in engineering for a judgment call rather than making the disposition call solo in the field.
What advanced borescope technologies help with turbine inspection?
Standard 2D video borescopes cover the vast majority of turbine inspection work, but a few advanced capabilities are worth knowing when standard imaging leaves a judgment call unresolved.
Stereo and shadow measurement systems, now common on mid-range and higher video borescopes, let you pull a dimensional reading directly from the footage rather than estimating scale by eye. This is different from simple digital zoom, which just magnifies pixels without adding real measurement accuracy.
Phased array ultrasonic and eddy current probes sometimes get paired with visual borescope findings for subsurface defect confirmation, useful when a surface indication might extend deeper than the borescope image alone can show. This is a supplemental technique, not a replacement for the visual pass.
3D surface mapping, still emerging in industrial borescope equipment, reconstructs a defect's geometry from multiple captured angles instead of a single flat image. For a crack running across a curved blade surface, that geometry can matter more than a length measurement taken from one viewing angle.
Digital enhancement tools, contrast boosting, edge detection overlays, and image stabilization for handheld probe work, reduce the odds of missing a subtle defect buried in a low-contrast frame. None of these replace fundamentals like proper lighting and probe control. They extend what a well-executed inspection can confirm.
What are the limitations of borescope inspection, and how do you work around them?
Borescope inspection cannot see what it cannot access, and every turbine has geometry that puts some components out of reach entirely. A defect hidden behind a shroud lip or on the backside of a vane relative to your access port simply will not show up, no matter how skilled the operator.
Subsurface defects are the second major limitation. A borescope shows surface condition, not what is happening a millimeter below the coating. A surface indication that looks minor could indicate deeper base metal damage that only shows up with ultrasonic or eddy current follow-up.
Operator variability is real and often underestimated. Two technicians examining the same stage can produce meaningfully different findings if one has weak probe-driving technique or skips the systematic stage-by-stage approach. The mitigation here is procedural, not technological: standardized checklists, guide tube use, and calibration frames close most of the gap between an experienced operator and a newer one.
Image quality can also degrade under the exact conditions where inspection matters most, extreme heat residual in a hot section, condensation on the lens after a cooling cycle, or debris kicked up during probe insertion. Waiting for a component to cool to a safer working temperature, and cleaning access ports before insertion, addresses most of this.
None of these limitations argue against borescope inspection. They argue for pairing it with sound procedure and, when a finding is ambiguous, escalating to supplemental NDT methods rather than guessing.
What training do turbine borescope operators need?
Probe-driving skill is not intuitive, and a technician's first few inspections on a live turbine are rarely their best work. Formal training typically covers RVI (remote visual inspection) technique, equipment-specific operation for the exact borescope model in use, and OEM-specific defect recognition for the turbine platforms a technician will actually encounter.
Hands-on practice matters more than classroom time here. Driving a probe through a mockup or retired component builds the muscle memory needed to navigate blind turns without snagging the tip, a skill that only develops through repetition. New operators should shadow an experienced technician through several full inspections before running one solo, paying close attention to how guide tubes are staged and how measurement shots get framed.
Ongoing skill development includes staying current on OEM technical bulletins, since defect thresholds and inspection intervals get revised as engine fleets accumulate operating hours. A technician trained five years ago on interval guidance that has since changed is working from outdated criteria without realizing it.
A note from the field on probe discipline
The best inspections come from technicians who resist the urge to rush past a stage that looks clean. One habit separates a good inspection from a mediocre one: shoot the calibration frame every single time, even on stages you are certain are fine. A technician who skips it on a "quick look" stage is the same one who gets a call three weeks later asking for a measurement they never captured.
Adopt one habit starting on your next outage: narrate the stage number out loud as you drive the probe, every time, no exceptions. It costs seconds and saves hours of guesswork later.
— Endoscope
Get the right borescope for your next turbine outage
1800endoscope built its industrial line around the exact access and durability constraints this guide covers, small ports, hot-section tolerances, and the need for repeatable measurement images your engineering team can actually use. The PVSM6150 is a portable 6mm video inspection system with SD card capture, sized for the tight cooling passages and blade rows where a bulkier scope simply will not fit.

If your current scope cannot reach the access ports on your fleet, or your image files are not consistent enough to trend defects across outages, that is a hardware and workflow problem worth fixing before your next planned window. Browse the full borescope catalog to compare diameters, insertion lengths, and accessory kits against your specific engine model, and check the PVSM6150 product page for full specs before your next outage schedule locks in.
Sources
- Importance of Borescope Inspections During Gas Turbine Outages - Advanced Turbine Support
- Borescope inspection by VBR Turbine Partners
- Borescope Inspection Guide: Aviation RVI Techniques (2026) - Aviation Titans