

Portable NDT tools let technicians find, document, and act on flaws in place, before a crack in a turbine blade or a lesion in a horse's airway forces an unplanned shutdown or emergency procedure. The role of portable NDT tools on-site is shifting from reactive repair to proactive maintenance, a shift TWI has been tracking for years. The Step by Step NDT Inspection: A Technician's Field Guide, published by 1800endoscope, operationalizes that shift into repeatable field workflows.
TL;DR:
- Primary use cases: spot-checks in confined geometries, go/no-go decisions at the asset, and confined-space visual inspection with videoscopes or borescopes
- Key benefits: reduced downtime, lower transport costs, and faster decision cycles compared to lab-based testing
- Operational caveat: portable inspections must feed a traceable, time-stamped record or they lose audit legitimacy
- Cross-industry reach: the same portable endoscope logic applies in veterinary clinics and industrial plants alike
Table of Contents
- What portable NDT tools are you actually working with?
- What roles do portable NDT tools actually play on-site?
- When should you use portable tools vs. automated systems?
- Which specs matter most when selecting a portable endoscope?
- How do you integrate portable inspection data into QA/QC and audit trails?
- What operator skills and training do portable NDT tools require?
- How do you clean and sterilize veterinary endoscopic tools on-site?
- What are the real limitations and U.S. regulatory considerations?
- What do portable NDT programs cost, and what is the ROI?
- What does a repeatable on-site endoscopic inspection workflow look like?
- Key Takeaways
- A field perspective on what portable NDT actually demands
- How 1800endoscope supports your portable NDT program
- Useful sources
What portable NDT tools are you actually working with?
The term "portable NDT" covers a wider toolkit than most technicians initially expect. Here is a quick taxonomy of what you will encounter on-site.
- Videoscopes and borescopes: Flexible or rigid insertion probes with a camera at the tip, used to inspect internal cavities, pipes, welds, and airways without disassembly. The go-to tool for confined-space visual inspection in both industrial and veterinary settings.
- Handheld ultrasonic flaw detectors: Pulse-echo devices that measure wall thickness and detect subsurface cracks. Standard for pipelines, pressure vessels, and structural steel.
- Portable eddy-current probes: Detect surface and near-surface defects in conductive materials, particularly useful on aircraft skins and heat exchanger tubes.
- Thermal imagers: Identify heat anomalies, insulation failures, and electrical faults through surface temperature mapping.
- Magnetic particle yokes: Portable AC/DC yokes for surface-crack detection on ferromagnetic welds and castings.
- Portable hardness testers: Rebound or ultrasonic contact instruments for in-situ material verification.
Portable radiography deserves a separate note. Handheld X-ray sources exist, but U.S. operators must hold state-issued radiography licenses, and field use requires radiation safety officers and controlled exclusion zones. Most field teams treat radiography as a lab-referred method unless a mobile testing unit with full shielding is deployed.
For deeper reading on industrial NDT methods and tool selection, the 1800endoscope field guide is a practical starting point.
What roles do portable NDT tools actually play on-site?
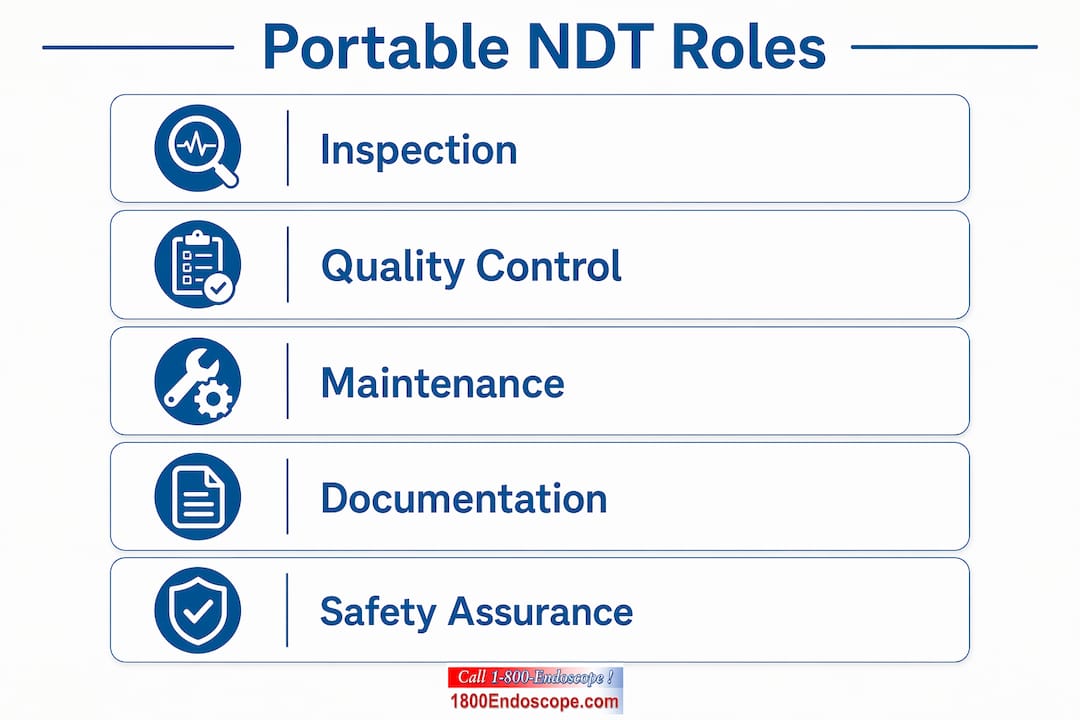
Proactive maintenance is the headline benefit. Detecting early-stage fatigue and corrosion before they force shutdowns is the reason portable inspection programs exist. TWI frames this explicitly: on-site NDT is moving away from reactive repair and toward scheduled, evidence-based condition monitoring.
Beyond that framing, the operational roles break down as follows:
- Early defect detection: Catch cracks, corrosion, and blockages before they escalate.
- Spot-checking confined geometries: Manual handheld tools reach areas robots and automated scanners cannot, making them indispensable for irregular or tight-access locations.
- Rapid troubleshooting: A technician with a videoscope can confirm a suspected fault in minutes rather than waiting for a lab appointment.
- Compliance-ready documentation: On-site image capture and data tagging produce the audit trail regulators and clients require.
- Reduced transport costs: In-place testing eliminates the cost and risk of moving large structures or live animals to a testing facility.
Industry shift: Mobile testing units aligned with MRO and compliance needs improve real-time flaw detection and reduce maintenance delays, according to FOERSTER Group.
When should you use portable tools vs. automated systems?
Portable manual tools win when access is tight, the geometry is irregular, the inspection is a one-off spot-check, or the budget does not justify a robotic crawler. Automated systems win when you need high-throughput scanning of uniform geometry, repeatable coverage across large surface areas, or continuous monitoring without a technician present.
Choose portable/manual when:
- The inspection area is confined, curved, or otherwise inaccessible to a scanner head
- You need a go/no-go decision within the same shift
- The asset cannot be taken offline or transported
- Budget or mobilization time rules out a robotic system
Choose automated/robotic when:
- You are scanning hundreds of linear feet of uniform pipe or plate
- Repeatability across multiple inspection cycles is a contractual requirement
- The environment is hazardous enough to remove the technician entirely
- Data resolution requirements exceed what a handheld probe can deliver
| Factor | Portable/Manual | Automated/Robotic |
|---|---|---|
| Access to confined spaces | Excellent | Limited |
| Throughput on uniform geometry | Moderate | High |
| Mobilization cost | Low | High |
| Data resolution | Good | Very high |
| Operator skill dependency | High | Moderate |
| Flexibility across asset types | High | Low |
Which specs matter most when selecting a portable endoscope?
Start with insertion diameter. A 6 mm probe fits most industrial ports and veterinary airways; going narrower improves access but reduces image quality and channel options. After diameter, evaluate in this order:
- Articulation: Four-way tip articulation at 120° or greater lets you steer around bends and inspect lateral surfaces. Two-way articulation is a significant limitation in complex geometries.
- Image resolution and lighting: HD sensors (1080p or better) with adjustable LED illumination reduce the chance of missing a hairline crack or mucosal lesion. HD imaging directly affects diagnostic accuracy.
- Battery life: Field shifts run long. A system that dies after 90 minutes mid-inspection creates real problems. Look for at least 3–4 hours of continuous operation, with hot-swap battery support where available.
- Ruggedization and IP rating: IP67 or better for dust and water resistance is the practical minimum for industrial field use. Veterinary settings add chemical exposure from disinfectants.
- Probe length: Match to your deepest expected inspection point, with margin. A 1.5 m probe is standard for many industrial ports; equine airways may need 3 m or more.
- Recording and storage: On-board SD card or USB recording is non-negotiable for traceability. Wireless sync to a rugged tablet is a significant workflow upgrade.
Pro Tip: Weigh the complete kit, not just the handset. Backup batteries, calibration blocks, and cables add meaningful weight. A system that feels light in a demo can become a logistics problem across a full inspection shift.
How do you integrate portable inspection data into QA/QC and audit trails?
The short answer: every portable inspection must produce a time-stamped, operator-tagged, calibration-referenced record or it has no audit value. Data management failures are the most common point of project failure in field inspections, not the physical scan itself.
Follow this sequence on every job:
- Capture images and measurements at the asset, with device clock synchronized to UTC
- Tag each file with the metadata schema below before leaving the site
- Sync to an encrypted rugged tablet or cloud backup in real time
- Store in a named folder structure tied to the asset ID and inspection date
- Link the inspection record to the relevant work order in your CMMS
| Metadata Field | What to Record |
|---|---|
| Asset ID | Equipment tag or patient ID |
| Location | GPS coordinates or room/bay designation |
| Inspector | Full name and certification level |
| Probe ID | Serial number of the insertion tube used |
| Calibration reference | Calibration certificate number and date |
| Test settings | Frequency, gain, frame rate, or other device parameters |
| Pass/Fail verdict | Clear outcome with reference to acceptance criteria |
What operator skills and training do portable NDT tools require?

Operator skill matters as much as the equipment. A high-resolution videoscope in undertrained hands produces ambiguous images and missed defects. Documented training reduces false positives, data loss, and the kind of inconsistent results that fail audits.
A practical training checklist for field technicians:
- Basic device operation: powering on, navigating menus, adjusting lighting and focus
- Image capture technique: framing, distance control, and avoiding motion blur
- Cleaning and sterilization procedures (critical for veterinary use — covered in the next section)
- Calibration checks: verifying the probe against a reference block or known standard before each shift
- Data sync SOPs: file naming, metadata entry, and real-time backup protocol
ASNT-aligned training frameworks (Level I/II qualification for the relevant method) provide the industry-recognized baseline. The Step by Step NDT Inspection field guide from 1800endoscope is a practical supplement for field workflow and documentation habits.
How do you clean and sterilize veterinary endoscopic tools on-site?
Veterinary endoscopes must be fully reprocessed between patients. Skipping or shortcutting any step creates cross-contamination risk and may violate clinic infection-control policy.
- Pre-cleaning at point of use: Wipe external surfaces immediately after withdrawal. Flush channels with water before biofilm sets.
- Manual cleaning: Immerse in enzymatic detergent, brush all channels with the correct-diameter brush, and rinse thoroughly.
- High-level disinfection or sterilization: Use a method compatible with the device's IFU (instructions for use). Many flexible endoscopes tolerate glutaraldehyde or OPA-based soaks; confirm compatibility before use.
- Leak testing: Perform a leak test before immersion on every reprocessing cycle. A single pinhole in the insertion tube can destroy the scope.
- Documentation: Log the reprocessing cycle, disinfectant lot number, and technician name for each instrument.
For veterinary videoscope troubleshooting and maintenance steps, the 1800endoscope blog covers common field issues in detail.
What are the real limitations and U.S. regulatory considerations?
Portable NDT tools are powerful, but surface condition, access constraints, environmental extremes, and regulatory boundaries all shape what they can actually deliver in the field.
Common field risk factors:
- Surface prep failures: Surface contamination is the most frequent cause of invalid ultrasonic readings. Carry a non-electronic surface-prep kit on every job.
- Temperature extremes: Battery performance and couplant viscosity both degrade in cold; some sensors drift in high heat.
- Battery and power failure: A dead handset mid-inspection means incomplete coverage and a partial record that may not satisfy acceptance criteria.
- Incomplete coverage: Portable tools inspect what the probe can reach. Complex geometries always carry blind-spot risk.
- Data loss: Without real-time sync, a dropped tablet or corrupted SD card can erase an entire shift's work.
U.S. regulatory considerations:
- Portable radiography requires a state-issued radiography license; requirements vary by state and are enforced by state radiation control programs.
- OSHA's general industry and construction standards (29 CFR 1910 and 1926) govern PPE requirements for field inspection work, including confined-space entry.
- Veterinary facilities must follow facility-level infection-control policies and applicable state veterinary practice act requirements for instrument reprocessing.
Regulatory note: Always verify current state radiography licensing requirements with your state's radiation control program before deploying portable X-ray sources in the field.
What do portable NDT programs cost, and what is the ROI?
Initial capital for portable endoscopic tools is modest compared to the logistics of lab-based testing. The recurring costs are training, consumables, and annual calibration.
Typical device tiers:
- Entry-level field videoscopes: Basic fixed-focus, SD recording, limited articulation. Suitable for simple pipe or duct inspection.
- Mid-tier systems: HD imaging, four-way articulation, on-board recording, IP67 rating. The practical choice for most industrial and veterinary field work.
- Professional/multi-modal kits: Full HD or 4K, wireless sync, interchangeable probes, CMMS integration. Justified for high-frequency inspection programs or multi-asset fleets.
Recurring costs to budget: calibration (annually or per manufacturer spec), replacement insertion tubes, cleaning consumables, and operator recertification.
ROI checklist:
- Downtime avoidance: one prevented unplanned shutdown typically offsets months of portable tool operating costs
- Transport savings: in-place testing eliminates mobilization fees and asset-movement risk
- Deferred replacement: early detection extends asset life by enabling targeted repair rather than full replacement
- Inspection cadence: monthly spot-checks for high-criticality assets, quarterly for moderate-risk, annual for low-risk or regulatory-minimum compliance
What does a repeatable on-site endoscopic inspection workflow look like?
Follow a six-step workflow on every job. Skipping steps is where traceability breaks down.
- Pre-job planning and risk assessment: Confirm access, identify hazards (confined space, energized equipment, biological risk), and verify the inspection scope against acceptance criteria.
- Equipment and calibration check: Verify probe integrity, confirm calibration is current, charge batteries, and test image capture before leaving the staging area.
- Inspection and image capture: Work systematically through the inspection area. Capture images at defined intervals and at every anomaly. Tag files immediately.
- On-site triage and decision: Apply the acceptance criteria in the field. Record a clear pass/fail verdict with supporting images before packing up.
- Data sync and work-order linkage: Sync all files to the encrypted backup. Link the inspection record to the open work order in the CMMS before leaving the site.
- Follow-up and corrective action: Assign any defect findings to a repair work order with a deadline. Schedule the re-inspection date.
| Field | Record |
|---|---|
| Asset ID | Equipment tag or patient ID |
| Location | GPS or bay/room designation |
| Probe ID | Serial number |
| Images captured | File names or count |
| Verdict | Pass / Fail / Monitor |
| Recommended action | Repair, re-inspect, or clear |
Key Takeaways
Portable NDT tools deliver their full value only when proactive inspection schedules, documented operator training, and real-time data traceability are in place alongside the hardware.
| Point | Details |
|---|---|
| Proactive maintenance first | TWI confirms portable NDT's primary role is early defect detection, not reactive repair. |
| Data traceability is non-negotiable | Inspenet research shows data management failures, not scan quality, are the most common field project failure point. |
| Match tool to geometry | Manual handheld tools reach confined and irregular spaces that automated scanners cannot. |
| Train before you deploy | ASNT-aligned operator training and the Step by Step NDT Inspection field guide reduce false positives and audit failures. |
| 1800endoscope for procurement | 1800endoscope supplies portable videoscopes and accessories suited to both veterinary and industrial on-site inspection workflows. |
A field perspective on what portable NDT actually demands
The conversation around portable NDT tools tends to focus on the hardware. Smaller probe, better camera, longer battery. Those specs matter, but they are not where most field programs fail. The gap is almost always in the workflow that surrounds the device: how images get tagged, how calibration records get maintained, how a pass/fail verdict gets linked to a work order before the technician drives away.
What the Step by Step NDT Inspection guide gets right is treating documentation as part of the inspection, not an afterthought. That framing changes how technicians approach the job. A videoscope that produces beautiful images but no traceable record is, from an audit perspective, the same as no inspection at all.
The cross-industry application of portable endoscopes, from equine airway assessment to turbine blade inspection, also tends to be underestimated. The core skill set transfers more than most practitioners expect. A veterinary technician who understands four-way articulation, image capture discipline, and reprocessing SOPs is already most of the way to competent industrial borescope operation. The inspection context changes; the discipline does not.
How 1800endoscope supports your portable NDT program
1800endoscope supplies portable videoscopes, borescopes, and accessories built for the workflows this guide describes, covering both veterinary clinical inspection and industrial field NDT.

The borescope and videoscope catalog covers multiple insertion diameters, probe lengths, and articulation configurations, so you can match the tool to the inspection geometry rather than the other way around. For veterinary teams, the veterinary rigid endoscopy catalog includes rigid scopes and accessories suited to small and large animal procedures. The PVSM6150 portable video endoscope is a fully portable, direct-monitor system with SD card recording, designed for technicians who need a field-ready scope at a practical price point. Contact 1800endoscope directly to request spec sheets or get guidance on matching a system to your inspection requirements.
Useful sources
- Why is NDT important — TWI: Primary citation for the proactive maintenance framing throughout this article.
- Step by Step NDT Inspection: A Technician's Field Guide — 1800endoscope: Field workflow and documentation reference used in the training and workflow sections.
- Portable digital radiography and NDT criteria — Inspenet: Source for data traceability and SOP guidance; supports the integration and limitations sections.
- Why choose manual NDT solutions — ScanNDT: Supports the confined-geometry and kit-weight points in the taxonomy and specs sections.
- Why portable NDT equipment is becoming essential — Magnafield NDT: In-place testing and transport savings evidence used in the benefits and ROI sections.
- Solving real-world inspection problems with mobile NDT — FOERSTER Group: Mobile testing unit deployment benefits cited in the primary roles section.
- Multi-modal NDT with ultrasound and imaging — Fluke: Application note supporting the multi-modal tool taxonomy and combined-use workflow examples.
Consult your device's IFU for reprocessing specifications, your state radiation control program for radiography licensing requirements, and OSHA standards 29 CFR 1910 and 1926 for field PPE obligations.