
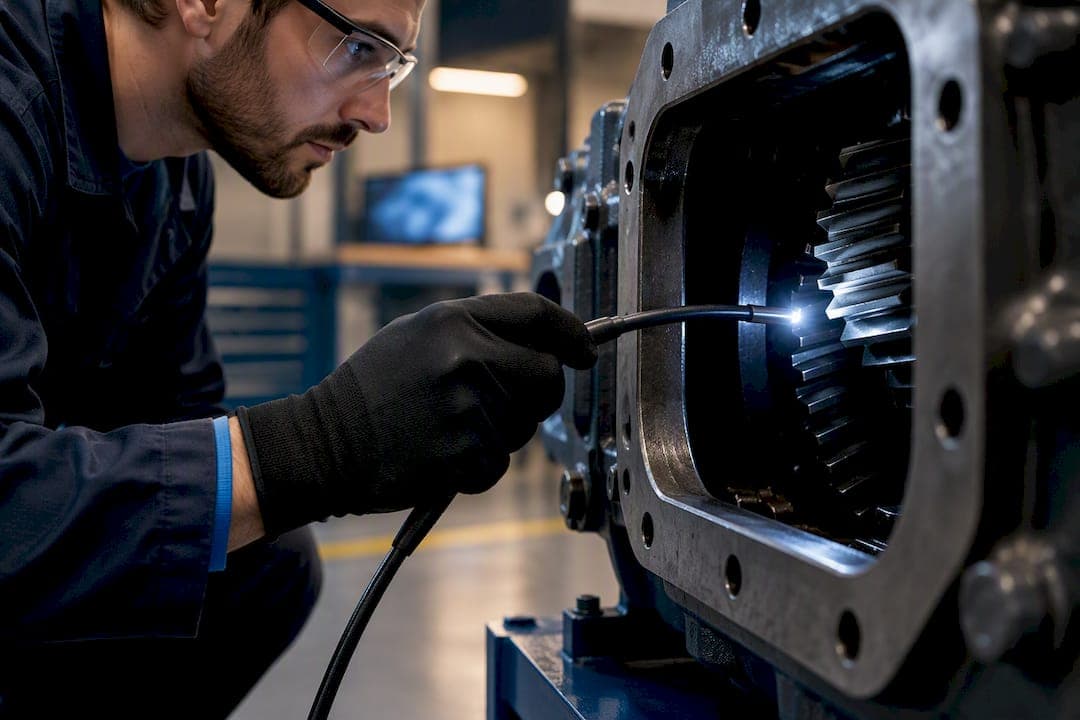
A gearbox borescope inspection is a non-destructive visual check that lets you see teeth, bearings, and debris inside a gearbox without teardown. Technicians use it to confirm what an oil or vibration alert already suggests, or to build a scheduled baseline before problems show up on a sensor. Done right, it turns a guess into a documented finding.
TL;DR:
- Using a 3 to 4 millimeter probe is recommended for tight bearing gaps, while a 6 millimeter probe provides clearer views of gear tooth flanks.
- Lockout, tagging, and proper cooling time (3 to 5 hours) are essential safety steps before inserting the borescope into a gearbox.
- Consistent inspection routes and properly labeled images are critical for accurate trend analysis and avoiding missed damage in gearboxes.
- Combining borescope findings with oil and vibration data enhances fault detection accuracy and prevents unnecessary or late teardown decisions.
- Regular maintenance, including lens cleaning, proper storage, and calibration, is vital to ensure the accuracy and longevity of borescope equipment.
Table of Contents
- Tools, equipment, and prechecks to have before you begin
- Step-by-step inspection workflow for a gearbox
- Interpreting what you see: common gearbox failure modes and practical dispositions
- Common mistakes, probe care, and safety best practices
- How often to borescope and how it fits a condition-monitoring program
- Documentation, labeling, and report structure for useful trend analysis
- Field-proven tips and resources from 1800endoscope and industry playbooks
- Maintenance and care of borescope equipment to ensure accuracy and longevity
- Limitations and challenges of borescope inspection in gearboxes
- Author perspective: disciplined borescoping saves teardown costs and improves uptime
- Relevant products and guides from 1800endoscope
- Sources
- FAQ
Tools, equipment, and prechecks to have before you begin
Probe diameter drives what you can actually see. Industry playbook guidance recommends probes around 3 to 4 millimeters for tight bearing gaps and up to 6 millimeters when you need a sharper image of gear tooth flanks. Rigid probes give you more control in a straight shot; articulated probes let you turn corners inside a housing without forcing the tip against a casing wall.
Beyond the probe itself, a few supporting items make or break the job:
- A guide tube or bendable tubing (automotive fire suppression line works well) to protect the probe tip in tight paths.
- Oil-clearing lens adapters and microfiber wipes to keep the image clean between shots.
- Spare seals and gaskets for whatever access port cover you remove.
- A gearbox schematic marking every access port before you get on-site.
Before inserting anything, lock out and tag out the unit, isolate lube pumps, and lock the rotor. Hot gearboxes need a cooling window, commonly 3 to 5 hours, or dry-motoring if facility practice allows it. Skipping the wait risks a warped image and a damaged probe tip.
Pro Tip: Mark your access ports on the schematic ahead of time so you are not hunting for entry points with a live probe in hand.
Step-by-step inspection workflow for a gearbox
Once the unit is isolated and cooled, the inspection itself follows a repeatable sequence.
- Review the gearbox schematic and pick the access port that gives the shortest, straightest path to the component you need to see.
- Confirm lockout and tagout, isolate the lube pump, and lock the rotor before removing any cover.
- Fit a guide tube if the path has sharp edges or narrow clearances, then insert the probe slowly, watching for resistance rather than forcing it past a pinch point.
- Use an oil-clearing adapter and a microfiber wipe on the lens as needed. Oil film on the tip is the fastest way to turn a clean inspection into a blurry one.
- Rotate the rotor in small, methodical increments to bring each tooth, bearing face, and contact patch into view. Multi-stage gearboxes with planetary stages can need many rotations to clear every planet tooth, so work a fixed route rather than jumping around.
- Where it is safe to do so, lower the oil level slightly to expose more of the tooth surface for a cleaner shot.
- Capture a labeled photo or short video clip at each stop, noting the component ID and its position before moving to the next point.
Pro Tip: Work the same route every time you inspect a given gearbox. A consistent path makes it obvious later whether you covered a spot or skipped it.
The goal is coverage, not speed. A rushed pass that misses half the ring gear is worse than no inspection at all, because it creates false confidence.
Interpreting what you see: common gearbox failure modes and practical dispositions
A clean image is only useful if you can read it correctly. Micropitting shows up as a dull, gray, sandpaper-like texture on the tooth surface, while macropitting produces visible craters that catch light differently and signal deeper fatigue. Scuffing looks like localized smearing or discoloration from momentary metal-to-metal contact, and spalling appears as flaking or chunks missing from the surface, usually a sign the damage has progressed past the early stage. Scoring shows as parallel grooves from debris passing through the mesh, and corrosion presents as dull, matte staining rather than the shine of an active wear surface.
- Contact patterns skewed to one edge of the tooth often point to misalignment rather than a lubrication problem.
- Uniform discoloration across many teeth tends to trace back to lubricant breakdown or contamination.
- Isolated debris on a single tooth face is worth flagging, but is not automatically a teardown trigger on its own.
Borescope images work best paired with oil analysis and vibration data. A wind-turbine gearbox program uses this pairing to locate failing components quickly after a condition-monitoring flag, which lets teams target the right part rather than opening the whole unit.
A practical rule of thumb backed by field guidance: distinguishing cosmetic staining from active corrosion, and micropitting from destructive macropitting, is the real skill in this work, which is why ambiguous images deserve a second set of eyes before you commit to a disposition.
Common mistakes, probe care, and safety best practices
Most probe damage happens the same way: someone pushes the tip between rotating components instead of routing around them with a guide tube. Keep the lens clear of oil film using an adapter and a wipe between shots, since a smeared lens is the most common cause of a wasted inspection.
- Never force a probe past resistance. A pinch point that catches a probe tip usually breaks it.
- Watch for false positives from glare, poor focus, or reflections off a wet surface before flagging a defect.
- Confirm lockout and tagout, lock the rotor, and, on turbine units, account for wind or gust conditions before opening any access port.
- Reseal every port cover with the correct gasket before returning the unit to service.
Pro Tip: If an image looks suspicious, take it from a second angle before writing it up. A shadow or a glare spot can mimic a crack on a single pass.
Formal borescope training reduces both kinds of error, tool damage and misdiagnosis, according to playbook guidance built around common field mistakes.
How often to borescope and how it fits a condition-monitoring program
Annual borescope inspections build the baseline you need to judge whether a gearbox is degrading normally or accelerating. Once oil particle counts or vibration readings flag an anomaly, tighten that cadence to monthly or even weekly until the picture is clear.
- A typical trigger workflow: an oil particle spike prompts a borescope check that same shift or at the next planned break, not weeks later.
- Borescope findings help prioritize parts procurement, since you know exactly which component to order before the teardown starts.
- Use the combination of oil, vibration, and visual data to decide whether a planned teardown can wait for the next scheduled outage.
This layered approach avoids two costly mistakes: tearing down a healthy gearbox on a false alarm, and running a failing one past the point where a scheduled repair was still possible.
Documentation, labeling, and report structure for useful trend analysis
Documentation is the highest-leverage part of a borescope program, because a clean image with no record of where it came from is nearly useless six months later.
- Capture a minimum image set for every finding: a distance shot for context, a close-up with a scale reference, and a shot showing shaft orientation.
- Name files with a consistent scheme: component code, inspection date, orientation, and image index number.
- Structure the report with a short summary, the mapped images tied to component locations, a recommended action with a stated confidence level, and a suggested follow-up interval.
Archived, labeled images are what make trend analysis possible across inspection cycles, and they are what a wind-turbine borescope program points to as the difference between a defensible teardown decision and a guess.
Field-proven tips and resources from 1800endoscope and industry playbooks
A few practical resources back up this workflow directly:
- Probe types and articulation explained for selecting the right rigid or flexible tool for the job.
- A field guide to borescope safety procedures covering lockout, tagout, and port resealing.
- Guidance on flexible borescope technique for accurate, repeatable diagnostics.
Formal training remains the single best way to cut false positives and avoid probe damage on the shop floor.
Maintenance and care of borescope equipment to ensure accuracy and longevity
A borescope is a precision optical instrument, and gearbox oil is hard on it. Wipe the insertion tube down after every use, before oil has a chance to dry and stiffen the sheath. A stiff tube articulates poorly and is more prone to kinking at the next inspection.
Store the probe coiled at its manufacturer's recommended radius, never folded or kinked, since a sharp bend in the fiber bundle or cable can crack internal fibers and leave permanent dark spots in the image. Keep the unit in a case with foam cutouts rather than loose in a toolbox, where it can pick up scratches on the lens or dents in the insertion tube.

Check the lens and light source before each job. A scratched lens softens detail exactly where you need it most, on a micropitted tooth surface or a hairline crack. Replace worn O-rings and seals on guide tubes and adapters before they let oil seep past and reach the optics.
Battery-powered units need a charge cycle check on a set schedule, since a videoscope that dies mid-insertion is a probe stuck in a gearbox until someone can extract it safely. Calibrate focus and white balance periodically, particularly after any drop or hard knock, since a probe that looks fine externally can still have a shifted optical alignment that throws off measurements taken from the image.
A well-maintained borescope holds its resolution and color accuracy for years. A neglected one starts producing images that are technically viewable but not reliable enough to base a teardown decision on, which defeats the entire purpose of the inspection.
Limitations and challenges of borescope inspection in gearboxes
A borescope only shows what is in the line of sight from an access port. Areas behind other components, deep inside a planetary carrier, or on the far side of a shaft from every available port simply will not appear in any image, no matter how good the probe is. That blind spot is why borescope findings should never be treated as a complete internal survey.

Resolution has a practical ceiling too. Even a high-quality probe can struggle to distinguish early micropitting from ordinary machining marks or light surface staining, especially under imperfect lighting. This is part of why borescope inspection is described as a technique that complements oil and vibration analysis rather than replacing it: each method catches something the others miss.
Inspection also captures a single moment in time. A tooth that looks fine on a Tuesday inspection can develop damage before the next scheduled check, so the interval between inspections matters as much as the quality of any single image.
Access ports themselves are a limiting factor. A gearbox designed without inspection ports in mind may only offer awkward entry points that force a longer, more indirect probe path, increasing both inspection time and the risk of probe damage. Planning access ports at the design or overhaul stage is a low-cost way to avoid this problem later, since a small, purpose-drilled port is cheap compared to the maintainability it buys.
Author perspective: disciplined borescoping saves teardown costs and improves uptime
The technicians who get the most value from this technique are not the ones with the fanciest probe. They are the ones who label every image, log every rotation, and pair what they see with oil and vibration data before deciding anything. That discipline turns a borescope from a curiosity into a tool that prevents unnecessary teardowns and catches the ones that matter in time.
— Endoscope
Relevant products and guides from 1800endoscope
If your kit is missing pieces from the checklist above, 1800endoscope's borescope and videoscope category covers monitor-type SD-card videoscopes and micro fiber borescopes built for tight, oily gearbox access.
 Look for a durable insertion tube and an oil-resistant tip when comparing units, since those two features determine how well a probe survives repeated field use. Need repairs on equipment already in your toolbox? Check the repair and service page before replacing a unit that just needs new seals.
Sources
- Borescope Inspection in Industrial Maintenance: Seeing Inside Without Teardown
- Gearbox Operations Playbook
- Tips for wind gearbox inspections using a borescope
FAQ
How much does a borescope inspection cost?
Cost depends heavily on whether you own the equipment or hire a contractor, and neither figure is fixed across the industry. Equipment ranges widely by probe diameter, resolution, and features like articulation, so check a current product listing such as 1800endoscope's borescope category for specific unit pricing.
How do I inspect a gearbox with a borescope?
Lock out and tag out the unit, let it cool, then plan your entry path using the gearbox schematic and an available access port. Insert the probe with a guide tube if needed, rotate the rotor methodically to view every tooth and bearing face, and capture labeled images at each stop.
What does "borescope inspection" mean?
A borescope inspection is a non-destructive visual technique that uses a slender optical or video probe to examine the inside of equipment through small access ports, without disassembly. It is commonly used to confirm findings from oil analysis or vibration monitoring before deciding on a teardown.
Do you need an articulating borescope for gearbox work?
Not always. A rigid probe works well for a short, straight path to a visible component, but an articulating probe is worth the extra cost when you need to turn corners inside a housing or reach around obstructions without forcing the tip against a casing wall.
How often should a gearbox be inspected with a borescope?
Annual inspections are a common baseline for building trend data on a healthy gearbox. That interval should tighten to monthly or weekly whenever oil analysis or vibration monitoring flags an anomaly, until the borescope images confirm the issue has stabilized or been resolved.