
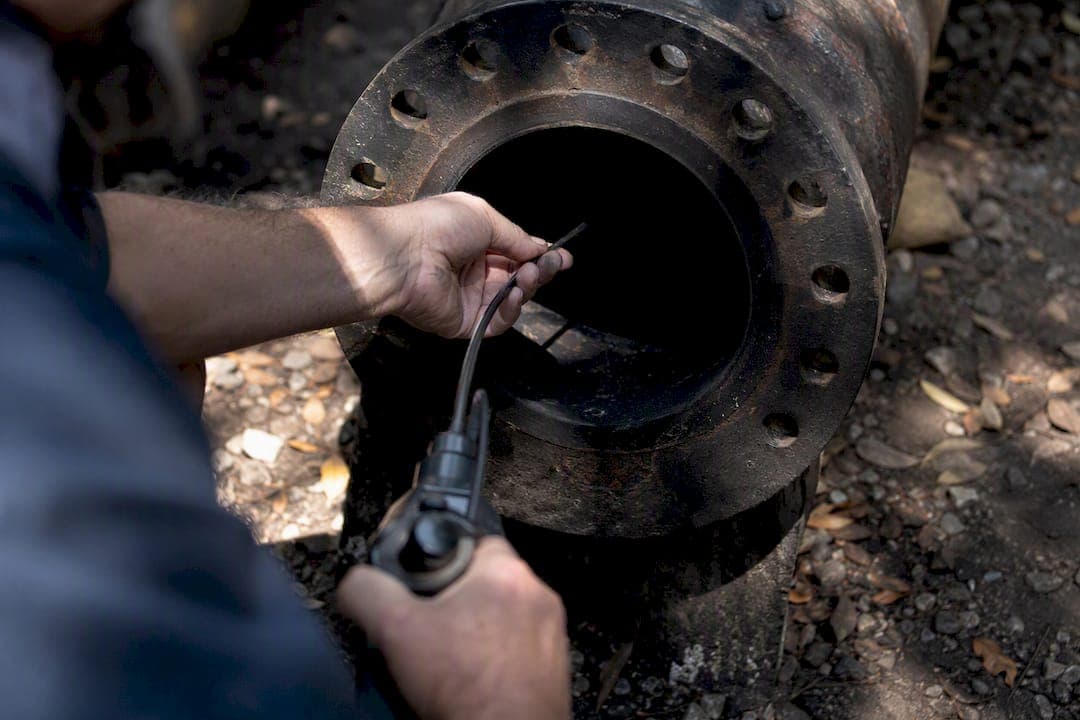
For most pipeline RVI work, the right tool is an articulating videoscope with at least a 4 mm probe, on-board recording, and a stereo or structured-light measurement option, sized down only when access ports force a smaller diameter. That combination gives you the reach, image clarity, and defect-sizing ability that a fiberscope or rigid borescope can't match on its own. This guide covers the specs, workflow, and standards behind that recommendation, plus when to hand the job to a specialist.
- When to use this: Standard pipeline runs with 4 mm+ access ports, bends under 90 degrees, and a need for documented, sizeable findings.
- When to choose a slimmer scope: Ports or nipples under 6 mm, tight nuclear or food-grade fittings, or when you're screening rather than sizing.
- When to escalate to specialist RVI: Long-reach runs past 15 to 20 meters, code-driven weld inspections, or any finding that needs certified sign-off.
Key Takeaways
Reliable pipeline RVI depends on matching a videoscope's diameter, articulation, and measurement capability to the actual access geometry, not the biggest spec sheet available.
| Point | Details |
|---|---|
| Pick videoscopes for pipeline work | They avoid the honeycomb artifact of fiberscopes and outperform rigid scopes on flexibility. |
| Match diameter to the smallest port | Oversizing a probe by even a few millimeters can block access entirely. |
| Require stereo or structured-light for sizing | Comparison scalers are fine for screening but not for documented defect dimensions. |
| Release articulation locks before withdrawal | Skipping this step is a leading cause of bent or broken articulation cables. |
| Compare portable and measurement-grade options | 1800endoscope's catalog splits scopes by diameter, reach, and measurement capability for procurement comparisons. |
Table of Contents
- How Borescopes Work and the Three Relay Families
- The Eight Specifications That Determine Inspection Success
- Decision Workflow for Selecting a Pipeline Borescope
- Step-by-Step Pipeline Inspection Procedure
- Common Accessories and Working Tools for Pipeline Inspections
- How to Measure and Size Defects From Borescope Images
- Maintenance and Cleaning for Longer Scope Life
- Standards, Qualifications, and When to Escalate
- Troubleshooting Inspection Problems and Common Pipeline Findings
- Procurement Notes and U.S. Cost Expectations
- What Twenty Minutes Inside a Pipe Teaches You
- Where to Find the Right Scope for the Job
- Primary Sources and Further Reading
- Sources
How Borescopes Work and the Three Relay Families
Every borescope relays an image from the tip to your eye or a display using one of three methods, and picking the wrong one is the single most common procurement mistake in pipeline work. Rigid borescopes use a lens train inside a solid tube. They deliver excellent optical clarity but only work in straight-shot access, which rules out most pipeline geometry beyond a short nozzle or valve body. Fiberscopes relay light through a coherent fiber bundle, giving you flexibility to snake around bends, but the image carries a visible "honeycomb" pattern from the fiber grid that limits how small a crack you can confidently resolve. Videoscopes put a miniature camera chip right at the tip and send digital video back through a cable, which is why they have become the default choice for pipeline inspection, offering sharper images, no honeycomb artifact, and enough onboard processing to support recording and measurement.
- Rigid: best clarity, zero flexibility, short straight-line access only.
- Fiberscope: flexible and cheaper, but resolution suffers and honeycomb artifact obscures fine cracking.
- Videoscope: flexible, high resolution, supports recording and measurement, the standard pick for pipeline RVI.
Pro Tip: Walk the pipeline drawing before you pick a scope. If there's a single 90 degree elbow within the first meter of insertion, a rigid borescope is dead on arrival. Match relay type to the path geometry first, then worry about resolution.
The Eight Specifications That Determine Inspection Success
Datasheets bury the numbers that matter under marketing copy, so know which eight to check before you compare anything else. Diameter, working length, articulation, field of view, depth of field, direction of view, illumination, and image resolution determine whether a scope will physically fit, reach the target, and produce a usable image once it gets there. Measurement method is the ninth factor, and it deserves its own section below.
Common videoscope diameters are available in multiple standard sizes, with typical working lengths suitable for most pipeline inspections and specialized long-reach systems for extended distances. Direction of view matters more than most technicians assume: a side- or oblique-viewing tip often reveals pitting and cracking that a forward-viewing tip misses, because grazing light angles at the crack edge create shadow contrast a straight-on view can't produce.
- Diameter: choose to clear the smallest access port on the route, not the average one.
- Working length: add roughly 0.5 meters of slack to your measured distance for handling loops and bends.
- Articulation: two-way minimum for pipeline work; four-way for junctions and tees.
- Direction of view: side-viewing tips catch defects forward tips miss.
| Spec | What to check |
|---|---|
| Diameter | Clears smallest port with margin, not just nominal fit |
| Working length | Measured route length plus slack for handling |
| Articulation | Two-way or four-way tip control for bends |
| Field of view | Wide enough for context, narrow enough for detail |
| Illumination | LED brightness adjustable for reflective metal interiors |
| Measurement method | Comparison, stereo, or structured-light capability |
Decision Workflow for Selecting a Pipeline Borescope
Run through five checks in order, because each one eliminates options faster than comparing full spec sheets side by side.
- Access geometry. Measure the smallest port or fitting on the route and pick a diameter with margin, not a tight fit.
- Path complexity. Count bends and their radius. Anything past one tight elbow needs at least two-way articulation.
- Measurement need. If the job calls for documented defect dimensions, require stereo or structured-light capability now, not as an add-on later.
- Environmental hazards. Confirm temperature, moisture, and any explosive-atmosphere rating before you commit to a probe material.
- Handling and ergonomics. Match working length and control-unit weight to how long the technician will be holding it steady.
A short straight run through a 2 inch access port needs little more than a 6 mm probe with basic articulation. A junction inspection with sizing requirements needs a 4 mm four-way articulating videoscope with stereo measurement. A long-reach transmission line inspection needs a purpose-built long-reach system, full stop.
Pro Tip: Don't over-buy working length. A 30-meter probe is heavier, stiffer to advance, and harder to control on a 5-meter job than a scope sized to the actual route. Length you don't need is a handling penalty you pay on every insertion.
Step-by-Step Pipeline Inspection Procedure
A repeatable sequence protects both your equipment and your findings.
- Prep and safety. Confirm isolation and lockout status, verify cooling time on any thermally hot section, and check PPE against your site's confined-space or hot-work permit requirements. Reference ASME BPVC Section V, Article 9 and your facility's visual testing procedure before starting. If a fitting is too hot to hold bare-handed, it's too hot for the probe.
- Setup. Charge the unit fully, test LED output, and connect your display before insertion, as standard operator setup guidance recommends. Measure the port diameter one more time against your probe.
- Insertion. Keep the bending section straight while feeding tube through a guide sleeve, advance slowly, and watch the live feed rather than the tube itself.
- Sweep pattern. Run an axial sweep down the pipe centerline, then a slow circumferential pass at each joint, weld, or suspected defect zone, logging position by insertion distance as you go.
- Documentation. Capture stills at every anomaly, timecode your video, record measurements inline, and name files by line number, station, and date so nothing gets mixed up in the report.
- Withdrawal. Release the articulation lock before pulling the tube back, always, since withdrawing with the tip still locked is a leading cause of bent or snapped articulation cables.
- Never force the probe against resistance; back off and reassess the sweep angle.
- Log every finding's insertion distance, not just a general description.
- Keep a second technician on standby for anything past a routine sweep.
Common Accessories and Working Tools for Pipeline Inspections
The scope itself is half the equipment list. Guide tubes and rigid sleeves protect the insertion tube from abrasion inside rough-bore pipe and keep the probe centered so you're not scraping the camera window against scale or weld slag. Centering guides and float collars do similar work in larger-diameter runs where the probe would otherwise sag to the bottom of the pipe. For working-channel tasks, grabbers, magnets, and snares let you retrieve small debris without a second entry, while cleaning adaptors clear light fouling ahead of the lens. Close-focus and prism tips help when you need to inspect flush against a wall or around a corner without full articulation.
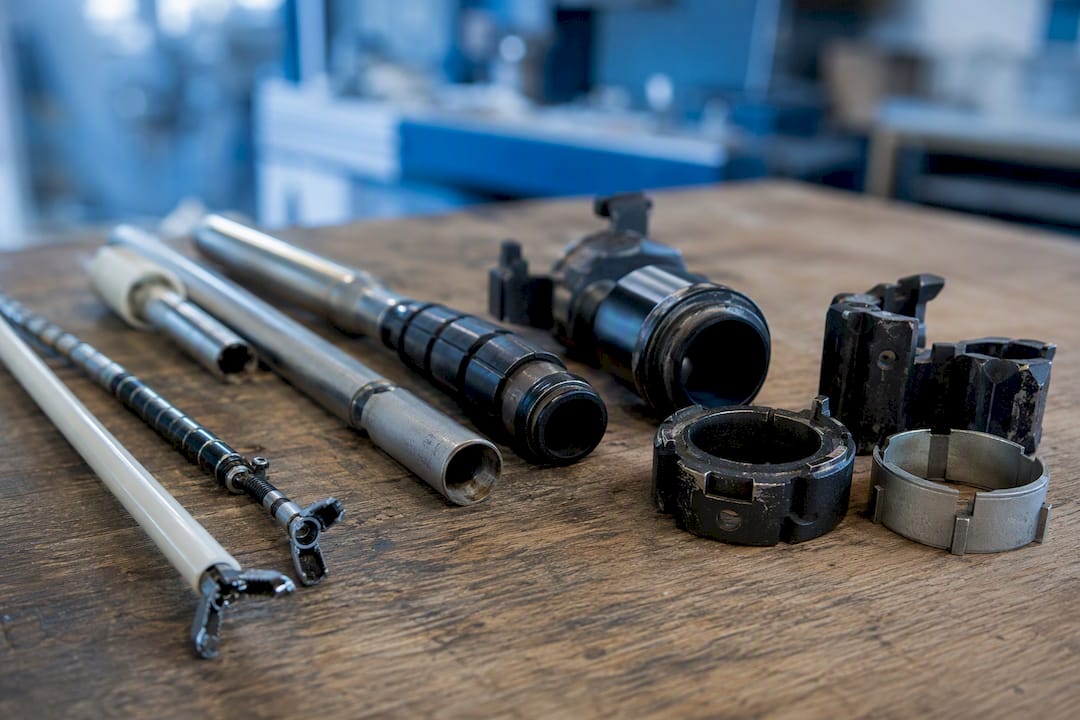
A guide tube or centering sleeve isn't optional on rough cast-iron or heavily corroded pipe. Skipping one is how insertion tubes get gouged or, worse, get stuck.
How to Measure and Size Defects From Borescope Images
Comparison, or scaler, measurement overlays a reference shape on the live image and works fine for fast screening, but it's not precise enough to defend a repair decision. Stereo triangulation is the industry standard for authoritative dimensional sizing, using two optical viewpoints to calculate depth and length with real geometric accuracy. Structured-light, or phase measurement, projects a pattern onto the surface and builds a dense 3D map, which is the better call when you're characterizing an irregular corrosion patch rather than a single linear crack.
- Comparison/scaler: fast, low-cost, screening only.
- Stereo triangulation: standard for pit depth, crack length, and weld defect sizing.
- Structured-light: best for mapping irregular surfaces and corrosion patterns.
If your scope of work requires a documented defect dimension for a repair or fitness-for-service decision, demand stereo or structured-light capability and the matching software license up front. A scaler reading on a pit that turns out to be borderline reject can cost you a re-inspection trip that a $2,000 measurement tip would have avoided.
Maintenance and Cleaning for Longer Scope Life
A few minutes of daily care prevents most of the failures that take a scope out of service mid-job.
- Check lens clarity, articulation response, battery charge, and SD card space before every shift.
- Wipe optics with isopropyl and a lint-free cloth; never use abrasive pads near the distal lens.
- Manage oil and water contamination immediately; residue left on the sheath degrades faster than you'd expect.
- Store in a padded, humidity-controlled case, and run a tool-control check to confirm every guide tube and tip made it back.
Standards, Qualifications, and When to Escalate
Confirm every inspection scope against the job's governing spec, not general habit. ASME BPVC Section V, Article 9 covers visual examination requirements, while personnel qualification typically runs through ASNT SNT-TC-1A or ISO 9712, depending on the client's program.
- Verify which standard the job spec calls out before starting, not after.
- Require certified Visual Testing (VT) personnel for code-driven inspections or anything feeding a fitness-for-service decision.
- Keep OEM inspection manuals on hand; they define approved scope models, tip sizes, and probe limits for a reason.
Troubleshooting Inspection Problems and Common Pipeline Findings
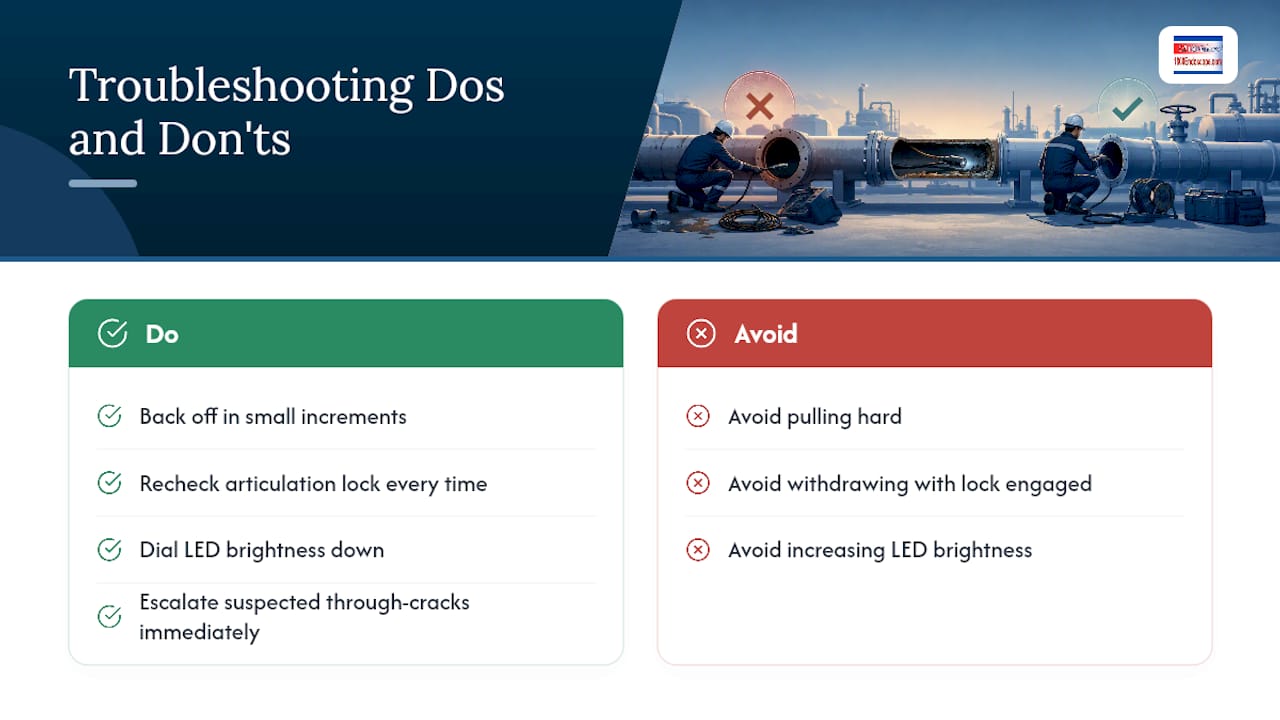
Most mechanical failures trace back to forcing the probe or skipping a check step. A stuck probe usually means you advanced too fast past a joint offset; back off in small increments rather than pulling hard. Articulation failure often follows a withdrawal with the lock still engaged, so recheck that step every time. Poor illumination on reflective metal interiors gets fixed by dialing LED brightness down, not up, since overexposed glare hides more than dim light does.
On the image side, glare off wet or polished surfaces clears up with an angle change, and fiberscope honeycomb artifact is inherent to the technology, not a fault. As for what you'll actually see: pitting shows as small, sharp-edged dark spots, shallow general corrosion looks like a duller, textured surface change, and a through-crack shows a visible line with light or fluid behind it. Escalate anything resembling a through-crack to measurement and repair teams immediately.
Procurement Notes and U.S. Cost Expectations
Entry-level WiFi borescope cameras start in the low hundreds of dollars and suit basic screening, not documented pipeline RVI. Professional portable videoscopes with articulation and recording typically run into the low thousands, and measurement-capable systems with stereo or structured-light tips push higher still, reflecting the added optics and software licensing.
Before you sign a purchase order, run through warranty terms, service and repair turnaround, availability of modular tips, and whether the measurement option you need is included or a costly add-on. Training availability matters too; a scope your team can't run confidently on day one is a bad buy regardless of spec sheet. The borescope catalog at 1800endoscope breaks out portable and measurement-capable models by these exact criteria, and advanced videoscope feature guides go deeper on what separates entry-level from measurement-grade systems.
What Twenty Minutes Inside a Pipe Teaches You
Orientation is the first thing that goes wrong on a new job. Count the blades or segments visible in frame, note them in your log, and re-check that count before you claim the sweep is complete; it's the fastest way to catch a missed section. A field crew that skipped a guide tube on a corroded 6 inch line once scored the insertion sheath badly enough to need a mid-day probe swap. The crew running the same line the next week used a rigid sleeve and finished without incident. The scope choice didn't change. The tool control did.
Where to Find the Right Scope for the Job
Choosing between a compact portable unit and a full measurement-capable videoscope comes down to the access geometry and sizing requirements covered above, and 1800endoscope's lineup is built around exactly that split.

If your routes run short and your ports are tight, the 6mm portable video endoscope system covers direct-monitor inspection with SD card recording at a lower cost than a full measurement rig. For longer runs, junctions, or straight-section work where a rigid probe holds up better than a flexible one, the rigid endoscopy catalog and guide-tube accessories round out a kit that matches the workflow in this guide. Browse the full borescope and accessory catalog to compare probe diameters, working lengths, and measurement options side by side, and get a quote on the configuration that fits your next inspection.
Primary Sources and Further Reading
- ASME BPVC Section V, Article 9 governs visual examination requirements for pipeline RVI.
- ASNT SNT-TC-1A and ISO 9712 cover personnel qualification frameworks.
- Always confirm equipment-specific limits against your scope's own OEM inspection manual.
Sources
- Industrial Borescope Guide — Types, Specs, Selection | SpecForge
- Borescope Inspection Guide: Aviation RVI Techniques (2026) | AviationTitans
- How to use a borescope camera: complete beginner's guide - Borescope HQ