
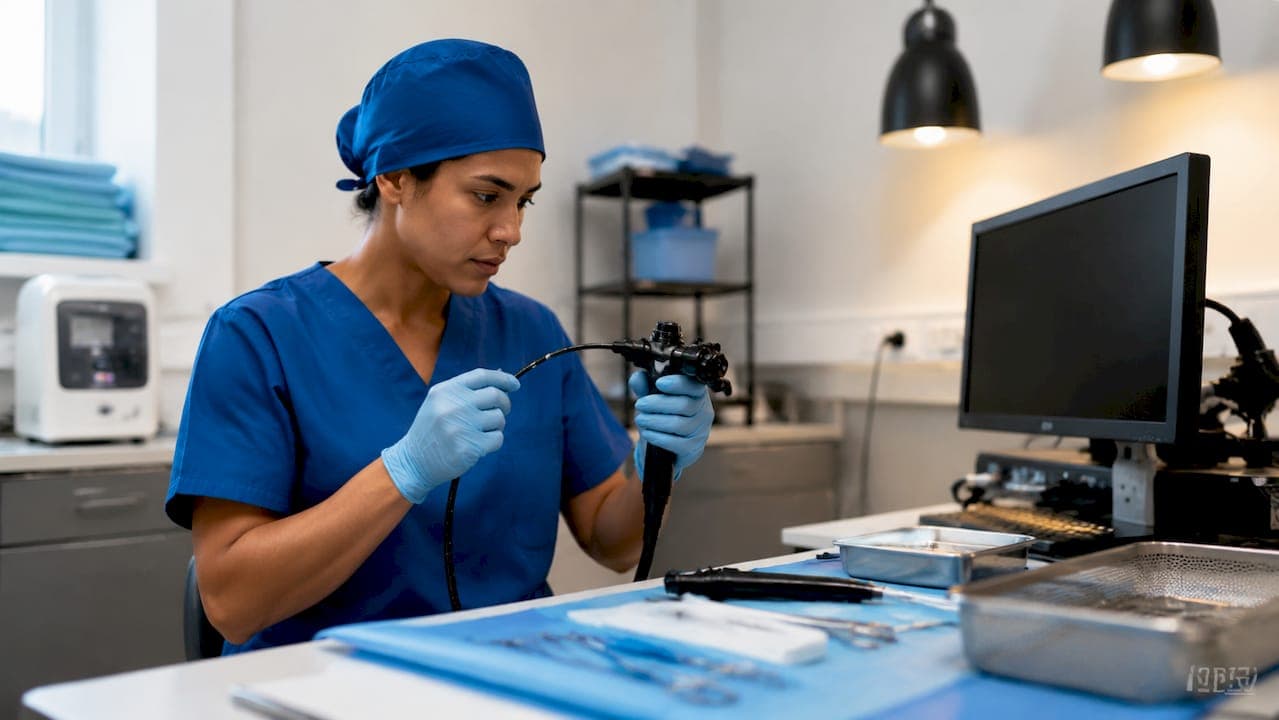
Endoscopic equipment is defined as a class of precision instruments that combine insertion tubes, optical systems, cameras, and light sources to visualize internal body cavities or structural spaces without destructive access. Whether you work in a veterinary clinic examining a horse's airway or an industrial facility inspecting a turbine housing, the core anatomy of the scope you reach for is nearly identical. This guide covers endoscopic equipment basics from component-level anatomy through scope types, maintenance protocols, and procurement decisions, giving veterinary and industrial professionals the foundational knowledge to choose, use, and maintain these instruments correctly.
What are the main types and uses of endoscopic equipment?
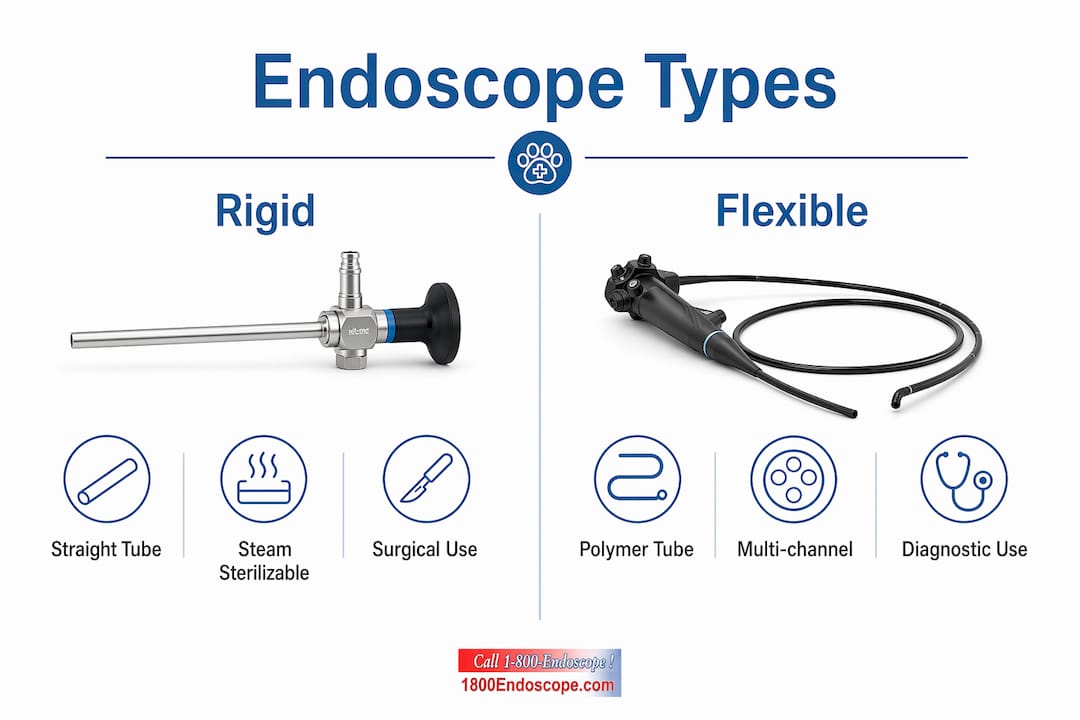
Endoscopes are classified into three structural categories: rigid, flexible, and semi-rigid. Each category maps directly to a set of applications, and choosing the wrong type for a given task is one of the most common and costly mistakes professionals make.
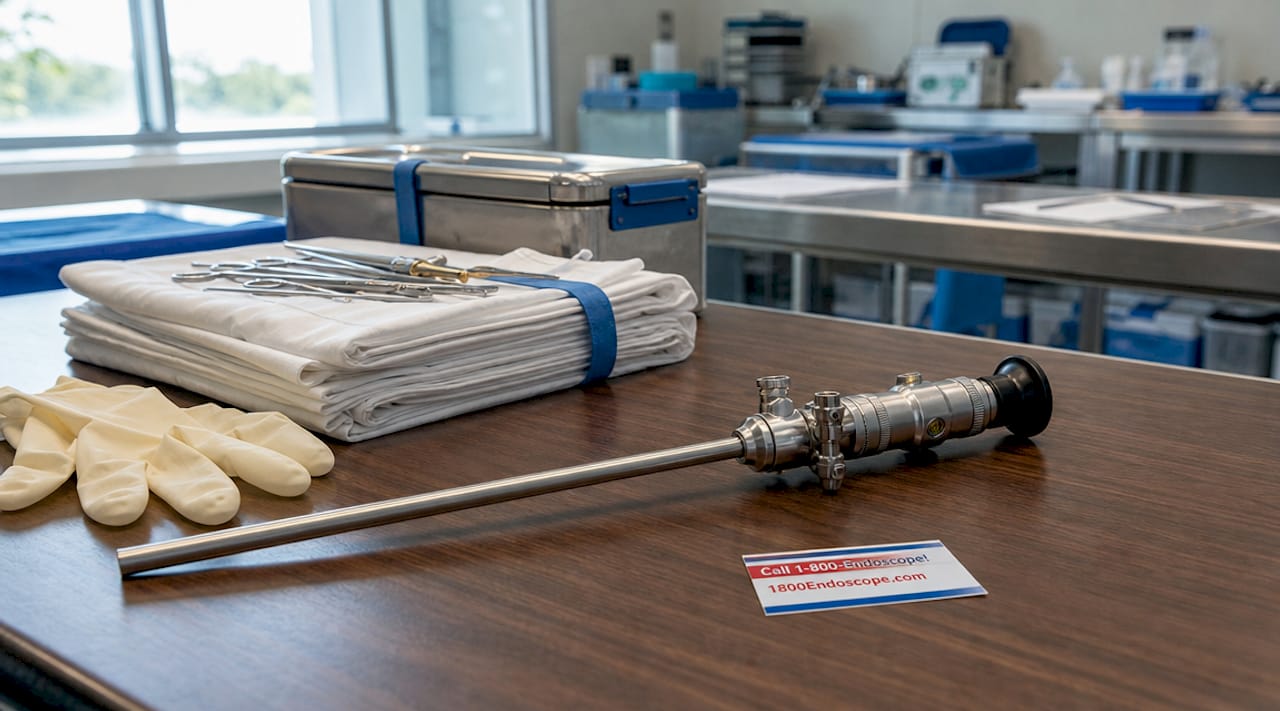
Rigid endoscopes consist of a straight, inflexible metal tube compatible with steam sterilization, commonly used in surgical and industrial inspections. Their simple construction makes them durable and easy to reprocess, but they require a straight or near-straight access path. Veterinary surgeons use them for cystoscopy, rhinoscopy, and arthroscopy in small animals. Industrial technicians use rigid borescopes to inspect engine cylinders, gun barrels, and straight pipe runs.
Flexible endoscopes house multiple fluid channels and delicate electronics inside a thin polymer insertion tube, typically under 12 mm in diameter, with internal angulation wires that allow the distal tip to steer through curves. This design makes them the instrument of choice for gastrointestinal examinations in dogs, cats, and horses, as well as for inspecting complex industrial cavities with bends and offsets. Semi-rigid scopes occupy a middle ground, offering limited deflection for applications like nasal passages or small-diameter pipe inspections where full flexibility is unnecessary.
| Scope type | Structure | Veterinary use | Industrial use | Key advantage |
|---|---|---|---|---|
| Rigid | Straight metal tube | Arthroscopy, cystoscopy | Engine cylinders, gun barrels | Durable, steam-sterilizable |
| Flexible | Polymer tube with angulation wires | GI endoscopy, airway exams | Complex cavity inspection | Steerable tip, multi-channel |
| Semi-rigid | Partially flexible shaft | Nasal passages, ear canals | Small-diameter pipe runs | Balance of reach and control |
Pro Tip: When selecting a scope for small animal diagnostics, prioritize insertion tube diameter first. A 5 mm scope that fits a cat's esophagus will be useless for a horse's trachea, and buying the wrong diameter wastes both money and procedure time.
How does endoscopic equipment work technologically?
An endoscopy machine consists of several integrated components: the insertion tube, light source unit, camera control unit (CCU), monitor, insufflator, suction pump, video processor, and accessories. Each component handles a distinct function, and a failure in any one of them degrades the entire system's output.
Illumination is delivered through one of two methods. Fiber-optic bundles transmit light from an external xenon or halogen source down the insertion tube to the distal tip. LED illumination, increasingly common in portable and veterinary field scopes, integrates the light source directly at the tip, eliminating transmission loss across long fiber bundles. For veterinary professionals choosing between these options, LED versus fiber-optic light sources affect both image brightness and equipment portability in meaningful ways.
Image capture relies on either CCD (charge-coupled device) or CMOS (complementary metal-oxide-semiconductor) sensors mounted at the distal tip or at the eyepiece. CMOS sensors dominate newer designs because they consume less power and integrate more easily with digital processing pipelines. The signal travels from the sensor through the insertion tube to the CCU, which processes and outputs the image to a dedicated monitor or recording device.
| Component | Function |
|---|---|
| Insertion tube | Delivers optics, light, and working channels to the target site |
| Light source unit | Provides illumination via fiber-optic bundle or LED |
| Camera control unit (CCU) | Processes raw sensor data into a displayable video signal |
| Monitor | Displays real-time and recorded images for the operator |
| Insufflator | Inflates body cavities with CO₂ or air to create working space |
| Suction pump | Removes fluids and debris from the field of view |
| Video processor | Manages recording, image enhancement, and output formats |
Accessories like insufflators and suction pumps are standard in clinical GI procedures but also appear in industrial applications where debris removal or cavity pressurization aids inspection accuracy. Understanding this component map is the prerequisite for both effective use and accurate troubleshooting.
What are the fundamental maintenance and reprocessing steps?
Scope failures trace back to post-procedure handling far more often than to use during the procedure itself. Most flexible endoscope damage results from improper handling, storage, and inadequate pre-cleaning immediately after use. That single fact should reframe how your team thinks about reprocessing: it is not an afterthought, it is the procedure.
Current standards, including ANSI/AAMI ST91:2021, mandate a strict, sequential 9-step reprocessing protocol starting with immediate point-of-use pre-cleaning to prevent cross-contamination. The full sequence runs as follows:
- Point-of-use pre-cleaning: Wipe the insertion tube and flush all channels with enzymatic solution immediately after withdrawal, before biofilm can form.
- Leak testing: Pressurize the scope to detect any breach in the outer sheath or internal channels before immersion in liquid.
- Manual cleaning: Brush all accessible channels with the correct-sized brush. An undersized brush fails to contact channel walls, while an oversized brush damages the delicate internal lining.
- Rinse: Flush channels thoroughly with clean water to remove enzymatic cleaner and loosened debris.
- Visual inspection: Examine the insertion tube, distal tip, and connectors under magnification for physical damage.
- High-level disinfection (HLD) or sterilization: Immerse in a validated disinfectant such as glutaraldehyde or peracetic acid, or use an automated endoscope reprocessor (AER).
- Final rinse: Flush all channels with sterile or filtered water to remove disinfectant residue.
- Drying: Force air through all channels and hang the scope vertically in a drying cabinet. Residual moisture is the primary driver of biofilm growth in storage.
- Documentation and storage: Record the reprocessing cycle, operator ID, and scope ID before placing the scope in a ventilated, dedicated storage cabinet.
Pro Tip: Never skip leak testing before immersion. A pinhole breach in the insertion tube allows disinfectant to infiltrate the internal electronics, causing corrosion that is expensive to repair and impossible to reverse. Leak testing takes under two minutes and prevents repairs that can cost thousands of dollars.
Effective reprocessing programs also require robust documentation and staff training alongside the physical protocol. Administrative planning and standard operating procedures are as critical as the instrument processing steps themselves. A clinic or facility where reprocessing is undocumented is a facility where compliance cannot be verified and liability cannot be managed.
What are key innovations and equipment options for professionals?
The sterilization technology available to veterinary and industrial professionals has advanced considerably. The EOGas 4PLUS system sterilizes complex endoscopes using 90% less ethylene oxide per cycle compared to legacy EO sterilizers, with an abator that removes over 99% of EO from exhaust. This matters for facilities that handle high volumes of flexible scopes requiring terminal sterilization rather than high-level disinfection alone. Shelf life for sterilized scopes processed through this system extends up to six months.
For budget-conscious practices and inspection firms, refurbished endoscopy equipment from reputable suppliers offers a cost-effective alternative with rigorous testing and warranty safeguards, including rental options to lower initial capital costs. Rental programs are particularly practical for industrial inspection firms that need a specific scope diameter for a single project rather than a permanent addition to inventory.
Key considerations when evaluating equipment options:
- Insertion tube diameter and working length: Match these to your most common procedure. A 6 mm diameter scope covers most small animal GI work; equine airway inspection typically requires 8 mm or larger.
- Video output format: HD video output with SD card recording is now standard on portable units and is non-negotiable for documentation-heavy workflows.
- Repair and service network: Confirm that the vendor or manufacturer offers repair services before purchasing. A scope without a service path is a liability.
- Portability requirements: Field veterinarians and industrial technicians working in remote locations benefit from battery-powered, self-contained systems rather than cart-based setups.
Pro Tip: When evaluating refurbished scopes, request the full service history and ask specifically whether the insertion tube has been replaced. Insertion tube replacement is the most common major repair, and a scope with a new tube on an older body is functionally equivalent to a new instrument at a fraction of the cost.
How to optimize procedures through documentation and video recording
Video recording transforms an endoscopic procedure from a real-time observation into a permanent, reviewable record. For veterinary professionals, recorded footage supports second-opinion consultations, client communication, and longitudinal case tracking. For industrial inspectors, it provides the audit trail required by clients and regulatory bodies.
Optimizing video recording setups for veterinary use involves matching resolution, frame rate, and storage format to the intended use of the footage. HD at 30 frames per second is sufficient for most diagnostic review. Higher frame rates matter when capturing fast-moving structures like cardiac valves or respiratory mucosa during forced breathing.
Best practices for documentation and video management include:
- Log every procedure with scope ID, operator name, date, patient or asset ID, and reprocessing cycle number.
- Store video files in a named folder structure that mirrors your patient or asset management system for fast retrieval.
- Review footage immediately after the procedure while context is fresh, and annotate key timestamps before filing.
- Use videoscope troubleshooting protocols to address image artifacts, color shifts, or resolution drops before they affect a diagnostic procedure.
- Schedule quarterly scope performance checks, including white balance calibration and channel flow tests, to catch degradation before it becomes a failure.
Documentation is not a bureaucratic exercise. It is the mechanism by which you prove your equipment was functioning correctly, your reprocessing was compliant, and your findings were accurately captured. In both veterinary and industrial contexts, that proof has direct legal and commercial value.
Key takeaways
Endoscopic equipment performs reliably only when professionals understand its component anatomy, match scope type to application, and execute reprocessing protocols without shortcuts.
| Point | Details |
|---|---|
| Match scope type to application | Rigid scopes suit straight-access procedures; flexible scopes handle curved anatomical or structural paths. |
| Pre-clean immediately after use | Wiping and flushing channels at point of use prevents biofilm and preserves disinfection efficacy. |
| Leak test before every immersion | A two-minute leak test prevents corrosive disinfectant infiltration and costly internal repairs. |
| Document every reprocessing cycle | Logging scope ID, operator, and cycle data is required for compliance and liability management. |
| Evaluate refurbished equipment carefully | Request full service history and confirm insertion tube condition before purchasing a refurbished scope. |
What I've learned from years of watching professionals get this wrong
Most professionals who struggle with endoscopic equipment are not struggling with the procedures. They are struggling with everything that happens between procedures. The reprocessing suite, the storage cabinet, the documentation log: these are where scopes fail and where compliance gaps appear.
The most consistent mistake I see is treating pre-cleaning as optional when the schedule is tight. Biofilm begins forming within minutes of a scope leaving a patient or inspection site. By the time the scope reaches the reprocessing sink an hour later, enzymatic cleaning alone will not fully address what has already adhered to the channel walls. That is not a theoretical risk. It is the documented mechanism behind most scope-related contamination events.
For veterinary professionals specifically, the gap between clinical skill and equipment knowledge is wider than it should be. A surgeon who can perform a complex GI procedure but cannot correctly identify a leak test failure is operating with incomplete competency. Equipment anatomy is not a technician's concern alone. It belongs in the clinical skill set.
For industrial professionals, the temptation to skip documentation on field inspections is real and understandable. But the inspection report is only as credible as the equipment record behind it. A client who questions your findings will ask about your scope's calibration history and reprocessing log. If you cannot produce those records, the inspection's value is diminished regardless of what the footage shows.
My recommendation for budget-conscious buyers in both fields: prioritize vendors who offer repair services and service histories over those who offer only the lowest purchase price. A scope that costs 30% less but has no service path will cost more over three years than a properly supported instrument at full price.
— Endoscope
Explore endoscopic equipment at 1800endoscope
1800endoscope carries a full range of new and refurbished endoscopy systems built for veterinary clinics, animal health professionals, and industrial inspection teams. From portable airway inspection systems with direct monitor output and SD card recording to complete gastroscope setups for large and small animal diagnostics, the catalog covers the full spectrum of professional needs.

The veterinary rigid endoscopy catalog includes cystoscopes, arthroscopes, and rhinoscopes sized for small animals through equine patients, with accessories including light sources, biopsy forceps, and valves. Repair services and rental options are available for practices managing capital budgets carefully. Contact 1800endoscope directly to discuss your application requirements and get matched to the right system.
FAQ
What are the core components of an endoscope?
An endoscope consists of an insertion tube, light source, camera or optical system, control section, and working channels for suction, irrigation, or instrument passage. The camera control unit and monitor complete the system by processing and displaying the captured image.
What is the difference between rigid and flexible endoscopes?
Rigid endoscopes use a straight metal tube and are steam-sterilizable, making them ideal for surgical and straight-access industrial inspections. Flexible endoscopes use a steerable polymer tube with internal angulation wires, suited for curved anatomical paths like the GI tract or complex industrial cavities.
How often should endoscopes be reprocessed?
Every endoscope must be reprocessed after each use following the full sequential protocol mandated by standards like ANSI/AAMI ST91:2021, starting with immediate point-of-use pre-cleaning and ending with documented storage.
Can refurbished endoscopes meet clinical or inspection standards?
Yes. Refurbished scopes from reputable suppliers undergo rigorous testing and come with warranty coverage, making them a compliant and cost-effective option for veterinary and industrial professionals managing equipment budgets.
What causes most flexible endoscope failures?
Most flexible endoscope damage results from improper post-procedure handling, specifically skipping or delaying pre-cleaning, which allows biofilm to form in internal channels and accelerates both contamination risk and mechanical degradation.