
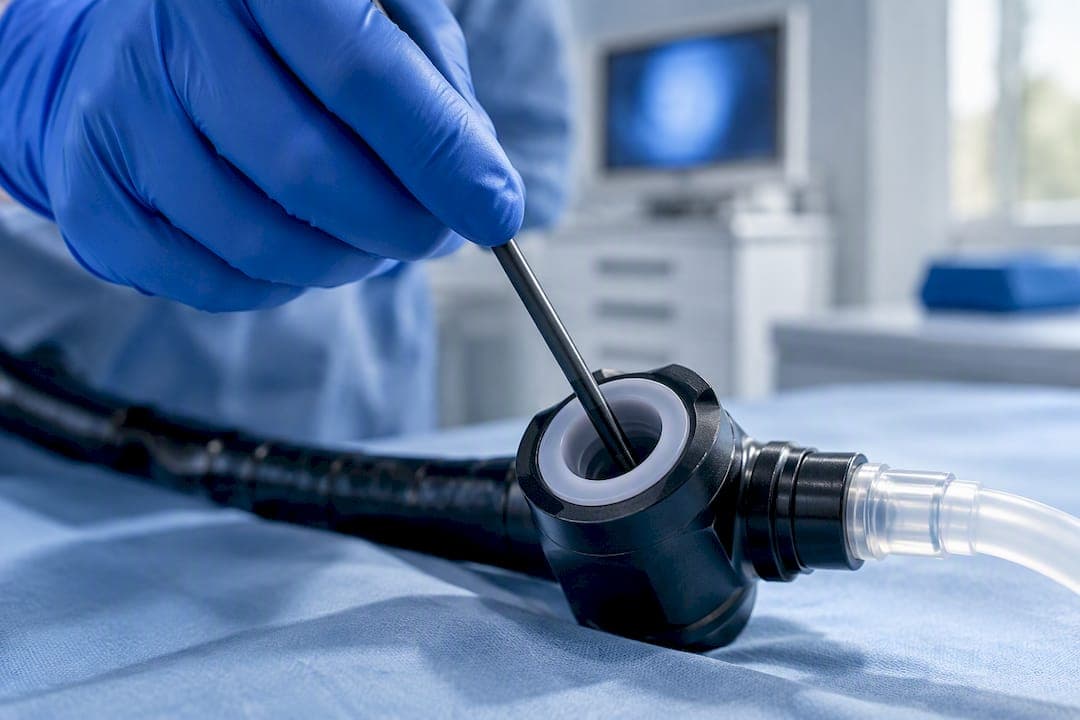
The endoscope working channel is the internal conduit that carries biopsy forceps, suction, and irrigation fluid from the handpiece to the distal tip. Its diameter and how much space an inserted instrument occupies directly govern suction speed, irrigation flow, and how clearly the operator sees the field. That same channel is also the hardest part of the scope to clean, which makes it the leading reservoir for residual bioburden between procedures. The sections below walk through the anatomy, the performance data, and the inspection routine that keep it working and safe.
TL;DR:
- Increasing the working channel diameter by 0.4 millimeters can significantly reduce suction and procedure times.
- Inserting large instruments can decrease irrigation flow by nearly 97 percent, impacting visualization and safety during procedures.
- Proper instrument and connector choices can mitigate flow reduction, but damage from channels often remains invisible without regular borescope inspections.
- Manual brushing and leak testing are critical, as residual debris hampers disinfection, and frequent inspections help identify hidden damage early.
- AI-assisted borescope review can cut inspection time by over 90 percent, making routine surveillance more feasible in busy clinical settings.
Table of Contents
- Anatomy and Connectors: Inlet, Shaft, and Distal Tip
- Evidence: How Channel Diameter and Instruments Change Suction, Irrigation, and Time
- Choosing Instruments and Connectors During a Procedure
- Measuring and Testing Channel Performance in the Clinic
- Reprocessing Essentials: Cleaning, Inspection, and Surveillance
- Practical Maintenance Guidance for Working Channels
- Building a Channel Surveillance Program That Actually Scales
- Cleaning, Inspection, and Repair Support from 1800endoscope
- Primary Sources on Reprocessing, Flow, and Inspection
- Sources
- FAQ
Anatomy and Connectors: Inlet, Shaft, and Distal Tip
The working channel begins at a proximal inlet port on the handpiece, where accessories enter and where suction and irrigation lines attach. From there it runs the length of the insertion shaft as a flexible lumen, passing through the bending section near the distal tip before opening at the objective lens assembly. The shaft segment sees the most mechanical stress from repeated instrument passage, while the distal bend is where sharp angulation can pinch or abrade the channel wall.
Proximal connectors determine how instruments and fluids enter the channel, and the choice is not cosmetic:
- Tuohy-Borst connectors seal around an inserted instrument but add dead space that can change relative flow.
- UroLok connectors are common on ureteroscopes and balance sealing with a more direct fluid path.
- Check-Flo connectors are designed to minimize resistance, which matters most when irrigation is the primary source of visualization.
Nominal working channel diameters on most flexible endoscopes fall between about 2.0 and 4.0 millimeters, though the figure printed in an instructions-for-use document reflects the channel at rest. Once an instrument occupies part of that lumen, the usable cross-section for suction or irrigation shrinks well below the nominal number, a distinction that matters more in practice than the spec sheet suggests.
Evidence: How Channel Diameter and Instruments Change Suction, Irrigation, and Time
Small differences in working channel diameter produce measurable clinical effects. A controlled study of an ultrathin endoscope found that increasing the working channel to 2.4 millimeters shortened suction time and, as a result, shortened total esophagogastroduodenoscopy time compared with a narrower channel, a 0.4-millimeter difference with a real procedural payoff.

Instrument occupancy has an even larger effect on flow than diameter alone. Research on flexible ureteroscopes found that inserting large-diameter instruments through the working channel can reduce irrigation flow by roughly 96 to 97 percent, which severely limits the clinician's ability to clear debris or blood from the field. That same body of work found connector choice alone can shift relative flow performance by 10 to 15 percent with small instruments, and by as much as 50 percent relative in some connector and instrument combinations.
The practical takeaways:
- Visualization risk rises sharply once a large instrument is seated in the channel, not gradually.
- Swapping to a narrower instrument or a lower-resistance connector can partially restore irrigation flow without changing the scope.
- Procedure planning should treat channel occupancy, not just channel diameter, as a variable that affects both speed and safety.
Choosing Instruments and Connectors During a Procedure
Instrument diameter is the single biggest lever an operator has over intra-procedural flow, but surface finish matters too: a smoother or coated instrument shaft slides with less friction and less flow disruption than a rough one, and it tends to preserve distal tip deflection better when the instrument is seated in a tight channel. Connector selection compounds these effects. A connector with lower intrinsic resistance can partially offset the flow loss from a larger instrument, while a poorly matched connector can turn a marginal setup into an unworkable one.
Quick rules for intra-procedural choices:
- Choose the smallest instrument diameter that still accomplishes the clinical task.
- Favor connectors documented to minimize dead space when irrigation is critical to visualization.
- Avoid forcing an oversized instrument through a channel already narrowed by a bend or a partial obstruction.
- Reassess flow the moment visualization degrades rather than assuming the instrument is the only variable.
Pro Tip: Keep a quick-reference card of instrument outer diameters against your scope's nominal channel size so staff can flag a poor match before insertion rather than mid-procedure.
Measuring and Testing Channel Performance in the Clinic
Two checks catch most channel problems before they become a procedure-day surprise: a flow check and a leak test, both run per the manufacturer's instructions for use.
- Time how long it takes a fixed volume of water to pass through the channel and compare it against the baseline recorded when the scope was new.
- Run the leak test specified in the IFU before every use, since a failing test often signals a channel breach before any visible damage appears.
- Perform a borescope pass through the channel on a defined schedule, watching for deep scratches, coating peel, buckling of the inner liner, or any perforation.
- Treat a positive leak test, a failed flow check, or any perforation on borescope as an automatic pull from service.
- Route any scope with moderate or severe channel damage to manufacturer repair rather than continuing to reprocess and reuse it.
A scope that passes a visual check but fails a flow or leak test still needs to come out of rotation. Damage inside the channel is frequently invisible from the outside.
Reprocessing Essentials: Cleaning, Inspection, and Surveillance

Manual brushing and flushing remain the step that determines whether high-level disinfection actually works. The CDC and HICPAC guidance on flexible endoscope reprocessing is explicit that residual organic material left in a working channel reduces disinfectant efficacy regardless of how well the rest of the process runs, and ANSI/AAMI ST91 echoes that same emphasis on channel brushing as a non-negotiable step.
The seven-step framework that CDC and HICPAC distill from that guidance covers:
- Pre-cleaning at the point of use, before organic material dries.
- Leak testing to catch a breached channel early.
- Manual cleaning, including brushing every accessible channel.
- Visual inspection of the scope and its channels.
- High-level disinfection or sterilization per the device's validated method.
- Rinsing and drying to prevent residual moisture from supporting microbial growth.
- Storage in a manner that protects the reprocessed scope until next use.
Automated reprocessors handle several of these steps consistently, but they do not replace manual brushing where a channel geometry, such as a duodenoscope's elevator recess, prevents adequate flushing pressure from reaching every surface.
Borescope inspection adds a layer that manual cleaning and visual checks cannot match on their own. It routinely finds occult damage and residue in working channels even after documented high-level disinfection, and a deep learning approach to borescope review reported sensitivity around 91 percent for detecting channel damage and residue findings, which supports its use as a surveillance tool rather than a one-time audit.
Borescope inspection finds occult damage and residue in endoscope working channels despite high-level disinfection, and AI-assisted review can flag those findings with sensitivity above 90 percent.
The time cost of manual borescope review is the main barrier to routine use, which is exactly the gap AI-assisted labeling is designed to close: it does not replace the inspector, but it cuts the review burden enough to make weekly or monthly sampling realistic for a busy department.
Practical Maintenance Guidance for Working Channels
Brush sizing has to match channel diameter exactly, since an undersized brush leaves debris behind and an oversized one can abrade or catch on the channel wall. For channels in the 1.2 to 2.8 millimeter range, a correctly matched cleaning brush is the difference between a channel that passes inspection and one that does not, a point our brush sizing guide covers in more detail. A borescope used for channel inspection should be flexible enough to navigate the bending section, small enough in diameter to enter the channel without forcing it, and capable of image quality sufficient to distinguish a scratch from genuine wall damage.
Common repair flags include:
- Persistent flow reduction that a flow check confirms is not instrument-related.
- Any borescope finding of buckling, deep scratching, or perforation.
- Repeated leak-test failures on a scope that previously passed reliably.
Building a Channel Surveillance Program That Actually Scales
Routine borescope surveillance is easy to justify on paper and hard to staff in practice. The realistic path is staged: pilot borescope checks on a small sample of scopes each week, train sterile processing staff on a simple severity scale rather than a full diagnostic course, and expand only once that first group runs smoothly. AI-assisted review earns its place here by cutting the time cost of review, not by replacing judgment. Every step in the program should trace back to the scope manufacturer's instructions for use and the facility's own reprocessing policy, since neither borescope surveillance nor AI assistance overrides those requirements.
— Endoscope
Cleaning, Inspection, and Repair Support from 1800endoscope
Matching a brush, a borescope, or a repair path to your working channel is easier when the sizing is already worked out for you. The company offers endoscopic accessories and inspection tooling designed to address the issues discussed in this article.

- The medical endoscopes and accessories line covers channel-compatible tooling for scopes already in service.
- The borescope and videoscope category includes portable, flexible options sized for channel inspection work rather than industrial-only use.
- Flexible biopsy forceps are available in diameters matched to common channel sizes, which avoids the flow problems oversized instruments cause.
- The company provides endoscope repair services to support scopes identified as needing service during inspections.
Orders and repair inquiries go through the 1800endoscope site, where product categories and repair contact details are listed by equipment type.
Primary Sources on Reprocessing, Flow, and Inspection
- CDC/HICPAC essential elements of endoscope reprocessing
- Connector and instrument effects on ureteroscope irrigation flow
- AI-assisted borescope detection of channel damage
- Ultrathin endoscope working channel and EGD suction time
- FDA guidance on automated endoscope reprocessors
Sources
- Essential Elements of a Reprocessing Program for Flexible Endoscopes – Recommendations of the Healthcare Infection Control Practices Advisory Committee
- Effects of endourologic devices and connectors on irrigation flow through the flexible ureteroscope working channel
- Initial application of deep learning to borescope detection of endoscope working channel damage and residue
- An ultrathin endoscope with a 2.4-mm working channel shortens the esophagogastroduodenoscopy time by shortening the suction time
FAQ
What is D1 and D2 in endoscopy?
D1 and D2 typically refer to the first and second portions of the duodenum as landmarks during upper endoscopy or ERCP, not to working channel components. They help operators describe scope position and lesion location relative to the papilla and duodenal anatomy.
Do all flexible endoscopes have internal channels?
Most flexible endoscopes used for biopsy, suction, or irrigation include at least one internal working channel, but some diagnostic-only or ultrathin scopes are built without one to reduce overall diameter. Whether a given model has a channel, and how many, depends on its intended procedure and is specified in its instructions for use.
What is the working principle of an endoscope?
An endoscope transmits an image from a distal lens through fiber optic or digital sensor technology to a viewing screen, while a separate working channel allows suction, irrigation, and instrument passage during the same procedure. The channel's diameter and any instrument occupying it directly affect how much suction and irrigation flow reach the tip, as ureteroscopy flow studies demonstrate.
What are the CDC guidelines for reprocessing endoscopes?
CDC and HICPAC guidance centers on a sequence of essential steps: pre-cleaning, leak testing, manual cleaning with channel brushing, visual inspection, high-level disinfection or sterilization, rinsing and drying, and proper storage. The guidance stresses that manual brushing of channels is the step most likely to determine whether disinfection succeeds.
How often should working channels get borescope inspection?
There is no single mandated interval, but facilities piloting surveillance programs often start by sampling a small number of scopes weekly before expanding. The right frequency depends on scope usage volume, prior damage history, and staff capacity for review, with AI-assisted review helping make more frequent sampling practical.