
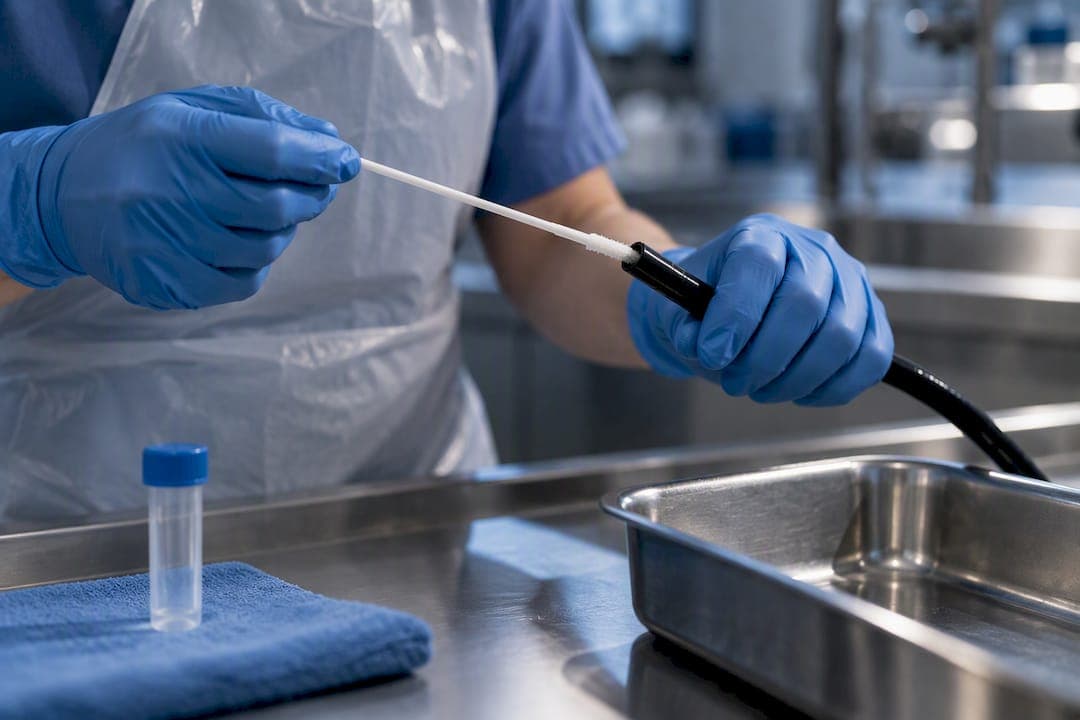
Endoscope cleaning verification is the test performed after manual cleaning and before high-level disinfection (HLD) or sterilization to confirm no residual organic soil remains on or inside a scope. If a scope fails, the rule is simple: reclean it and retest it. A pass clears the scope to move forward in reprocessing, but it never substitutes for a validated HLD or sterilization cycle, and both the CDC and FDA treat it as a distinct checkpoint, not a shortcut.
TL;DR:
- Verification must be performed after manual cleaning and before high-level disinfection, serving as a critical checkpoint to detect residual soil missed visually.
- Different test methods like ATP, protein, or hemoglobin assays have unique strengths and limitations, and thresholds are specific to each kit's validation process.
- Sampling sites such as the distal tip and elevator channel require validated sampling tools, and results are not interchangeable between different kits or collection methods.
- Failure in verification prompts recleaning, retesting, and possibly quarantining the scope, with repeated failures indicating mechanical issues or training gaps rather than technician error.
- Proper interpretation of results depends on validated thresholds established by the test kit manufacturer and must be aligned with the scope's worst-case soil scenarios.
Table of Contents
- Where Verification Fits in the Reprocessing Workflow
- ATP, Protein, Hemoglobin, and Colorimetric Swabs: How They Compare
- What Is the Step-by-Step Endoscope Cleaning Verification Workflow?
- How Do You Interpret Verification Test Results?
- Which Tools Help Technicians Verify Clean Scopes?
- Common Verification Failure Modes to Watch For
- What Do CDC, FDA, and AAMI/AORN Require for Verification?
- What Verification Failures Actually Teach a Reprocessing Team
- Inspection Tools That Support Verification Programs
- Sources
- FAQ
Where Verification Fits in the Reprocessing Workflow
Verification sits at a specific hinge point in reprocessing: after manual cleaning and visual inspection, before the scope goes into an automated endoscope reprocessor (AER) or sterilizer. Skip it, or treat it as optional, and you lose your only checkpoint for catching soil that manual cleaning missed but the naked eye can't see.
Residual protein, blood, or organic debris left in a channel does more than look bad on a swab. It can shield microorganisms from disinfectant contact and give biofilm a foothold, which is exactly why AERs are designed to supplement thorough manual cleaning, not replace it. Verification is what tells you whether that manual step actually worked, as outlined in veterinary endoscope cleaning protocols.
Think of verification as a feedback loop rather than a gate you check once and forget:
- It confirms the brushing and flushing steps in your IFU were followed correctly, not just documented.
- It flags training gaps before they become outbreak investigations.
- It gives your program actual data instead of assumptions about cleaning consistency.
ATP, Protein, Hemoglobin, and Colorimetric Swabs: How They Compare
No single test type wins on every dimension, and that's the point. Each one measures something different, and each has blind spots you need to know before you pick one for your unit.
ATP bioluminescence is the fastest option, delivering relative light unit (RLU) readings in about a minute. It measures adenosine triphosphate, a marker of any living cell, so it doesn't distinguish bacteria from leftover tissue. That's a real limitation: one prospective study found that post cleaning ATP testing, as used in that trial, did not lower the rate of contamination detected after HLD in duodenoscopes. ATP alone can miss things that matter clinically.
Protein and hemoglobin assays target organic residue more specifically and show up frequently in validation studies and internal audits, though they typically run slower than point-of-use ATP tests.
Colorimetric swabs offer a low-cost, visual pass/fail read that's easy to train on but less quantifiable than an RLU number.
Sampling method changes your results just as much as test chemistry does. A sponge pulled through a channel and a flush sample from the same channel will not read the same, and neither transfers cleanly to a different kit without its own validation.
Turnaround and cost tradeoffs:
- ATP: fastest, moderate cost, ideal for point-of-use screening
- Protein/hemoglobin: slower, often lab-based, stronger for periodic audits
- Colorimetric swabs: cheapest, fastest to read, least granular
What Is the Step-by-Step Endoscope Cleaning Verification Workflow?
A verification result only means something if the steps before it were done in order and per the device's instructions for use (IFU). Here's the sequence sterile processing technicians should follow:
- Pre-clean at the point of use. Wipe the exterior and flush channels immediately after the procedure, before soil dries.
- Transport promptly to decontamination, minimizing delay that lets residue set.
- Leak test the scope before manual cleaning, when the IFU requires it, to catch internal damage before fluids enter.
- Manually clean per IFU: disassemble valves and caps, brush every accessible channel, flush per the specified volume and detergent, and rinse thoroughly.
- Visually inspect the scope with the naked eye, magnification, or a video borescope, paying attention to the distal tip, elevator mechanism, and control head.
- Sample worst-case sites and run your chosen verification test.
- If it passes, proceed to HLD or sterilization per protocol.
- If it fails, reclean the scope, document the failure, and retest before moving forward.
- If it fails again, quarantine the scope and route it for service rather than pushing it through a third cycle.
- Log everything: test values, corrective actions taken, and the technician's competency record.
Pro Tip: Keep a running log of which scopes fail verification most often. A pattern pointing to one specific duodenoscope or elevator channel usually means a mechanical or training issue, not a fluke, and it's the fastest way to catch a scope that needs service before it causes a bigger problem.
How Do You Interpret Verification Test Results?
There's no such thing as a universal numeric cutoff that applies across every kit and every scope. The idea that 10 ppm of protein serves as a blanket pass/fail line is a persistent myth. It circulates as though it were a settled standard, but the FDA's own validation guidance requires manufacturers to test cleaning instructions against worst-case, clinically relevant soils using at least two quantitative methods, not a single fixed number lifted from one context and applied everywhere.
Published ATP cutoffs illustrate why. One simulated-use validation study established a ≤100 RLU threshold for a sponge-based channel collection method, correlated against protein and bioburden benchmarks for that specific sponge technique. A flush-sampling method might use a different threshold entirely, because ATP assays vary by collection method and instrument, and cutoffs don't transfer between kits without revalidation.
| Consideration | What it means for your program |
|---|---|
| Cutoff source | Must come from the test kit's own validation, not a generic figure |
| Sampling method | Sponge, swab, and flush results are not interchangeable |
| Worst-case testing | Validate against your dirtiest realistic soil load, not average cases |
| Repeated failure | Escalate to service or quarantine, not a third retest |
Which Tools Help Technicians Verify Clean Scopes?
The right tool depends on what you're trying to catch and where. Channels, the distal tip, and the elevator mechanism on duodenoscopes each demand a different approach.
- Sampling kits — swabs, sponge-channel collectors, and flush-sampling kits — each come validated for a specific site and technique; matching the kit to the site matters more than the brand.
- Lighted magnifiers catch surface soil and scratches invisible to the naked eye during routine inspection.
- Video borescopes let you see inside the channel itself, which is where residue and damage hide from any external check. Choosing an insertion diameter and articulation compatible with the scope's own lumen matters here; forcing an incompatible scope risks damaging the channel you're trying to inspect.
- Protein-detection slides work well as a quick adjunct check alongside ATP testing rather than a replacement for it.
Whatever you buy, confirm it ships with validation data and IFU compatibility documentation before it enters your workflow. A kit without that paperwork is a liability, not a shortcut.
Common Verification Failure Modes to Watch For
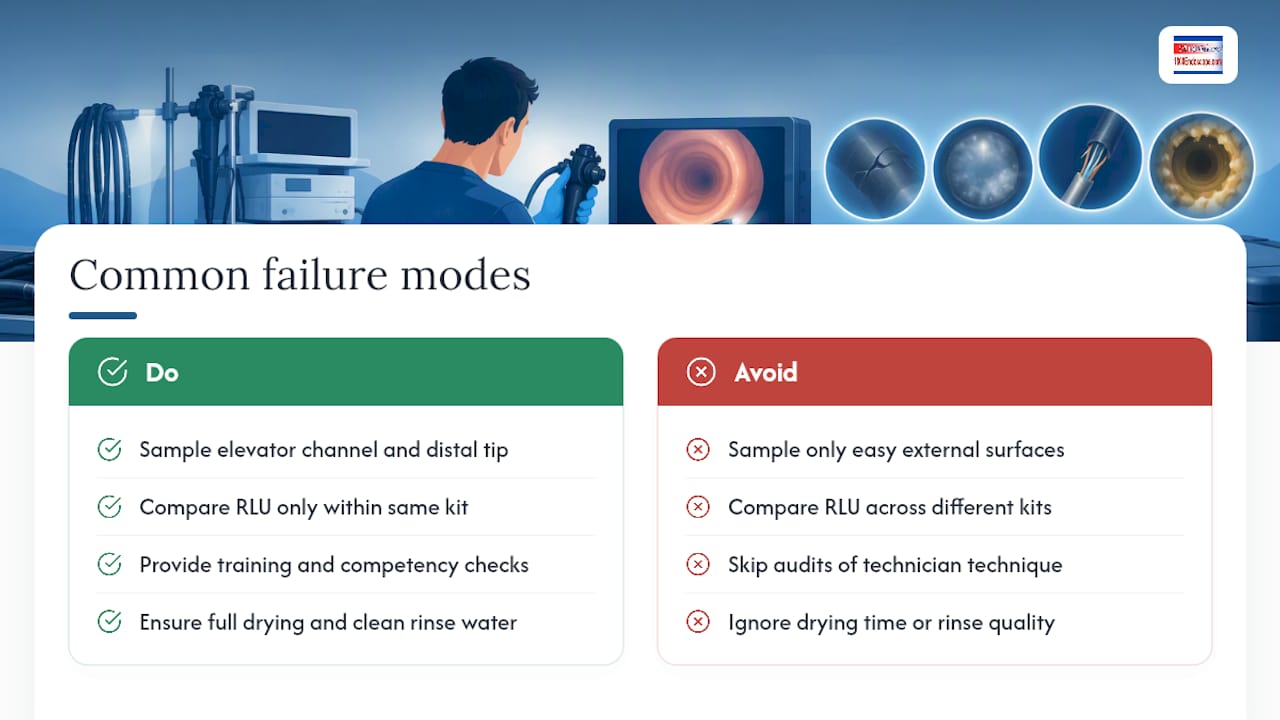
Most verification programs don't fail because of bad test kits. They fail because of how the kits get used.
Sampling only the easy, external surfaces while skipping the elevator channel or distal tip gives you a false sense of confidence. Comparing RLU numbers across different kits or instruments is another common mistake. Those numbers are not interchangeable, and a "clean" reading on one device might mean something different on another. Human factors matter just as much as chemistry: technician training, competency checks, and periodic audits catch drift in technique before it becomes a pattern of failures. Drying time and rinse water quality deserve equal attention, since a scope that reads clean but stays wet or gets rinsed with contaminated water can still support microbial regrowth before its next use.
What Do CDC, FDA, and AAMI/AORN Require for Verification?
The CDC's HICPAC essential elements document lays out seven critical reprocessing steps, from pre-cleaning through documentation, and cleaning verification sits inside that sequence rather than replacing any single step. The FDA's guidance on AERs reinforces that automated reprocessing supplements manual cleaning, and its validation guidance insists on worst-case soil testing rather than a single generic benchmark.
- AAMI/AORN materials add detail on water quality, drying, and storage as program elements that shape verification outcomes.
- Practical takeaway: treat the device IFU and its validated test endpoints as the authority for your acceptance criteria, not a number borrowed from another facility's protocol.
What Verification Failures Actually Teach a Reprocessing Team
A failed verification test rarely means one technician did something wrong. It usually points to a gap in training, a channel design that resists brushing, or a step in the SOP that gets rushed under volume pressure. Treat every failure as data. If resources are tight, prioritize the scopes that carry the highest risk, like duodenoscopes and linear echoendoscopes, over routine gastroscopes. Speed matters, but not at the cost of choosing an unvalidated shortcut over a documented, defensible process.
— Endoscope
Inspection Tools That Support Verification Programs
Verification is only as good as your ability to see what you're testing. That's where the right hardware earns its keep, not by replacing your test kit, but by making the sampling and inspection steps around it more reliable.

1800endoscope stocks portable video borescopes built to check distal tips, elevator mechanisms, and channel interiors that a naked-eye inspection simply can't reach, alongside sampling accessories and medical endoscopes and accessories sized for veterinary and industrial reprocessing programs. Every tool you add still needs to be validated against your device's IFU and your facility's protocol before it touches a clinical workflow. If a scope has already failed verification more than once, quarantine it and look at endoscope repair and service options rather than pushing it through another cycle. Browse the borescope and inspection lineup to find a model that matches your channel diameters, or check current specs and pricing directly on the product page before you order.
Sources
For deeper reference, consult the CDC HICPAC essential elements guidance, the FDA's AER evaluation page, the BMC sponge ATP validation study, and the peer-reviewed ATP and reprocessing-cycle study on PMC.
This article is general information, not a substitute for advice from a qualified doctor. Consult a qualified healthcare professional about your own circumstances before acting on anything here.
- Essential Elements of a Reprocessing Program for Flexible Endoscopes – HICPAC (CDC)
- Information about Automated Endoscope Reprocessors (AERs) and FDA’s Evaluation | FDA
FAQ
What Is the 10 PPM Criteria for Cleaning Validation?
The 10 ppm protein figure is often repeated as a universal pass/fail line, but no such single number applies across all kits and devices. Acceptance criteria must come from validated testing against worst-case soils using the method the manufacturer specified, per FDA validation guidance.
What Are the CDC Guidelines for Reprocessing Endoscopes?
The CDC's HICPAC essential elements document outlines seven core steps: pre-cleaning, leak testing, manual cleaning, visual inspection, HLD or sterilization, rinsing and drying, and documentation. Cleaning verification is a checkpoint within that sequence, not a separate standalone requirement.
What Are the FDA Guidelines for Cleaning Validation?
FDA guidance requires manufacturers to validate their cleaning instructions using worst-case and clinically relevant soils, tested with at least two quantitative methods rather than a single generic benchmark. This is detailed in the agency's reprocessing validation guidance.
How Do I Verify Endoscope Cleaning at My Facility?
Verification means sampling worst-case sites, like the elevator mechanism and distal tip, with a test method validated for your specific kit, then recleaning and retesting anything that fails. Video borescopes and sampling kits, such as those available through 1800endoscope, support this process, but they still need to be validated against your device's IFU first.
Does a Passing ATP Test Guarantee a Sterile Scope?
No. ATP testing and other verification methods confirm that residual organic soil is below a validated cutoff, not that the scope is sterile or that HLD will succeed. One prospective study even found that ATP testing did not reduce post-HLD contamination rates in duodenoscopes, which is why verification works as one layer in a larger reprocessing program, not a final answer.