
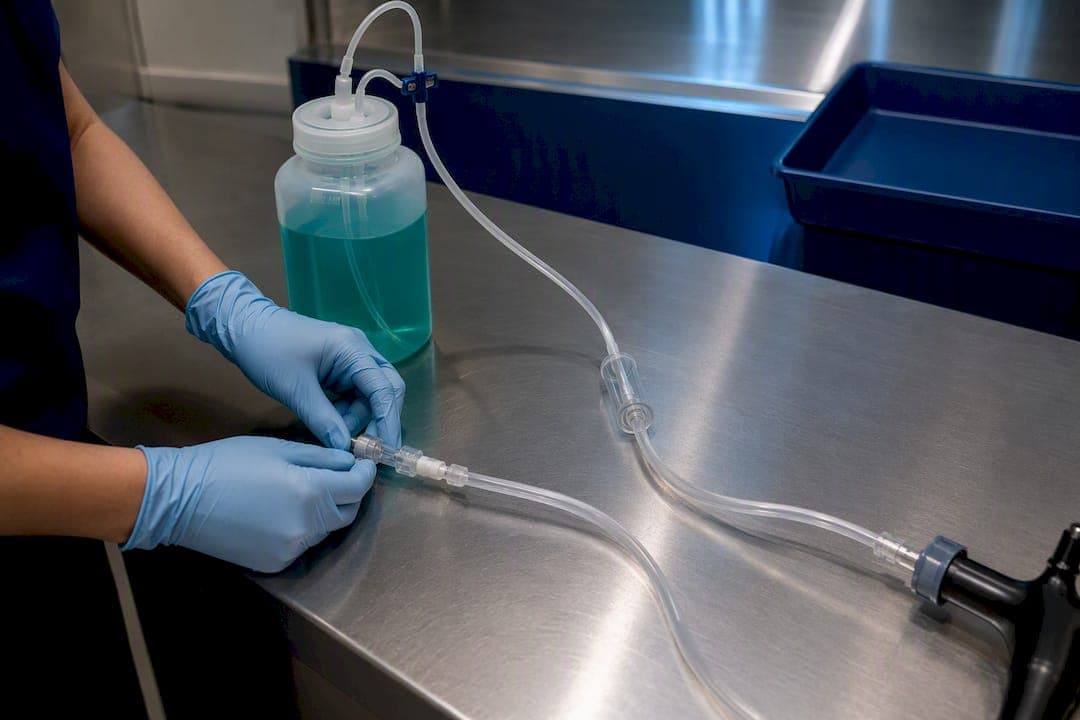
An endoscopy irrigation setup is a reservoir, pump, tubing, and a backflow-prevention valve arranged so sterile fluid reaches the scope on demand. The single non-negotiable requirement is a one-way valve placed in the fluid path close to the scope, because everything past that point counts as contaminated once it touches a patient or inspection surface. Get the reservoir, pump tubing, irrigation tubing, and connectors sized correctly, then build the safety habit around them. 1800endoscope stocks most of these parts individually or as kits.
TL;DR:
- Proper placement of the backflow-prevention valve near the scope is essential to prevent contaminated fluid from reaching the pump or reservoir.
- Using distilled or purified water in reservoirs and replacing pump tubing regularly significantly reduces mineral buildup and the risk of blockages.
- Assembly must follow a precise order to avoid introducing air locks or creating contamination pathways, with timely priming crucial before use.
- Mismatched connectors or tubing diameters are common causes of leaks or flow failure; matching the scope inlet exactly is critical for reliable operation.
- Most irrigation failures stem from sequencing mistakes or reuse of distal tubing instead of equipment malfunction, emphasizing proper handling routines.
Table of Contents
- What Goes Into an Endoscopy Irrigation Pump Setup?
- How Do You Set Up an Endoscopy Irrigation System Step by Step?
- Why Does Backflow Prevention Matter So Much in Endoscopy Irrigation?
- How Should You Maintain and Clean Endoscopy Irrigation Equipment Daily?
- How Do You Match Connectors to Your Scope's Irrigation Inlet?
- What Should You Check First When Irrigation Flow Fails?
- The Setup Habit That Separates Careful Teams From Lucky Ones
- Where to Find a Complete Irrigation Starter Kit
- Where to Verify Irrigation Setup and Reprocessing Standards
- Sources
What Goes Into an Endoscopy Irrigation Pump Setup?
A working irrigation system has six parts, and skipping any one of them either breaks flow or breaks infection control.
The pump replaces manual syringe flushing with steady, adjustable pressure. Battery-powered units suit field inspections and mobile veterinary practice; AC-powered bench pumps suit fixed clinic stations where outlet access isn't a problem. Pump tubing connects the reservoir to the pump housing and is usually thicker-walled than the tubing downstream, since it handles the mechanical squeeze or peristaltic action. Irrigation tubing runs from the pump to the scope and needs to match the scope's auxiliary water channel diameter. Many irrigation tubing products carry integrated backflow protection and single-use discard labeling, which simplifies compliance if you buy accordingly.
The backflow-prevention valve sits as close to the scope inlet as possible; a distal placement stops contaminated fluid from ever reaching the pump or reservoir side of the line. Reservoirs should hold distilled or purified water rather than tap water. Connectors and adapters bridge tubing to pump ports and scope inlets.
Round out the setup with these accessories:
- Tubing clamps for controlling flow without shutting off the pump
- Hanging bottle adapters for gravity-assisted reservoirs
- Quick-disconnects for fast tubing swaps between cases
- Cleaning adapters sized to fit the auxiliary water channel for daily flushing
How Do You Set Up an Endoscopy Irrigation System Step by Step?
Assembly order matters more than most technicians assume. Get it wrong and you either introduce air locks or, worse, create a path for contaminated fluid to migrate upstream.
Before you connect anything:
- Inspect tubing for cracks, discoloration, or kinks, and check that the one-way valve moves freely in one direction only.
- Fill the reservoir with distilled or purified water, typically to around 80 percent capacity as most veterinary videoscope manuals specify.
- Power on the pump briefly, listening for the motor and confirming the display or indicator light responds normally.
Connection order, in sequence:
- Reservoir to pump tubing.
- Pump tubing into the pump housing, seated per the manufacturer's channel guide.
- Pump outlet to irrigation tubing.
- Irrigation tubing to the distal backflow-prevention valve.
- Valve to the scope's auxiliary water inlet.
Prime the line at low flow first to purge air, then briefly raise flow to confirm a continuous jet exits the distal tip. A weak or broken stream at that stage almost always signals a partial channel blockage that needs cleaning before the scope goes near a patient or inspection target.
Pro Tip: Label the tubing at both ends with tape and a marker before your first case of the day. It takes fifteen seconds and prevents the mix-up that happens when two irrigation lines are coiled next to each other on a busy bench.
Industrial borescope setups differ in a few ways worth flagging. They typically use mechanical push-fit or threaded connectors rather than the locking luer-style fittings common on veterinary flexible scopes, and they often run at lower irrigation pressure since the goal is lens clearing rather than tissue lavage. Confirm the connector style before ordering tubing, not after.
Why Does Backflow Prevention Matter So Much in Endoscopy Irrigation?
Everything downstream of the backflow-prevention valve should be treated as contaminated the moment it touches a scope that has been inside a patient or inspected a soiled industrial surface. That's not caution for its own sake. It's the specific failure mode regulators have flagged.
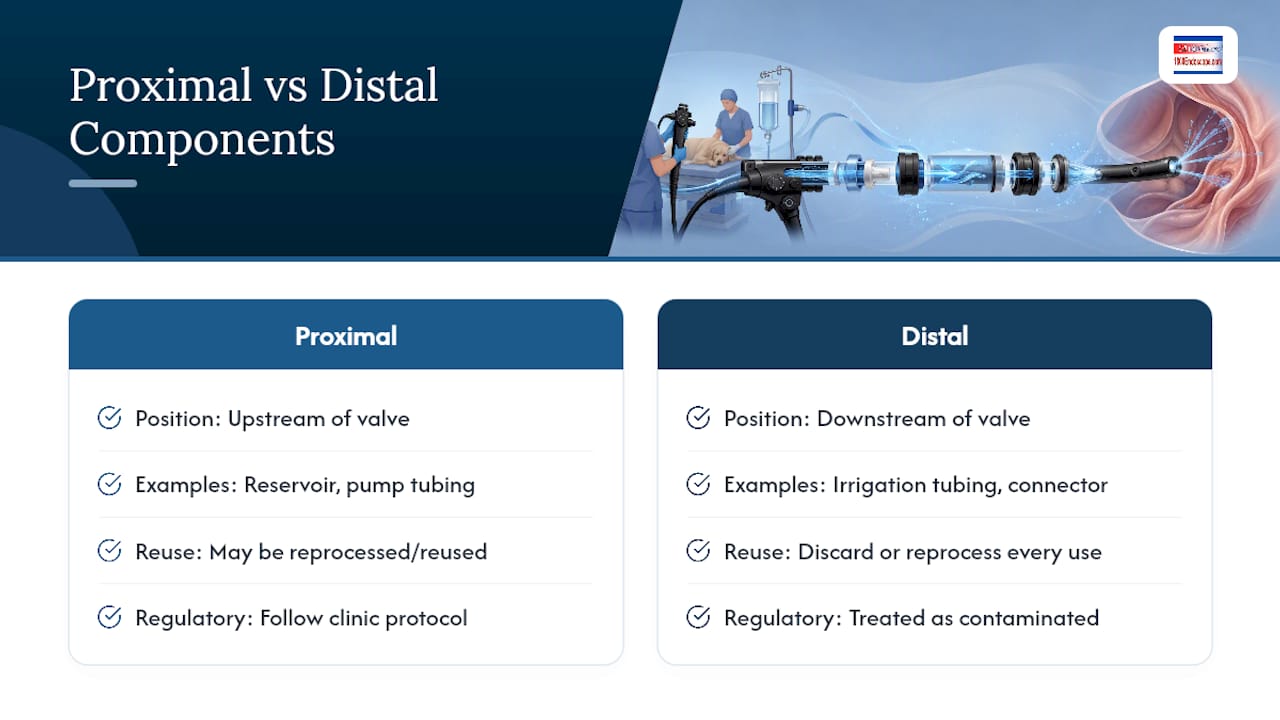
FDA guidance on endoscopic irrigation systems recommends that irrigation systems include at least one backflow-prevention valve or comparable feature to stop contaminated fluid from traveling backward into the proximal irrigation line, and treats distal components as contaminated and subject to reprocessing or disposal after each use.
The practical dividing line is proximal versus distal. Proximal components, the reservoir and pump tubing, sit upstream of the valve and can generally be reprocessed or used across multiple cases if your protocol supports it. Distal components, the irrigation tubing segment and connector closest to the scope, sit downstream and should be discarded or reprocessed after every patient unless the manufacturer has validated multi-use performance data for that exact part.
For reprocessing consensus beyond FDA's device-specific guidance, ANSI/AAMI ST91 lays out the broader framework clinics use to validate cleaning and high-level disinfection cycles for flexible endoscopes and their accessories. Label distal parts at the point of use, before the next tech grabs the wrong tubing off the counter.
How Should You Maintain and Clean Endoscopy Irrigation Equipment Daily?
Biofilm doesn't build up overnight, but it builds up fast in tubing and valves that sit wet between cases. Pump tubing and one-way valves are the highest-risk sites because they trap moisture in tight geometry that's hard to fully dry.
Run a daily flush and soak cycle using a cleaning adapter sized to the auxiliary channel, following the volume and dwell time your reprocessing protocol specifies. Repeated injection of cleaning solution through the channel, rather than a single pass, is what actually clears residue from the lumen.
- Replace pump tubing on a fixed schedule rather than waiting for visible wear.
- Swap one-way valves at the first sign of sluggish closure.
- Use distilled or purified water exclusively; tap water leaves mineral deposits that narrow lumens over time and cause blockages expensive enough to justify a whole new pump.
- Air-dry tubing fully after high-level disinfection before storing it coiled, not kinked.
Pro Tip: Keep a spare set of pump tubing and valves in stock at all times. A biofilm-clogged line found mid-procedure is a scheduling problem you can't fix by ordering a replacement that day.
How Do You Match Connectors to Your Scope's Irrigation Inlet?
Mismatched connectors are the most common reason a brand-new irrigation setup leaks or won't flow at all. Before ordering tubing, locate the inlet identifier on the scope, usually near the control handle or on the light-guide connector for scopes with remote auxiliary ports.
- Check adapter labeling for intended channel, inner diameter, and locking style (luer, push-fit, or threaded).
- Match inner diameter and connector type exactly. A tubing product listing compatible pump models saves you a return shipment.
- Choose single-use adapters for patient-contact points and reusable ones only for proximal, reprocessing-validated components.
- Escalate to the manufacturer or a veterinary rigid endoscopy parts specialist when a scope's inlet doesn't match any standard adapter in your kit.
What Should You Check First When Irrigation Flow Fails?
Most flow problems trace back to one of four causes, and you can usually diagnose them in under two minutes.
- No flow at all: check the reservoir isn't empty, confirm no clamp is closed, verify the pump has power, and prime again to clear a possible air lock.
- Weak or intermittent flow: inspect for tubing diameter mismatches, partial blockage from mineral buildup, or a valve that isn't opening fully.
- Leaks: these usually show up at connector joints first; reseat the connection, and if the leak persists, replace the fitting rather than trying to reseal it.
- Suspected backflow: stop irrigation immediately, disconnect the reservoir, mark all distal components as contaminated, replace those consumables before the next use, and log the event per your reprocessing policy.
The Setup Habit That Separates Careful Teams From Lucky Ones
Most irrigation failures 1800endoscope hears about aren't equipment failures. They're sequencing mistakes: someone reused a distal tubing segment across two patients, or skipped priming and didn't notice the weak stream until mid-procedure. The FDA's backflow guidance exists because that specific failure mode is common enough to warrant a federal notice, not because irrigation setups are inherently risky when built correctly.
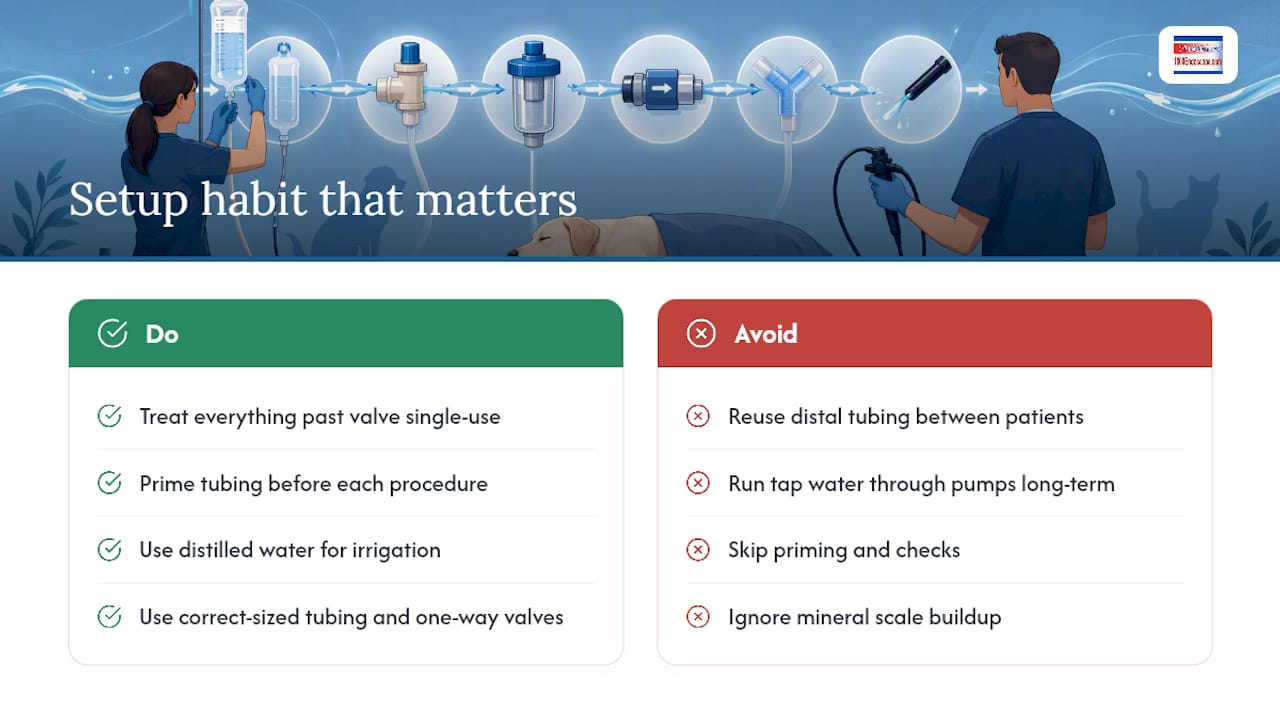
The overlooked variable is water quality. Clinics fixate on valve placement and tubing diameter, both legitimate concerns, while running tap water through a pump for months until a lumen clogs with mineral scale. That's a preventable repair bill, not a design flaw in the equipment. Distilled water costs pennies. A replacement pump does not.
1800endoscope carries the pump, tubing, and valve categories that make these setups straightforward: portable battery pumps for field inspection work, tubing kits sized to common veterinary and industrial scope channels, and one-way valves built for distal placement. The parts matter less than the habit of treating everything past that valve as a single-use item.
— Endoscope
Where to Find a Complete Irrigation Starter Kit
Building an irrigation line piece by piece from three different suppliers is how mismatched connectors end up on your bench in the first place. 1800endoscope stocks pumps, pump tubing, irrigation tubing, backflow valves, and adapter kits sized for veterinary flexible scopes and industrial borescopes under one catalog, so the parts you order are already confirmed to fit together.

If you're building a fresh setup or replacing a failing pump, start with the portable video endoscope system for a complete unit with compatible irrigation accessories, or browse the borescope catalog if you're outfitting an industrial inspection line. For scope-specific adapter questions, our small animal endoscopy tips cover common veterinary compatibility issues. Reach out with your scope model and channel diameter, and we'll confirm the exact tubing and valve combination before you order.
Where to Verify Irrigation Setup and Reprocessing Standards
- FDA guidance on endoscopic irrigation systems for backflow-prevention and reprocessing rules
- ANSI/AAMI ST91 for reprocessing consensus standards
- Scope-specific manufacturer user manuals for adapter instructions
Sources
- FDA guidance: Safety communication and recommendations for endoscopic irrigation systems
- CITEC irrigation tube product page
- Care and maintenance of endoscopy equipment (dvm360 proceedings)
- EickView video endoscope user manual (VET series)